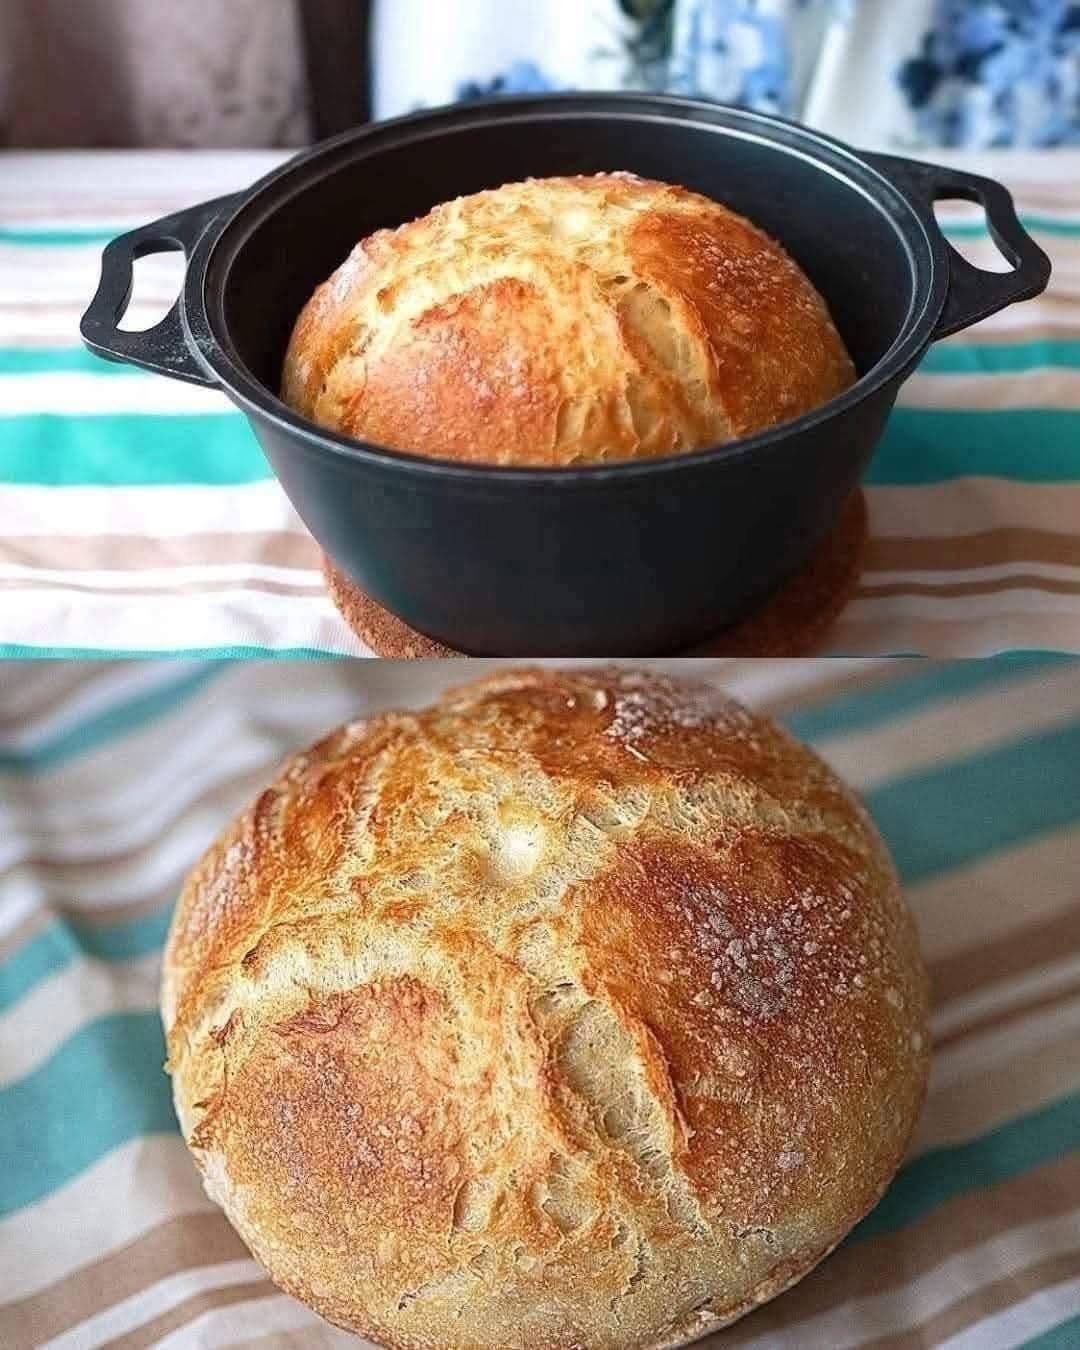
There is something incredibly comforting about a loaf of homemade rustic bread. With its crisp, golden-brown crust, beautiful cracks across the top, and soft, airy center, this Dutch oven artisan bread looks like it came straight from a cozy bakery—but it is surprisingly simple to make at home. The Dutch oven helps trap steam while the bread bakes, creating the gorgeous crust and bakery-style finish you see in the picture.
This recipe is perfect for beginners because the dough requires very little hands-on work. The secret is giving the dough enough time to rise and allowing the oven to get properly hot before baking.
Why You’ll Love This Rustic Bread
This homemade artisan loaf has a beautifully crisp crust while the inside stays soft, light, and chewy. It requires only a few basic ingredients and does not require a stand mixer or complicated bread-making equipment.
The long resting time allows the flour to hydrate and the yeast to develop flavor naturally. Once the dough is prepared, most of the work is simply waiting for it to rise.
The result is a rustic loaf that is delicious enough for breakfast, sandwiches, soups, or simply serving warm with butter.
Ingredients
- 3 cups all-purpose flour or bread flour
- 1 ½ cups warm water
- 1 ½ teaspoons salt
- 1 teaspoon instant yeast
- 1 teaspoon sugar or honey, optional
- 1 tablespoon olive oil, optional
- Extra flour or cornmeal for shaping
For Serving
- Salted butter
- Honey or jam
- Olive oil
- Cheese
- Soup or stew
How to Make Rustic Artisan Bread
1. Mix the Dough
In a large mixing bowl, combine the flour, instant yeast, and salt. If using sugar or honey, add it at this stage as well.
Slowly pour in the warm water while mixing with a wooden spoon or spatula. Continue mixing until the flour is fully incorporated and a sticky, rough-looking dough forms.
Do not worry if the dough does not look smooth. Rustic artisan bread dough is supposed to be soft and slightly sticky.
If the dough feels extremely dry, add another teaspoon or two of water. If it seems excessively wet, sprinkle in a small amount of flour.
2. Let the Dough Rise
Cover the bowl tightly with plastic wrap, a lid, or a clean kitchen towel.
Place it somewhere warm and allow the dough to rise for approximately 8–12 hours. Overnight is ideal.
During this long resting period, the yeast slowly works through the dough, helping develop both flavor and texture. By the end of the rising time, the dough should look noticeably larger and bubbly.
For the best flavor, avoid rushing this step.
3. Shape the Loaf
Lightly flour your work surface and gently turn the dough out onto it.
Try not to knead the dough heavily. Instead, fold the edges toward the center several times until the dough begins to form a round shape.
Turn the dough over so the smoother side is facing upward. Using your hands, gently shape it into a round boule.
Sprinkle a little flour over the surface. You can also place the shaped dough on a piece of parchment paper, which makes transferring it into the hot Dutch oven much easier.
Cover the dough and allow it to rest for another 30–60 minutes.
4. Preheat the Dutch Oven
Place your Dutch oven, including its lid, inside the oven.
Preheat the oven to 450°F (230°C) and allow the Dutch oven to heat for at least 30 minutes.
Preheating the pot is an important step. The hot surface gives the bread an immediate burst of heat, while the covered pot traps steam around the loaf. This helps create the crisp, blistered crust characteristic of artisan bread.
5. Score the Bread
Before baking, use a sharp knife or bread lame to make one or two shallow cuts across the top of the dough.
Scoring gives the expanding bread a controlled place to open while it bakes. It also creates the beautiful rustic pattern seen on bakery-style loaves.
You can make a simple cross, one long slash, or a few decorative cuts.
6. Bake the Bread
Carefully remove the hot Dutch oven from the oven. Remember that it will be extremely hot, so use thick oven mitts.
Transfer the dough into the Dutch oven. If you are using parchment paper, you can lower the dough in together with the parchment.
Cover with the lid and bake for approximately 25–30 minutes.
The covered baking stage allows steam to build up inside the pot. This is what helps produce a thin, crisp crust and impressive rise.
7. Finish Baking Uncovered
Remove the lid and continue baking for another 15–20 minutes, or until the bread becomes deeply golden brown.
For a loaf with a crust similar to the one pictured, allow it to develop a rich golden color rather than removing it from the oven too early.
The exact baking time can vary depending on your oven and the size of your loaf.
8. Cool Before Slicing
Once the bread is finished, carefully remove it from the Dutch oven and place it on a wire rack.
Allow it to cool for at least 45–60 minutes before slicing.
Although it may be tempting to cut into the loaf immediately, cooling gives the interior time to finish setting. Cutting it too early can cause the soft center to become gummy.
Once cooled, slice the loaf with a serrated bread knife.
Tips for the Best Homemade Artisan Bread
Use warm, not hot, water: Water that is too hot can damage the yeast. The water should feel comfortably warm.
Don’t add too much flour: A slightly sticky dough is normal. Adding excessive flour can make the finished bread dense instead of light and airy.
Give it enough rising time: The long fermentation is one of the most important parts of this recipe. A slow rise helps create better flavor and texture.
Preheat the Dutch oven: A properly heated pot helps the dough rise quickly when it enters the oven.
Don’t skip the covered baking stage: Keeping the Dutch oven covered traps steam, which is essential for developing that crisp artisan crust.
Let the loaf cool: Waiting before slicing may be difficult, but it makes a noticeable difference in the texture.
How to Store Homemade Bread
Once completely cooled, store the bread at room temperature in a paper bag, bread box, or loosely covered container. Avoid sealing a warm loaf in plastic because trapped moisture can soften the crust.
For longer storage, slice the bread and freeze it in an airtight freezer bag. Individual slices can be removed as needed and warmed in a toaster or oven.
Serving Ideas
This rustic loaf is delicious in so many ways. Serve thick slices with butter for a simple breakfast, or drizzle toasted pieces with olive oil for an easy snack.
It also pairs wonderfully with creamy soups, tomato soup, stews, pasta dishes, roasted vegetables, and grilled chicken.
For a sweet option, toast a slice and top it with butter, honey, cinnamon, or your favorite jam.
You can also use day-old slices to make homemade croutons, garlic bread, French toast, or breadcrumbs.
Final Thoughts
Making homemade rustic artisan bread does not have to be complicated. With simple ingredients, patience, and a hot Dutch oven, you can create a beautiful loaf with a crunchy golden crust and a soft, flavorful interior.
The best part is that every loaf has its own natural shape and character. A few uneven cracks, golden patches, and rustic edges are exactly what make homemade bread so special.
Serve it warm with butter, share it with family, or simply enjoy a fresh slice straight from the cooling rack. This easy Dutch oven bread is the kind of recipe you’ll want to make again and again.

Leave a Reply