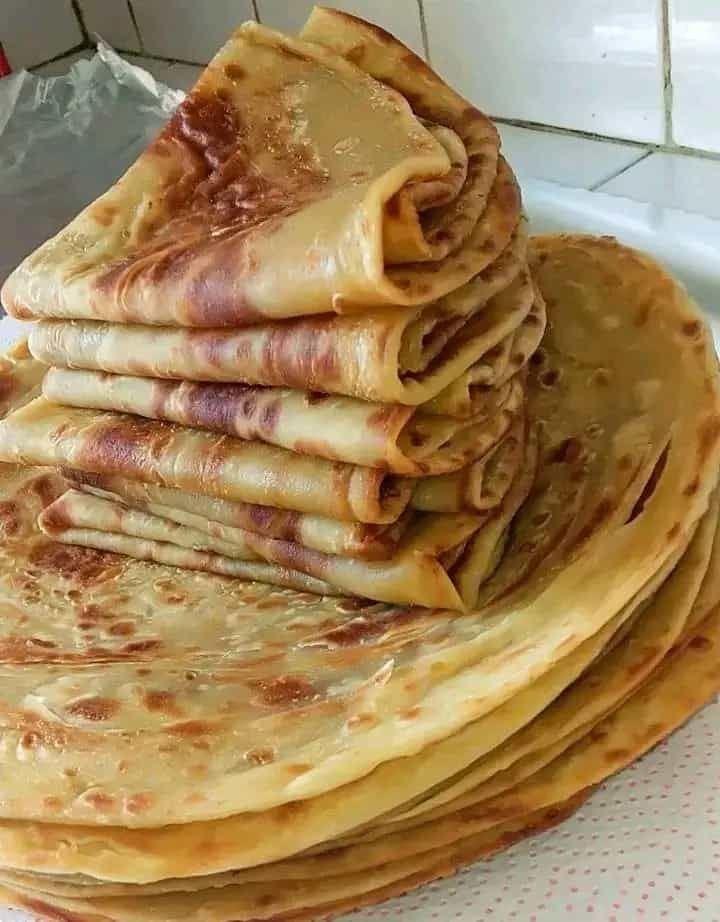
There is nothing more satisfying than a stack of freshly cooked parathas with beautiful golden-brown spots, soft layers, and a delicious buttery flavor. Homemade parathas are a favorite breakfast in many South Asian homes, served with chai, yogurt, pickle, omelets, or a spicy curry.
The parathas in the picture look beautifully layered, with a soft inside and a lightly crispy exterior. The secret to achieving this texture is preparing a soft dough, allowing it to rest, spreading a little oil or ghee between the layers, and cooking each paratha over medium heat until golden.
This easy homemade paratha recipe uses simple ingredients and is suitable for beginners. Whether you are preparing breakfast for your family or making a delicious side dish for lunch or dinner, these parathas are sure to become a regular favorite.
Why You Will Love This Paratha Recipe
- Soft and flaky layers that pull apart easily.
- Golden-brown spots with a lightly crispy exterior.
- Simple ingredients that are usually available in every kitchen.
- Perfect for breakfast, lunch, dinner, or evening tea.
- Easy to prepare in batches and reheat when needed.
Recipe Details
Preparation
20 minutes
Resting time
30 minutes
Cooking time
20–30 minutes
Yield
8 parathas
Total time: approximately 1 hour and 15 minutes, including resting.
Ingredients for Homemade Parathas
Easy How to Make Lachha Paratha: Step by Step Recipe Step by Step with Pics in Urdu & English
You will need the following ingredients to make approximately eight medium-sized parathas.
- 3 cups (375 g) all-purpose flour or whole-wheat atta
- 1 teaspoon salt, or to taste
- 1 tablespoon oil or melted ghee for the dough
- Approximately 1 to 1¼ cups (240–300 ml) lukewarm water, added gradually
- ½ cup (120 ml) oil or melted ghee for layering and cooking, as needed
- Extra flour for dusting
Optional: Mix equal amounts of melted butter and ghee for a richer flavor.
You can use all-purpose flour for softer, more flexible layers or whole-wheat atta for traditional everyday parathas. A combination of both also works well.
Step-by-Step Instructions
How to Make Soft Chapati at Home? : 4 Steps – Instructables
Step 1: Prepare the dough
Add the flour and salt to a large mixing bowl. Pour in the tablespoon of oil and gradually add the lukewarm water. Mix until the ingredients come together into a soft dough. Avoid adding all the water at once because different flours absorb different amounts of moisture.
Why Is My Roti Hard After Cooking? 7 Reasons & Fixes
Step 2: Knead until smooth
Transfer the dough to a clean work surface and knead for about 8–10 minutes. The dough should become smooth, soft, and pliable. If it feels too sticky, dust the surface with a little flour; if it feels dry, wet your hands and continue kneading.
Piadina – italienisches Streetfood | Einfach Kochen
Step 3: Rest the dough
Lightly grease the dough with a little oil, cover it, and leave it to rest for 20–30 minutes. Resting relaxes the gluten and makes the dough easier to roll into thin sheets. It also helps produce softer parathas.
Dal Paratha Recipe | Yellow Moong Dal Paratha
Step 4: Divide into portions
Divide the dough into eight equal portions and roll each one into a smooth ball. Keep the dough balls covered while working so they do not dry out. Lightly dust your rolling surface with flour before shaping each paratha.
Parathas Recipe (Plain Paratha)
Step 5: Create the flaky layers
Roll one dough ball into a thin circle or oval. Brush a light layer of oil or ghee over the surface and sprinkle with a little flour. Make small pleats like a paper fan, or cut the dough into thin strips and gather them together. Roll the gathered dough into a coil, tuck the end underneath, and let it rest for 5–10 minutes.
Make that dish that you always wanted to try – 7 Blue Band Margarine recipes to add flavour to your table
Step 6: Roll out the parathas
Gently roll each coil into a round or slightly oval paratha. Use light pressure so the layers do not completely merge together. Dust with flour only when necessary, as too much flour can make the cooked parathas dry.
Wooden Chakla Belan Set with Silicone Oil Brush and Spatula Round Rolling Board Wooden Roller Baking Tool Brown Green Blue | chakla belan set | wooden chakla belan | rolling board belan | wooden rolling pin | chakla belan wooden | silicone oil brush | silicone spatula | roti rolling board
Step 7: Cook until golden
Heat a tawa or flat frying pan over medium heat. Place one paratha on the hot surface and cook until small bubbles appear and the underside develops light golden spots. Flip it, spread a little oil or ghee on the cooked side, and turn again. Cook both sides until golden brown and the layers are cooked through.
Paratha: Complete Nutrition Guide – SnapCalorie
Step 8: Serve warm
Transfer each cooked paratha to a plate and stack them loosely. Cover with a clean kitchen towel to retain warmth and softness. Gently press the edges or clap the paratha between your hands once it is cool enough to handle to help separate the layers.
Tips for Perfect Flaky Parathas
- Make a soft dough. A stiff dough can produce hard parathas. Add water gradually until the dough feels supple and easy to knead.
- Do not skip resting. Resting the dough makes rolling easier and helps prevent it from shrinking.
- Use oil or ghee between the layers. This is one of the most important steps for creating distinct, flaky layers.
- Roll gently. Applying too much pressure can compress the layers. Roll evenly without flattening the dough excessively.
- Maintain medium heat. A pan that is too hot can burn the outside before the inside cooks. A pan that is too cool may dry out the paratha.
- Cook with enough fat. A light coating of oil or ghee encourages browning and gives the parathas their delicious texture. Adjust the quantity to your preference.
What to Serve with Parathas
Kakar Hotel Koila Chai menu in Karachi | Food Delivery Karachi | foodpanda
Quetta chai paratha hotel menu in Lahore | Food Delivery Lahore | foodpanda
Pango Pearl
Parathas are wonderfully versatile and can be served with a variety of dishes. For a traditional breakfast, enjoy them with a fried egg, omelet, yogurt, or a cup of hot chai.
For a savory meal, pair them with chicken curry, chickpea curry, lentils, potato bhujia, or your favorite homemade salan. Green chutney, mango pickle, and plain yogurt are also excellent accompaniments.
If you prefer a simple snack, serve a warm paratha with butter or enjoy it alongside a cup of tea.
How to Store and Reheat Parathas
Allow leftover parathas to cool before storing them in an airtight container. Refrigerate for up to 3 days.
To reheat, place a paratha on a preheated tawa over medium-low heat and warm both sides until soft and hot. Add a few drops of oil if needed.
You can also freeze cooked parathas with parchment paper between each one. Store them in a freezer-safe bag for up to 2 months for best quality. Reheat directly from frozen on a tawa until thoroughly hot.
Frequently Asked Questions
Why are my parathas hard?
The dough may be too dry, the parathas may be overcooked, or the pan may be too hot. Use a soft dough and cook over medium heat.
How can I make more visible layers?
Roll the dough thinly, apply oil or ghee evenly, sprinkle a little flour between the layers, and use the pleating or strip-folding method before coiling.
Can I make the dough ahead of time?
Yes. Cover and refrigerate the dough for up to 24 hours. Let it sit at room temperature briefly before shaping, and keep it covered to prevent drying.
Can I use whole-wheat flour?
Absolutely. Whole-wheat atta produces delicious traditional parathas. You may need slightly more water, depending on the flour.
Final Thoughts
Homemade flaky parathas are a simple yet delicious way to bring warmth and flavor to your table. With a soft dough, a little oil or ghee between the layers, and the right cooking temperature, you can make beautifully golden parathas that are tender inside and lightly crisp outside.
Serve them fresh for breakfast, pair them with your favorite curry, or prepare a batch to enjoy throughout the week. Once you master the layering technique, making restaurant-style parathas at home becomes much easier.
Try this recipe, save it for your next breakfast, and enjoy a stack of warm, homemade parathas with your favorite sides!

Leave a Reply