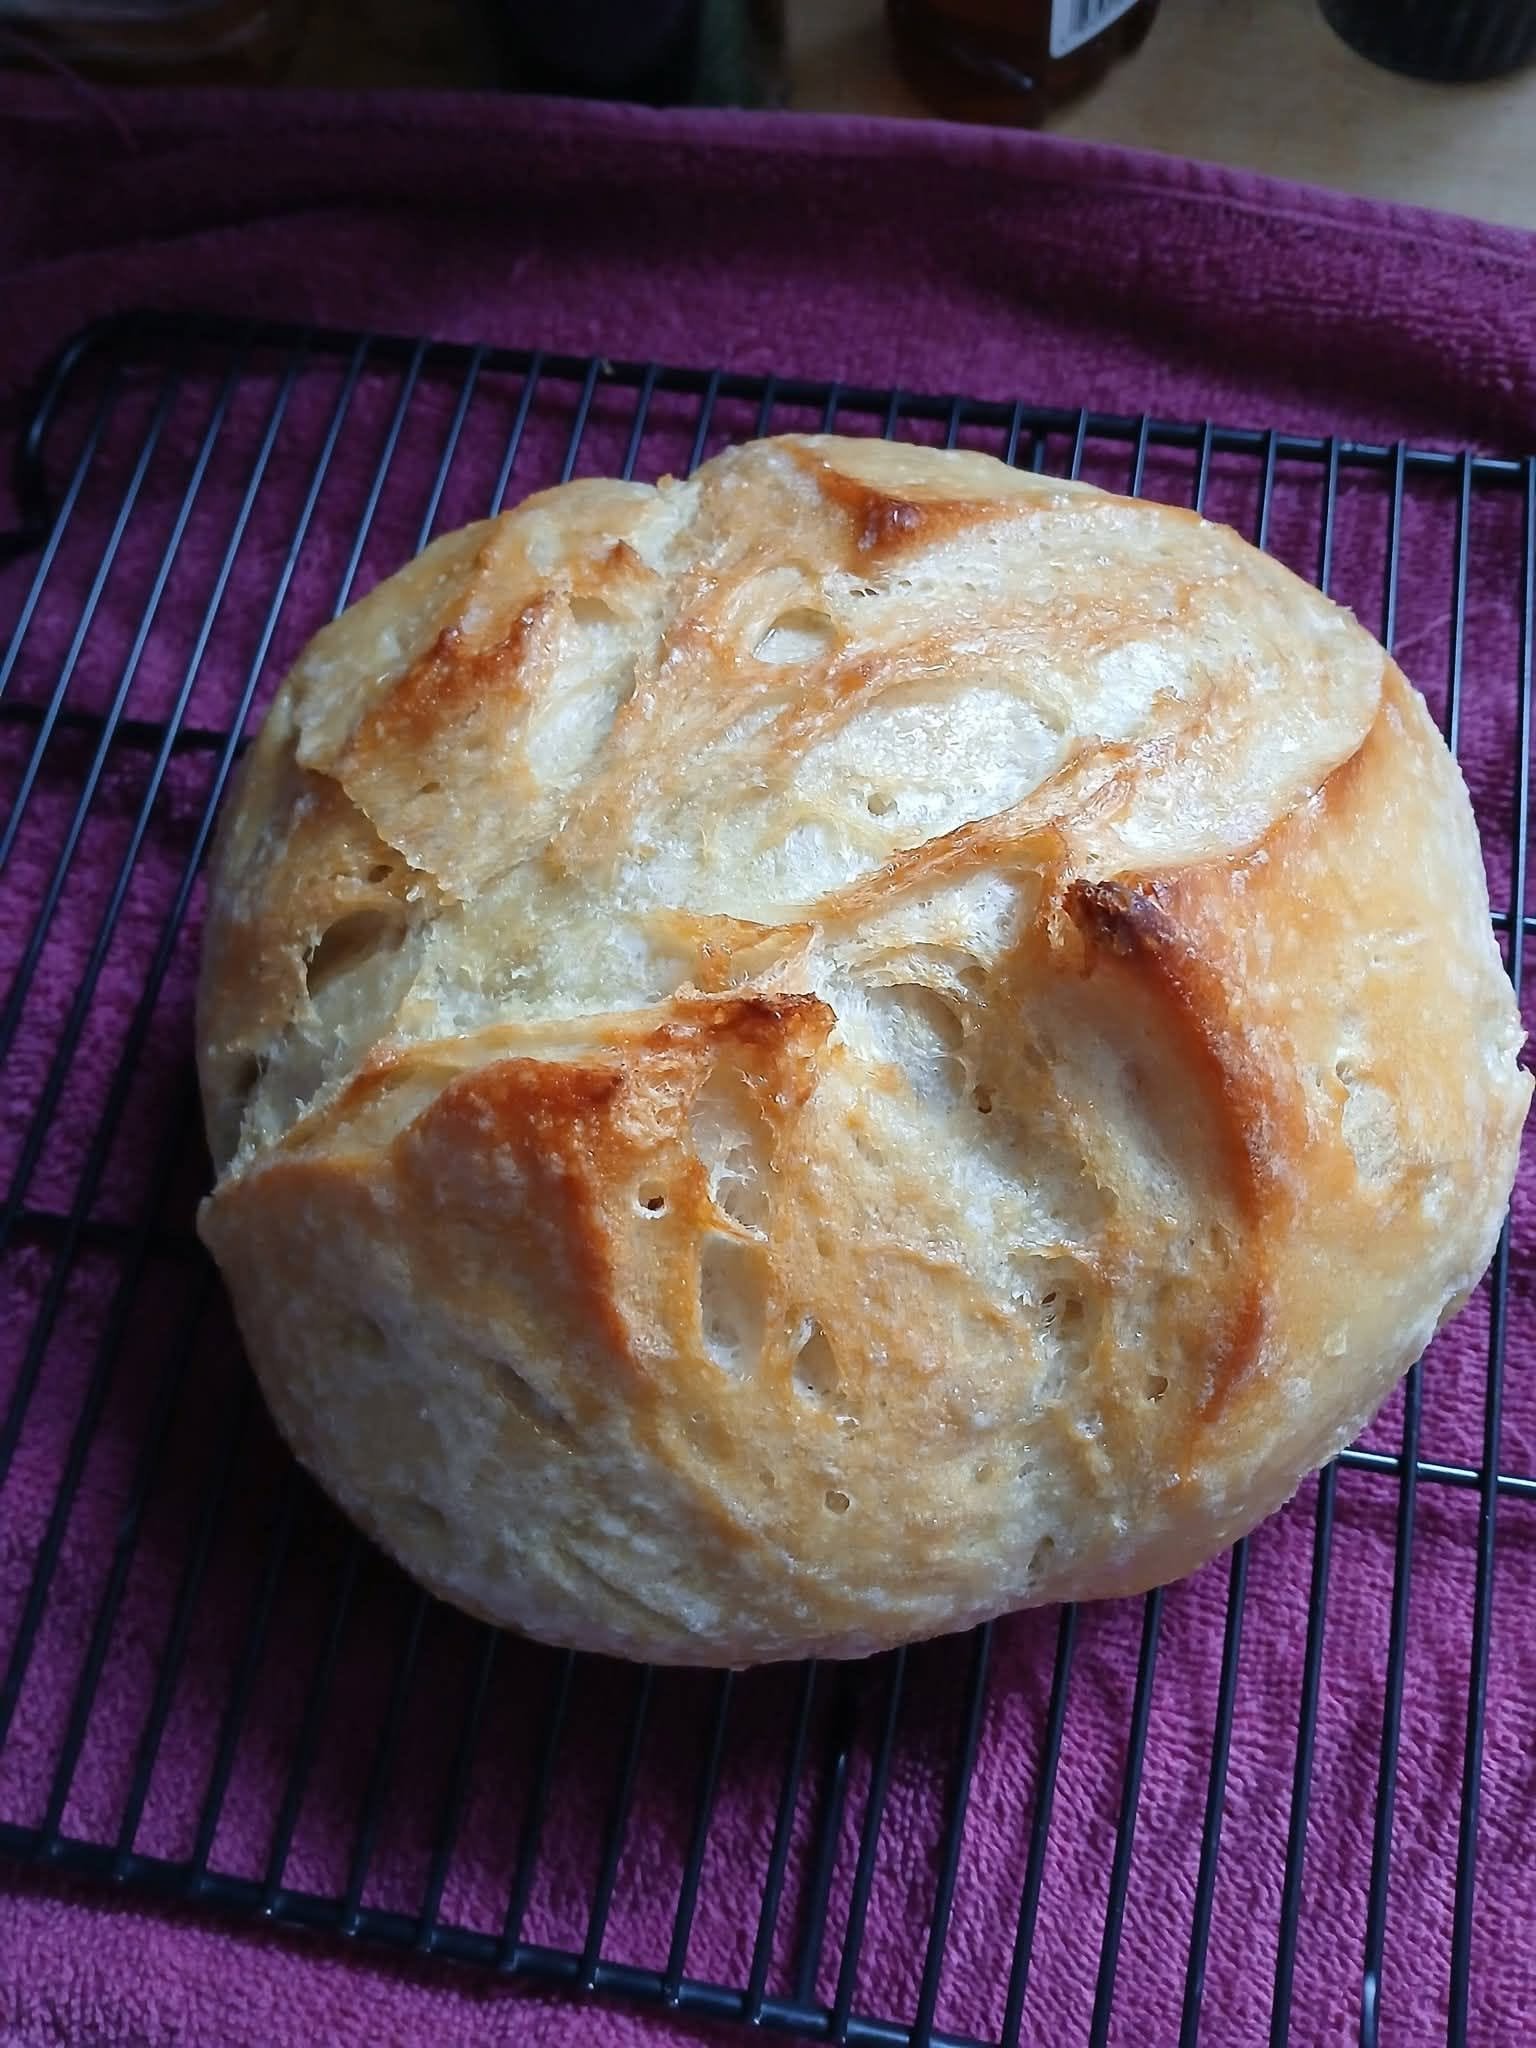
There is something wonderfully comforting about a freshly baked loaf of homemade bread. The crisp, golden crust, the light and chewy interior, and that irresistible smell filling the kitchen can make even an ordinary day feel special. This rustic homemade bread is exactly the kind of loaf that looks impressive but is surprisingly simple to make.
The loaf in the photo has a beautiful golden-brown crust with a naturally rustic appearance and plenty of little air pockets throughout. It is the sort of bread that is perfect for tearing apart while still slightly warm, spreading with butter, dipping into soup, or slicing for sandwiches.
The best part? You don’t need fancy equipment or advanced bread-making skills. With a handful of everyday ingredients, a little patience, and a hot oven, you can make a bakery-style loaf right in your own kitchen.
Why You’ll Love This Rustic Bread
This recipe is designed to produce a loaf with a crisp, lightly chewy crust and a soft, airy crumb. It is intentionally rustic, so don’t worry about making the dough perfectly smooth or shaping it like a professional baker.
The dough is mixed gently and allowed plenty of time to develop flavor. A long rise also helps create those attractive irregular holes inside the bread.
It is an excellent beginner-friendly recipe because the dough doesn’t require complicated kneading. In fact, the less you fuss with it, the more rustic and beautiful the finished loaf can become.
Ingredients
For one medium-to-large rustic loaf, you’ll need:
- 3 cups (375 g) all-purpose flour
- 1½ teaspoons salt
- ½ teaspoon instant yeast
- 1½ cups (360 ml) lukewarm water
- 1 teaspoon honey or sugar, optional
- 1 tablespoon olive oil, optional
The honey or sugar isn’t essential, but it can give the yeast a little assistance and contribute to a nicely browned crust. The olive oil adds a touch of tenderness to the bread.
A Note About Flour
All-purpose flour works wonderfully for this recipe. If you have bread flour available, you can substitute it for the all-purpose flour. Bread flour generally contains more protein, which can help produce a pleasantly chewy loaf.
You can also replace part of the white flour with whole-wheat flour. For a first attempt, however, I recommend keeping the recipe mostly white flour because it produces a lighter, airier crumb.
How to Make Rustic Homemade Bread
1. Mix the Dough
Start by adding the flour, salt, and instant yeast to a large mixing bowl. Stir everything together so the yeast and salt are evenly distributed.
If you’re using honey or sugar, mix it into the lukewarm water. Pour the water gradually into the flour mixture.
Use a wooden spoon, sturdy spatula, or your hands to combine everything.
The dough will look sticky and shaggy. Don’t be tempted to add lots of extra flour. A wetter dough helps create a lighter, more open crumb.
Once there are no obvious dry patches of flour, cover the bowl with plastic wrap, a lid, or a clean kitchen towel.
2. Let the Dough Rise
This is where the magic happens.
Leave the covered dough at room temperature for approximately 8 to 12 hours. Overnight is particularly convenient.
During this time, the yeast will slowly ferment the dough, developing flavor and creating bubbles. When you uncover the bowl, the dough should look noticeably expanded, soft, and bubbly.
If your kitchen is particularly warm, the dough may rise more quickly. If your kitchen is cool, it may need additional time.
Don’t worry if the dough looks messy. Rustic bread dough is supposed to look rustic!
3. Shape the Loaf
Lightly flour your work surface and gently tip the dough onto it.
Try not to aggressively knead or flatten the dough because you want to preserve some of those lovely air bubbles.
Fold the edges toward the center several times, then turn the dough over so the smoother side is facing upward.
Gently shape it into a round loaf.
Place the dough on a piece of parchment paper or a lightly floured surface. Cover it loosely and allow it to rest for another 30 to 60 minutes.
While it rests, preheat your oven.
4. Preheat the Oven
For the best crust, you’ll want a very hot oven.
Preheat your oven to 230°C (450°F).
If you have a Dutch oven or heavy oven-safe pot with a lid, place it inside the oven while it preheats. Let the pot the bread on a baking sheet. Place a heatproof pan in the oven and carefully add hot become thoroughly hot.
The combination of high heat and trapped steam is one of the secrets to achieving that gorgeous crust.
If you don’t have a Dutch oven, don’t worry. You can still bake the bread on a baking sheet. Place a heatproof pan in the oven and carefully add hot water when the bread goes in to create steam.
5. Score the Bread
Just before baking, use a sharp knife or bread lame to make one or two shallow cuts across the top of the dough.
Scoring gives the expanding bread somewhere to release pressure as it rises in the oven.
You can keep it simple with a single slash, or create a decorative pattern if you’d like.
A little flour sprinkled over the surface before scoring can also give the finished loaf a lovely bakery-style appearance.
6. Bake Until Golden Brown
Carefully transfer the dough into the preheated Dutch oven, using the parchment paper to help lower it in.
Cover with the lid and bake for approximately 25 to 30 minutes.
Then remove the lid and continue baking for another 15 to 20 minutes, or until the loaf is deeply golden brown.
This final uncovered stage is what helps develop the crisp, beautifully browned crust.
If you’re baking without a Dutch oven, bake for approximately 35 to 45 minutes, keeping an eye on the color.
The loaf should sound hollow when tapped underneath.
The Most Important Step: Let It Cool
I know it’s difficult to resist cutting into a freshly baked loaf, especially when your kitchen smells amazing.
But try to wait.
Place the bread on a wire rack and allow it to cool for at least 45 minutes to an hour before slicing.
The inside continues to set as the bread cools. Cutting too early can make the crumb appear gummy, even when the bread has technically finished baking.
Once cooled, use a serrated bread knife to slice through the crust.
What to Serve With Rustic Bread
This loaf is incredibly versatile.
For breakfast, toast thick slices and spread them with butter, honey, jam, or peanut butter.
For lunch, use it to make a hearty sandwich with cheese, vegetables, chicken, or roasted meat.
At dinner, serve warm slices alongside soup, stew, pasta, or roasted vegetables. The crust is especially good for soaking up sauces and gravies.
You can also cut leftover bread into cubes and turn it into homemade croutons or breadcrumbs.
And honestly, sometimes the best way to eat it is simply warm, with a little salted butter.
Tips for a Better Loaf
Don’t add too much flour. Sticky dough is normal. Adding excessive flour can make the bread dense.
Give the dough enough time. A slow rise contributes significantly to flavor and texture.
Use a hot oven. High heat encourages good oven spring and helps create a crisp crust.
Don’t skip the cooling period. It makes a noticeable difference to the texture of the interior.
Watch your dough, not just the clock. Yeast works differently depending on temperature. A warm kitchen can speed up fermentation, while a cool kitchen can slow it down.
Storage
Once completely cool, store the loaf at room temperature in a bread bag, paper bag, or loosely wrapped clean kitchen towel.
Avoid storing crusty bread in the refrigerator because the cold environment can make it stale more quickly.
The bread is best enjoyed within 2 to 3 days, although you can slice and freeze it for longer storage. Frozen slices can go directly into a toaster or be thawed at room temperature.
Final Thoughts
Making homemade bread doesn’t have to be intimidating. This rustic loaf proves that a simple mixture of flour, water, yeast, and salt can become something incredibly delicious with just a little patience.
The finished bread should have a beautifully golden, crackly crust and a soft, airy interior—the kind of loaf that looks wonderfully homemade rather than perfectly manufactured.
Don’t worry if every loaf looks slightly different. That’s part of the charm. Some will have larger air pockets, some will spread a little more, and some will develop dramatic cracks across the crust. Those imperfections are what make rustic bread so appealing.
So grab your mixing bowl, combine your ingredients, and give the dough time to work its magic. By the next day, you’ll have a warm homemade loaf ready to slice, tear, toast, or simply enjoy with butter.
Recipe at a glance: Mix → slow rise → gently shape → rest → bake hot → cool → slice and enjoy.
And once you’ve made this basic loaf, you can start experimenting with rosemary and garlic, cheese, olives, herbs, seeds, roasted garlic, or even a little whole-wheat flour to create your own signature homemade bread.

Leave a Reply