
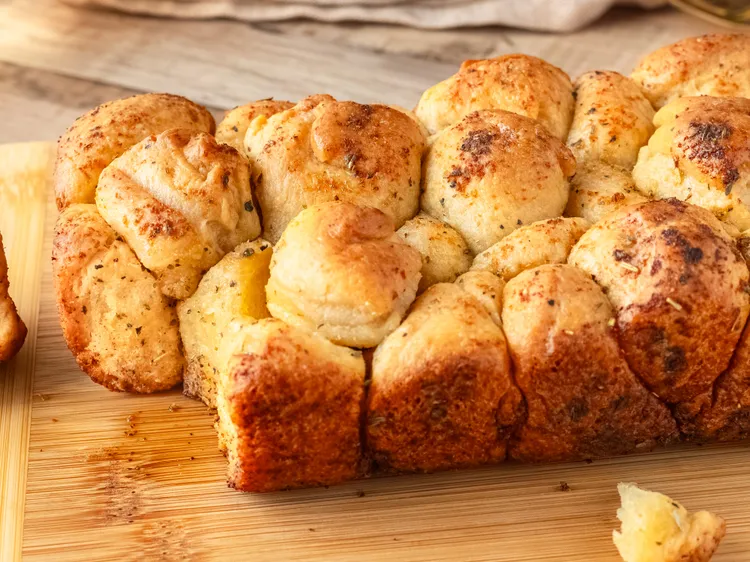
There is something irresistible about a basket of freshly baked bread, especially when the rolls are golden on top, soft and fluffy inside, and packed closely together so that everyone can pull one apart with their hands. These Golden Pull-Apart Garlic Herb Bread Rolls are exactly that kind of bread. They are rustic, comforting, buttery, and perfect for sharing.
Inspired by the beautiful homemade rolls in the photo, this recipe creates a tray of individual dough balls baked together until their edges become beautifully golden and slightly crisp while the centers stay tender and pillowy. A generous brushing of garlic butter, herbs, and a touch of seasoning gives every bite wonderful flavor.
The best part is that you do not need any special bread-making equipment. A mixing bowl, a baking tray, and a little patience are all you need. Whether you serve these rolls alongside soup, pasta, roasted vegetables, grilled meats, or a holiday dinner, they are guaranteed to disappear quickly.
Why You’ll Love This Recipe
These rolls have everything you want in homemade bread. The outside becomes golden and lightly crisp, while the inside remains soft and airy. Because the dough balls are arranged close together, they bake into a beautiful pull-apart loaf that looks impressive without requiring complicated shaping.
The garlic-herb butter also makes the bread especially flavorful. You can keep the seasoning simple with garlic and parsley, or customize it with rosemary, oregano, thyme, chili flakes, or even grated Parmesan.
This recipe is also wonderfully versatile. Make smaller rolls for a dinner table, larger rolls for sandwiches, or add cheese to the center for an extra-indulgent version.
Ingredients
For the Dough
3 cups (375 g) all-purpose flour
2 ¼ teaspoons (7 g) active dry yeast
2 tablespoons sugar
1 teaspoon salt
¾ cup (180 ml) warm milk
¼ cup (60 ml) warm water
2 tablespoons melted butter
1 large egg
For the Garlic Herb Butter
4 tablespoons unsalted butter, melted
3 cloves garlic, finely minced
1 tablespoon chopped fresh parsley
½ teaspoon dried oregano
½ teaspoon dried rosemary or thyme
¼ teaspoon black pepper
A pinch of salt
Optional: 2 tablespoons grated Parmesan cheese
Optional: ¼ teaspoon red pepper flakes
How to Make Pull-Apart Garlic Herb Bread
- Activate the Yeast
Start by preparing the yeast. Combine the warm milk, warm water, sugar, and yeast in a small bowl. The liquid should feel warm but not hot. Extremely hot liquid can damage the yeast.
Let the mixture stand for about 5–10 minutes. It should become slightly foamy on the surface. This is a good indication that the yeast is active and ready to use.
If your yeast does not foam at all, check its expiration date and make sure the liquid was not too hot or too cold before continuing.
- Make the Dough
In a large mixing bowl, combine the flour and salt. Add the activated yeast mixture, melted butter, and egg.
Mix everything together until a rough dough forms. Transfer the dough to a lightly floured surface and knead for approximately 8–10 minutes.
The dough should become smooth, elastic, and slightly soft. If it feels extremely sticky, add flour one tablespoon at a time. Avoid adding too much flour, because a stiff dough can result in dense rolls.
You can also knead the dough using a stand mixer fitted with a dough hook. Mix on low speed until the ingredients come together, then knead on medium-low speed until the dough becomes smooth and elastic.
- Let the Dough Rise
Place the kneaded dough in a lightly greased bowl and turn it once so the surface is coated.
Cover the bowl with a clean kitchen towel or plastic wrap. Leave it in a warm, draft-free place for approximately 1 to 1½ hours, or until the dough has roughly doubled in size.
The rising time can vary depending on the temperature of your kitchen. On a cool day, the dough may need additional time.
Do not rush this step. Allowing the dough to rise properly is one of the secrets to soft, fluffy bread.
- Prepare the Garlic Herb Butter
While the dough is rising, prepare the butter mixture.
Combine the melted butter, minced garlic, parsley, oregano, rosemary or thyme, black pepper, and salt. If desired, stir in Parmesan cheese and red pepper flakes.
The garlic butter should smell incredibly fragrant. You can adjust the herbs according to your taste. Fresh parsley gives the rolls a bright flavor, while rosemary and thyme add a warm, savory aroma.
- Shape the Rolls
Once the dough has doubled, gently press it down to release excess air.
Divide the dough into approximately 16–20 equal pieces. You can use a kitchen scale if you want perfectly uniform rolls, but dividing the dough by eye works perfectly for a rustic homemade appearance.
Take one piece of dough and gently pull the edges toward the bottom, forming a smooth ball. Repeat with the remaining pieces.
Arrange the dough balls in a greased round or rectangular baking dish. Leave a small amount of space between them so they have room for their second rise.
For the beautiful rustic appearance shown in the photo, do not worry if the rolls are not perfectly identical. Slight variations make homemade bread look even more inviting.
- Second Rise
Cover the shaped rolls again and allow them to rest for about 30–45 minutes.
During this time, the dough should become noticeably puffier. The rolls will expand and begin touching one another.
Meanwhile, preheat your oven to 375°F (190°C).
- Add the Garlic Butter
Brush the tops of the risen rolls generously with the prepared garlic herb butter.
Make sure the butter reaches the spaces between the rolls as well. This helps create flavorful, golden edges during baking.
If you want an especially golden finish, you can brush the tops with a little beaten egg before adding the garlic butter. Sprinkle a little extra Parmesan or dried herbs over the surface if desired.
- Bake Until Golden
Place the baking dish in the preheated oven and bake for approximately 20–25 minutes, or until the rolls are beautifully golden brown.
The exact baking time will depend on the size of your rolls and your oven. The tops should look golden and cooked through, while the centers should feel soft when gently pressed.
If the tops begin browning too quickly, loosely cover the dish with aluminum foil for the final few minutes of baking.
When the rolls come out of the oven, brush them with another thin layer of melted garlic butter. This final coating gives them a glossy finish and keeps the crust wonderfully flavorful.
Allow the bread to cool for about 5–10 minutes before serving.
Tips for Perfect Homemade Rolls
Use warm, not hot, liquid. The milk and water should be comfortably warm to the touch. Very hot liquid can prevent the yeast from working properly.
Don’t overload the dough with flour. A slightly soft dough produces lighter rolls. Add flour gradually if the dough is sticky.
Give the dough enough time to rise. Rising time depends on your kitchen temperature, so use the dough itself as your guide. It should become visibly larger and airy.
Keep the rolls close together. Arranging the dough balls side by side helps create the characteristic pull-apart shape and keeps the centers soft.
Customize the herbs. Parsley, oregano, rosemary, thyme, basil, and chives all work well. You can even add a pinch of chili flakes for a little heat.
Don’t skip the final butter. Brushing the warm rolls after baking adds extra flavor and gives the crust a beautiful finish.
Serving Suggestions
These garlic herb rolls are best served warm, when the centers are soft and fluffy and the butter is still fragrant.
Serve them with tomato soup, creamy mushroom soup, pasta, roasted chicken, grilled vegetables, steak, or a hearty stew. They also make a wonderful addition to a holiday dinner alongside turkey, ham, or roast beef.
For a special appetizer, serve the rolls with warm marinara sauce, whipped butter, or a creamy garlic dip.
If you love cheese, tuck a small cube of mozzarella, cheddar, or provolone into each dough ball before shaping. The result is a delicious cheesy pull-apart bread with a melted center.
Storage and Reheating
Store leftover rolls in an airtight container or tightly wrapped at room temperature for up to 2 days. For longer storage, freeze the baked rolls in a freezer-safe bag for up to 2 months.
To reheat, warm them in a 300°F (150°C) oven for about 8–10 minutes. A quick brush of melted butter before reheating will help restore their soft, flavorful texture.
Final Thoughts
Homemade bread does not have to be complicated. These golden pull-apart garlic herb rolls prove that simple ingredients and a little patience can create something incredibly special.
The combination of fluffy bread, crisp golden edges, fragrant garlic, and fresh herbs makes these rolls perfect for everyday meals and special occasions alike. Put the warm tray in the center of the table and let everyone pull off a roll—the informal, shareable presentation is part of the charm.
Once you make them, don’t be surprised if your family asks for them again and again. They are the kind of homemade bread that turns an ordinary meal into something memorable.
Prep Time: 25 minutes
Rising Time: 1½–2 hours
Bake Time: 20–25 minutes
Total Time: Approximately 2½ hours
Yield: 16–20 pull-apart rolls
Servings: 6–8

