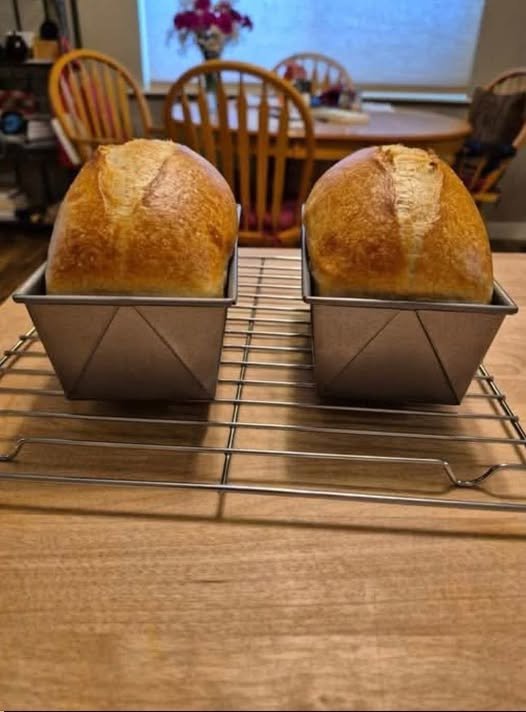
There is something incredibly satisfying about pulling a beautiful homemade sourdough sandwich loaf from the oven. This easy recipe creates a soft, tender loaf with a golden-brown crust, a light and chewy interior, and that wonderful naturally fermented sourdough flavor. Best of all, this method is designed for busy bakers because there are no stretch-and-fold steps required.
If you have ever avoided sourdough because you thought it involved complicated techniques, this sandwich bread is a great place to start. The dough comes together simply, rests, rises, gets shaped, and goes into the loaf pan. The process takes time because sourdough needs fermentation, but the hands-on work is surprisingly minimal.
Why You’ll Love This Sourdough Sandwich Loaf
This recipe is perfect when you want homemade bread without spending the entire day working with dough. There is no need to repeatedly stretch, fold, turn, or handle the dough during bulk fermentation.
The dough is mixed thoroughly at the beginning, allowing the ingredients to hydrate and the sourdough starter to begin working naturally. During fermentation, the dough develops structure on its own.
Once baked, the loaf has a beautiful golden crust and a soft center that makes it perfect for sandwiches, toast, breakfast, or simply spreading with butter.
The loaf-pan shape also makes slicing easy. Instead of the rustic shape associated with traditional artisan sourdough, you get neat, even slices that are ideal for everyday use.
Ingredients
- 100 g active sourdough starter
- 350 g warm water
- 500 g bread flour
- 25 g honey or maple syrup
- 30 g softened unsalted butter
- 10 g salt
- 30–50 g additional water if needed
Use a sourdough starter that is active, bubbly, and recently fed. A healthy starter is important because it provides the natural fermentation needed to make the dough rise.
For the best texture, bread flour is recommended because its higher protein content helps create a strong dough structure.
How to Make Easy Sourdough Sandwich Bread
1. Prepare the Dough
Add the active sourdough starter and warm water to a large mixing bowl. Stir until the starter is mostly dispersed throughout the water.
Add the bread flour, honey, softened butter, and salt. Mix everything together using a wooden spoon, dough whisk, or your hands.
Continue mixing until there are no large patches of dry flour remaining. The dough may look rough and slightly sticky at this stage. That is completely normal.
If the dough feels extremely dry, add additional water one tablespoon at a time. Avoid adding too much water at once because flour can absorb moisture differently depending on the brand and environment.
2. Knead Briefly
Instead of using multiple stretch-and-fold sessions, knead the dough by hand for several minutes until it begins to look smoother.
You do not need to achieve a perfectly smooth dough immediately. The long fermentation will continue developing the gluten and structure.
Place the dough into a lightly greased bowl and cover it with a lid, plastic wrap, or a clean damp towel.
3. Bulk Fermentation
Leave the covered dough at room temperature until it becomes noticeably larger, puffy, and airy.
Depending on the strength of your starter, room temperature, and hydration, this can take approximately 6–10 hours. Sourdough timing is flexible, so watch the dough rather than relying only on the clock.
The dough does not necessarily need to double completely. Look for an increase in volume, bubbles around the dough, and a soft, slightly domed appearance.
Because this recipe does not require stretch and folds, simply leave the dough undisturbed during this stage.
4. Shape the Loaf
Once bulk fermentation is complete, lightly flour your work surface and gently transfer the dough onto it.
Press the dough into a rough rectangle without aggressively deflating it. Fold the sides toward the center, then roll the dough tightly into a log.
The goal is to create enough surface tension to help the loaf rise upward in the pan.
Place the shaped dough seam-side down into a greased standard loaf pan.
5. Final Proof
Cover the loaf pan and allow the dough to rise again.
The final proof may take approximately 2–5 hours at room temperature, depending on your starter and kitchen temperature.
The dough should become visibly puffy and rise toward the top of the pan. A gentle finger press should leave a slight indentation that slowly springs back.
Do not rush this stage. Under-proofed dough can produce a dense loaf, while excessive proofing can cause the dough to collapse during baking.
6. Bake the Bread
Preheat your oven to 375°F (190°C).
For an attractive crust, lightly brush the top of the loaf with water, milk, or an egg wash. You can also leave it plain for a simple rustic appearance.
Use a sharp bread lame or knife to make one shallow slash across the top. This gives the bread room to expand while baking and creates the beautiful split seen on many sourdough loaves.
Bake for approximately 35–45 minutes, or until the loaf is deeply golden brown and sounds hollow when gently tapped.
If the top begins browning too quickly, loosely cover it with aluminum foil during the final part of baking.
7. Cool Completely
Remove the bread from the loaf pan as soon as it comes out of the oven and place it on a wire rack.
Allow it to cool completely before slicing. This is one of the hardest parts because the fresh bread will smell amazing, but cutting it too early can compress the soft interior.
Once completely cool, use a serrated bread knife to cut even slices.
Tips for Perfect Sourdough Sandwich Bread
The most important ingredient is an active starter. If your starter is sluggish, the dough may take considerably longer to rise.
Temperature also makes a big difference. Warmer kitchens generally speed up fermentation, while cooler environments slow it down. Instead of following the timing exactly, observe the dough throughout fermentation.
Avoid adding excessive flour while shaping. A slightly tacky dough can produce a softer sandwich loaf.
For a softer crust, brush the freshly baked loaf with melted butter immediately after removing it from the oven. This creates a tender, flavorful crust.
How to Store It
Once completely cooled, store the loaf in a bread bag or airtight container at room temperature for several days.
For longer storage, slice the bread and freeze it in a tightly sealed freezer-safe bag. Individual slices can be removed whenever needed and toasted directly from frozen.
Serving Ideas
This homemade sourdough sandwich bread is incredibly versatile. Use it for grilled cheese, turkey sandwiches, chicken sandwiches, avocado toast, breakfast toast, or simple buttered slices.
It also makes excellent French toast because the slightly chewy sourdough structure holds up beautifully when soaked in an egg mixture.
For breakfast, toast a slice and top it with butter, eggs, cheese, or your favorite spread. For lunch, use two slices to create a hearty sandwich with fresh vegetables and your preferred protein.
Final Thoughts
This easy sourdough sandwich loaf proves that homemade bread does not have to involve complicated techniques. With an active starter, a simple dough, patience during fermentation, and no stretch-and-fold routine, you can create a beautiful loaf with a soft interior and golden crust.
The process is simple enough for beginners but rewarding enough to become a regular baking recipe. Once you become comfortable with the fermentation times in your kitchen, you can easily make this loaf part of your weekly baking routine. Slice it for sandwiches, toast it for breakfast, or enjoy a warm piece with butter straight from the oven.

Leave a Reply