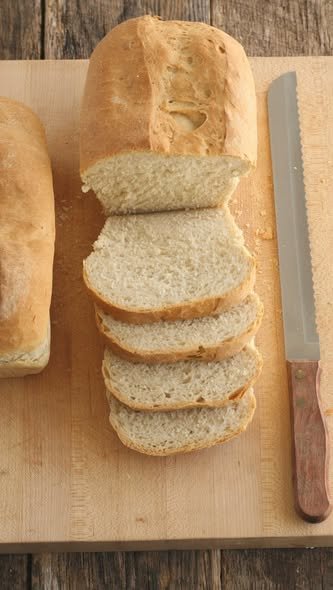
There is something incredibly satisfying about baking a beautiful loaf of sourdough bread from scratch. The golden crust, soft and slightly chewy center, and naturally tangy flavor make homemade sourdough completely different from ordinary store-bought bread. This simple sourdough bread recipe creates a classic everyday loaf with a tender crumb that is perfect for sandwiches, toast, breakfast, or enjoying with a little butter.
The best part is that sourdough does not require commercial yeast. Instead, a healthy, active sourdough starter does all the work. With a little patience and the right timing, you can turn a few basic ingredients into a bakery-style loaf right in your own kitchen.
This recipe is designed to be approachable, especially if you are still learning how sourdough works. You do not need complicated equipment or advanced bread-baking skills. The most important things are an active starter, good-quality flour, proper fermentation, and patience.
Why You’ll Love This Sourdough Bread
This homemade loaf has everything you want from classic sourdough bread. The crust becomes beautifully golden and lightly crisp, while the inside stays soft, fluffy, and flavorful. It is sturdy enough for sandwiches but tender enough to enjoy fresh from the oven.
Unlike bread made with commercial yeast, sourdough develops its flavor slowly during fermentation. This gives the loaf a naturally pleasant tang and a more complex taste.
It is also a wonderfully simple recipe. The dough needs only a handful of basic ingredients: flour, water, sourdough starter, and salt. Once you understand the process, you can make sourdough bread regularly and adjust the hydration, fermentation time, and shaping technique to suit your preference.
Ingredients
For the Dough
- 500 grams bread flour or strong all-purpose flour
- 350 grams lukewarm water
- 100 grams active sourdough starter
- 10 grams fine sea salt
- Extra flour for shaping
For the best results, use a sourdough starter that is active, bubbly, and recently fed. Your starter should rise noticeably after feeding and have plenty of bubbles throughout.
Bread flour gives the loaf a stronger structure and chewier texture, while all-purpose flour can also work well for a softer everyday loaf.
How to Make Sourdough Bread
1. Prepare Your Sourdough Starter
Before beginning the dough, make sure your starter is active. A healthy starter should look bubbly and slightly domed on top when it is ready to use.
If your starter has been sitting in the refrigerator, feed it and allow it to become active before starting the recipe. Depending on the temperature of your kitchen and the strength of your starter, this may take several hours.
The timing is flexible, but using an active starter is one of the most important steps for getting a good rise.
2. Mix the Flour and Water
Add the flour and most of the water to a large mixing bowl. Stir until there are no large dry patches of flour remaining.
At this stage, the dough does not need to be perfectly smooth. Cover the bowl and let it rest for about 30 minutes.
This resting period allows the flour to absorb the water and begins developing the dough naturally. It can also make the dough easier to handle later.
3. Add the Starter and Salt
After the initial rest, add the active sourdough starter and salt. Pour in the remaining water if needed and mix thoroughly using your hands or a sturdy spoon.
Work the mixture until the starter and salt are evenly distributed throughout the dough.
The dough will feel sticky and somewhat loose at first. Do not add a large amount of extra flour simply because the dough feels sticky. Sourdough dough often becomes smoother and stronger as gluten develops during fermentation.
Cover the bowl and let the dough rest for about 30 minutes.
4. Stretch and Fold the Dough
Instead of traditional kneading, this recipe uses stretch-and-folds to strengthen the dough.
With slightly wet hands, grab one side of the dough, gently stretch it upward, and fold it over the center. Turn the bowl and repeat from another side. Continue until you have folded all four sides.
Cover the dough and let it rest for another 30 minutes.
Repeat this process every 30 minutes for approximately 2 to 3 hours. You do not need to stretch and fold continuously. The resting periods allow the dough to relax while the gluten gradually strengthens.
As you continue, you should notice that the dough becomes smoother, more elastic, and easier to handle.
5. Bulk Fermentation
After your stretch-and-fold sessions, leave the dough covered at room temperature for bulk fermentation.
The exact time will depend on your room temperature, starter strength, and dough temperature. Rather than relying only on the clock, look at the dough itself.
The dough should become noticeably puffy and increase in volume. You may see bubbles forming along the sides or underneath the surface. It should feel lighter and more elastic when gently touched.
Bulk fermentation can take roughly 4 to 8 hours, sometimes longer in a cool kitchen.
Do not rush this step. Under-fermented dough can produce a dense loaf, while over-fermented dough may become weak and difficult to shape.
6. Shape the Loaf
Once bulk fermentation is complete, lightly flour your work surface and carefully turn the dough out.
Gently shape the dough into a round or oval loaf. Try not to press out all the air that has developed during fermentation.
For a round loaf, pull the edges toward the center and create some surface tension. Turn the dough seam-side down and gently rotate it against the work surface.
The goal is to create a smooth outer surface that helps the loaf hold its shape during its final rise.
7. Final Proof
Place the shaped dough into a well-floured banneton or a bowl lined with a clean, floured kitchen towel.
Cover it and let it proof.
You can allow the dough to rise at room temperature for a shorter final proof, or place it in the refrigerator for a cold proof overnight. Cold fermentation is especially convenient because it slows the dough down and allows the flavor to develop while making the dough easier to score and bake.
For an overnight proof, cover the dough well and refrigerate it for approximately 8 to 12 hours.
8. Preheat the Oven
When you are ready to bake, preheat your oven to 230°C (450°F). If you are using a Dutch oven, place it inside the oven while it preheats.
A thoroughly heated Dutch oven helps create steam during the first part of baking. Steam is important because it allows the crust to stay flexible while the loaf expands.
Let the oven and Dutch oven heat for at least 30 to 45 minutes.
9. Score the Dough
Carefully turn the cold dough onto a piece of parchment paper.
Use a sharp bread lame or very sharp knife to make one deep slash across the top of the loaf. You can also add a few decorative cuts if desired.
Scoring gives the expanding bread a controlled place to open during baking. Without scoring, the loaf may split randomly as it expands.
Work quickly but gently so the dough does not lose its shape.
10. Bake the Sourdough
Carefully transfer the dough into the preheated Dutch oven and cover with the lid.
Bake covered for approximately 20 minutes.
Then remove the lid and continue baking for another 20 to 25 minutes, or until the crust becomes a deep golden brown.
For an especially crisp crust, you can bake it a few additional minutes uncovered. Keep an eye on the loaf so the crust does not become too dark.
The finished bread should feel light for its size and have a beautifully browned exterior.
11. Let It Cool Completely
This step can be difficult because freshly baked sourdough smells incredible, but try not to cut into the loaf immediately.
Transfer the bread to a wire rack and allow it to cool completely before slicing.
The interior continues setting as it cools. Cutting the loaf too early can result in a gummy or compressed crumb.
Once completely cooled, use a serrated bread knife to slice it into even pieces.
Tips for Perfect Sourdough Bread
Use an active starter: A weak or inactive starter is one of the most common reasons sourdough bread does not rise properly.
Watch the dough, not just the clock: Fermentation changes with temperature. A dough that takes six hours in one kitchen may take much longer in another.
Do not add too much flour: Sticky dough is normal, especially at the beginning. Wetting your hands is often better than adding excessive flour.
Build dough strength: Stretch-and-folds help develop gluten and give the loaf enough structure to rise.
Do not skip the final proof: Proper proofing helps create a lighter texture and better crumb.
Bake in a hot Dutch oven: The enclosed environment traps steam and helps produce a beautiful crust.
Cool before slicing: Allowing the loaf to cool completely gives the crumb time to finish setting.
How to Store Sourdough Bread
Once cooled, store the loaf at room temperature in a bread bag, paper bag, or wrapped kitchen towel. Avoid storing freshly baked sourdough in the refrigerator because refrigeration can make the bread stale more quickly.
For longer storage, slice the bread and freeze it in an airtight freezer-safe bag. Individual slices can be removed whenever needed and toasted directly from frozen.
How to Serve Homemade Sourdough
Fresh sourdough is incredibly versatile. Serve thick slices with butter and jam for breakfast, or toast them and top with eggs, avocado, cottage cheese, or your favorite savory toppings.
The bread also makes excellent sandwiches because the slices are sturdy while still soft enough to bite through easily.
For a simple snack, toast a slice until crisp and drizzle it with olive oil before adding tomatoes, herbs, and a sprinkle of salt.
You can also use day-old sourdough for French toast, bread pudding, croutons, breadcrumbs, or homemade garlic toast.
Frequently Asked Questions
Can I use all-purpose flour?
Yes. Bread flour provides more structure and chew, but good-quality all-purpose flour can produce a delicious loaf as well.
Why is my sourdough bread dense?
Dense sourdough can happen for several reasons, including an inactive starter, insufficient fermentation, under-proofing, or weak gluten development. Give your starter enough time to become active and pay attention to how the dough looks and feels during fermentation.
Can I proof the dough overnight?
Absolutely. An overnight refrigerator proof is one of the easiest ways to fit sourdough baking into your schedule. It also gives the bread additional time to develop flavor.
Do I need a Dutch oven?
A Dutch oven is one of the easiest ways to create the steam needed for excellent sourdough, but it is not absolutely required. You can use another oven-safe covered baking vessel or introduce steam into the oven using a suitable baking setup.
Final Thoughts
Homemade sourdough bread may seem intimidating at first, but the process becomes much easier once you understand the rhythm of feeding your starter, mixing the dough, developing gluten, fermenting, shaping, proofing, and baking.
The beauty of sourdough is that every loaf teaches you something. Your kitchen temperature, flour, starter, hydration, and fermentation time can all affect the final result. With practice, you will learn to recognize when the dough is ready simply by looking at it and touching it.
This classic sourdough loaf is soft inside, golden and crisp outside, and full of naturally developed flavor. Slice it for sandwiches, toast it for breakfast, or enjoy a warm piece with butter. Once you get comfortable with the process, homemade sourdough can easily become a regular part of your baking routine.

Leave a Reply