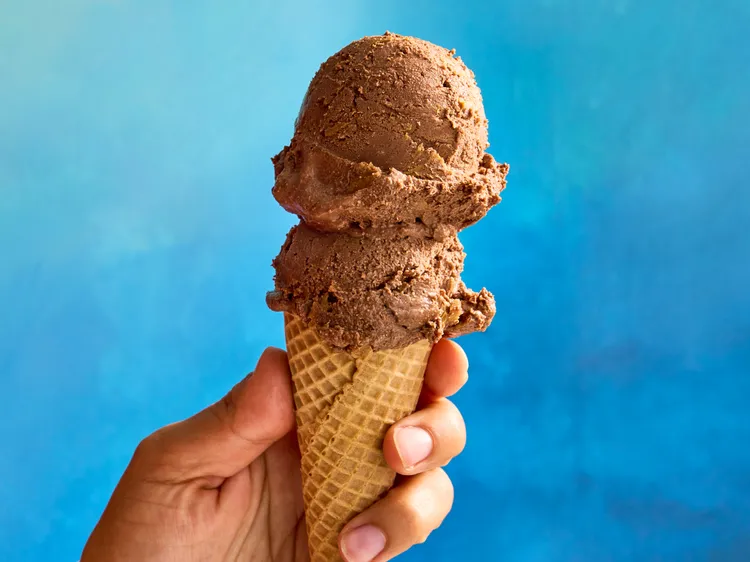
There is something incredibly satisfying about a scoop of rich, creamy chocolate ice cream, especially when it is homemade. This Homemade Chocolate Ice Cream is smooth, deeply chocolatey, and packed with delicious cocoa flavor. You do not need fancy ingredients or complicated techniques to make a batch that tastes like it came from a premium ice cream shop.
The best part is that this recipe can be made with simple pantry and refrigerator staples. It is perfect for hot summer afternoons, family gatherings, birthday parties, movie nights, or simply when you are craving something sweet and cold.
🍨 Why You’ll Love This Chocolate Ice Cream
This homemade ice cream has a wonderfully creamy texture with a rich chocolate taste in every spoonful. Unlike some store-bought varieties, you can control the sweetness and chocolate intensity yourself.
It is also easy to customize. Add chocolate chips for extra texture, crushed cookies for a fun twist, or a drizzle of chocolate sauce before serving. You can even add chopped nuts if you enjoy a little crunch.
The result is a beautiful chocolate ice cream that is indulgent, satisfying, and incredibly easy to enjoy in a cone or bowl.
🛒 Ingredients
For this homemade chocolate ice cream, you will need:
- 2 cups heavy cream or whipping cream
- 1 cup whole milk
- ¾ cup granulated sugar
- ½ cup unsweetened cocoa powder
- 100 g semi-sweet or dark chocolate, finely chopped
- 1 teaspoon vanilla extract
- A small pinch of salt
For serving:
- Waffle cones
- Chocolate sauce
- Chocolate chips
- Whipped cream
- Chopped nuts, optional
Using good-quality cocoa powder and chocolate makes a noticeable difference in the final flavor. Dark chocolate gives the ice cream a deeper, more intense taste, while semi-sweet chocolate creates a smoother and slightly sweeter flavor.
👩🍳 How to Make Homemade Chocolate Ice Cream
Step 1: Prepare the Chocolate Mixture
Start by placing the cocoa powder, sugar, and a small pinch of salt in a medium saucepan. Whisk everything together so the cocoa powder is evenly distributed.
Slowly add the whole milk while whisking continuously. This helps prevent lumps from forming. Place the saucepan over medium-low heat and warm the mixture gently.
Do not allow it to boil. You simply want the sugar to dissolve and the cocoa powder to blend smoothly into the milk.
Step 2: Add the Chocolate
Once the milk mixture is hot, add the finely chopped chocolate. Stir continuously until the chocolate melts completely and the mixture becomes smooth and glossy.
Remove the saucepan from the heat and allow it to cool for several minutes.
The melted chocolate gives the ice cream its rich flavor and helps create that luxurious chocolate texture.
Step 3: Add Cream and Vanilla
Pour the heavy cream into a large mixing bowl. Add the cooled chocolate mixture and vanilla extract.
Whisk everything together until well combined.
Taste the mixture carefully. If you prefer sweeter ice cream, you can add a little extra sugar. Remember that frozen desserts taste slightly less sweet once completely frozen, so the mixture should taste pleasantly sweet before freezing.
Step 4: Chill the Mixture
Cover the bowl and place it in the refrigerator for at least 2–4 hours.
For the best results, chilling it overnight is even better. A thoroughly chilled mixture freezes more evenly and helps produce a smoother texture.
Do not skip this step if you want creamy homemade ice cream.
❄️ Freezing the Ice Cream
If you have an ice cream maker, pour the chilled mixture into the machine and churn according to the manufacturer’s instructions.
Usually, the ice cream will become thick and creamy after around 20–30 minutes, depending on the machine.
Once it reaches a soft-serve consistency, transfer it to a freezer-safe container. Smooth the top with a spatula and cover tightly.
Freeze for another 3–5 hours, or until firm enough to scoop.
🥄 No Ice Cream Maker?
No problem! You can still make this recipe without a machine.
Pour the chilled mixture into a shallow freezer-safe container and place it in the freezer. After about 45 minutes, remove it and stir vigorously with a whisk or hand mixer.
Return it to the freezer and repeat the process every 30–45 minutes for about 3–4 hours.
This helps break up ice crystals and creates a smoother homemade texture.
Once the ice cream is thick and firm, leave it undisturbed until completely frozen.
🍫 How to Make It Extra Chocolatey
If you are a serious chocolate lover, there are several ways to make this ice cream even more indulgent.
Add a handful of mini chocolate chips before the final freezing stage. You can also swirl in homemade chocolate fudge sauce or add small pieces of your favorite chocolate bar.
For a delicious cookie version, crush chocolate sandwich cookies and fold them into the softened ice cream before freezing.
Another option is to add a small amount of instant espresso powder to the chocolate mixture. Coffee can enhance the flavor of chocolate without making the ice cream taste strongly like coffee.
🍦 Serving Suggestions
Homemade chocolate ice cream is delicious straight from the container, but serving it in a crispy waffle cone makes it even more special.
Scoop two generous balls of ice cream into a cone and top with chocolate sauce. Add whipped cream and a few chocolate chips for an extra-decadent dessert.
You can also serve it in a chilled bowl with:
- Fresh strawberries
- Sliced bananas
- Brownie pieces
- Chocolate shavings
- Crushed cookies
- Caramel sauce
- Chopped almonds or hazelnuts
For a special dessert, place a scoop of chocolate ice cream over a warm brownie. The combination of warm brownie and cold, creamy ice cream is absolutely delicious.
💡 Tips for Perfect Chocolate Ice Cream
Use full-fat dairy: Heavy cream and whole milk provide the fat needed for a creamy texture.
Do not boil the milk: Gentle heating is enough. Boiling can affect the texture.
Chill before freezing: Make sure the mixture is thoroughly chilled before putting it into your ice cream maker or freezer.
Use quality chocolate: Since chocolate is the main flavor, a good-quality chocolate bar can make the final result much richer.
Store it properly: Keep the ice cream in an airtight freezer-safe container. Pressing a piece of parchment or plastic wrap directly against the surface can help reduce ice crystals.
Let it soften before scooping: Homemade ice cream can become quite firm in the freezer. Let it sit at room temperature for about 5–10 minutes before serving for easier scooping.
🧊 Storage
Store homemade chocolate ice cream in a tightly sealed freezer-safe container for up to 2–3 weeks for the best flavor and texture.
Although it may remain safe for longer when continuously frozen, its texture can gradually become harder or develop ice crystals over time.
Avoid repeatedly letting the entire container melt and refreeze, as this can make the ice cream icy instead of smooth and creamy.
🍫 Frequently Asked Questions
Can I use milk chocolate?
Yes. Milk chocolate can be used, but because it contains more sugar, you may want to slightly reduce the added sugar.
Can I make this recipe without cocoa powder?
Yes. You can increase the amount of melted chocolate, although cocoa powder provides a concentrated chocolate flavor that works especially well in ice cream.
Why is my homemade ice cream too hard?
Homemade ice cream often freezes harder than commercial ice cream because it does not contain the same stabilizers and air content. Allowing it to sit at room temperature for several minutes before scooping usually helps.
Can I add mix-ins?
Absolutely. Chocolate chips, cookies, brownies, nuts, caramel pieces, and chocolate chunks all work beautifully.
❤️ Final Thoughts
This Homemade Chocolate Ice Cream is one of those simple desserts that feels special every time you make it. The combination of cocoa, melted chocolate, creamy dairy, and vanilla creates a rich and satisfying flavor that chocolate lovers will enjoy.
Whether you serve it in a crispy waffle cone, pile it into a dessert bowl, or place a scoop on top of a warm brownie, this ice cream is guaranteed to make dessert time more enjoyable.
Once you try making chocolate ice cream at home, you may find yourself experimenting with different toppings, chocolates, and mix-ins to create your own favorite version. It is creamy, chocolatey, comforting, and perfect for sharing—or keeping all to yourself. 🍫🍦❤️

Leave a Reply