If you’re craving something cold, creamy, and sweet without making a complicated dessert, this Homemade Low-Carb Ice Cream is an easy recipe to keep in your freezer. It has a rich, smooth texture and can be flavored in several different ways, including vanilla, strawberry, chocolate, and berry.
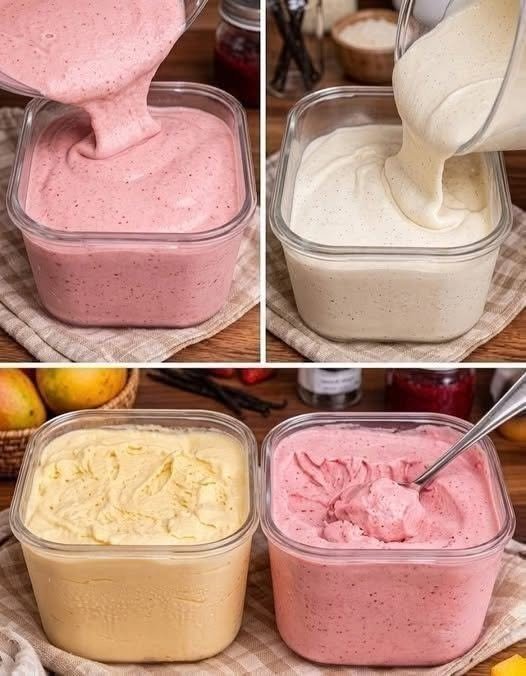
The inspiration for this recipe is the creamy homemade ice cream shown in the photo, where different flavors are prepared in small containers and enjoyed straight from the freezer. Instead of relying on traditional sugar and heavy ice cream ingredients, this version uses a simple low-carb base that can be customized to suit your favorite flavors.
It’s perfect for warm days, after-dinner cravings, or whenever you want a homemade frozen treat without making a full batch of traditional ice cream.
One important note: although recipes like this are often described online as “zero-carb” ice cream, it isn’t literally zero carbohydrate if it contains dairy, berries, or other flavorings. This recipe is better described as low-carb and no-added-sugar. The exact carbohydrate count depends on the ingredients and brands you use.
Why You’ll Love This Homemade Ice Cream
There are so many reasons to make homemade ice cream instead of buying a tub from the store.
First, you control the ingredients. You can choose a low-carb sweetener instead of regular sugar and avoid unnecessary syrups or added sugars.
Second, the recipe is incredibly versatile. The same creamy base can become vanilla, strawberry, chocolate, raspberry, coffee, or even peanut butter ice cream.
Third, you don’t need a long list of ingredients. A handful of basic ingredients is enough to create a creamy dessert that feels much more indulgent than its simple preparation suggests.
And because you can freeze the ice cream in individual containers, it makes portioning and meal preparation convenient.
Ingredients
Basic Low-Carb Ice Cream Base
- 1 cup heavy whipping cream
- ½ cup unsweetened full-fat Greek yogurt
- ¼ cup cream cheese, softened
- ⅓ cup powdered erythritol or another preferred low-carb sweetener
- 1 teaspoon vanilla extract
- Pinch of salt
- 2 tablespoons unsweetened almond milk, if needed
For Strawberry Ice Cream
- ½ cup finely chopped strawberries
- 1 tablespoon low-carb sweetener, optional
- ½ teaspoon lemon juice
For Chocolate Ice Cream
- 2 tablespoons unsweetened cocoa powder
- 1–2 tablespoons additional sweetener, according to taste
- ½ teaspoon vanilla extract
For Berry Ice Cream
- ½ cup raspberries or blackberries
- 1 tablespoon low-carb sweetener
- ½ teaspoon lemon juice
You don’t need to prepare all the flavors at once. Start with the basic vanilla base and divide it into separate containers if you’d like to make several flavors.
Choosing Your Sweetener
The sweetener you use can make a noticeable difference in the final texture.
Powdered erythritol works well because it blends easily into the creamy mixture. Monk fruit blends and allulose can also be used, depending on your preference and dietary needs.
Avoid adding regular granulated sugar if you’re specifically trying to keep the recipe low-carb.
Because different sweeteners vary in sweetness, start with less and taste the mixture before freezing. You can always add a little more.
How to Make Homemade Low-Carb Ice Cream
Step 1: Soften the Cream Cheese
Remove the cream cheese from the refrigerator and allow it to soften.
Place it in a mixing bowl and beat it until completely smooth.
This step is important because cold cream cheese can leave small lumps in the finished mixture.
Step 2: Add the Yogurt
Add the Greek yogurt to the softened cream cheese.
Beat the two ingredients together until smooth and creamy.
Greek yogurt gives the ice cream a slight tang that works especially well with sweet flavors. It also adds some protein and helps create a thick consistency.
Step 3: Whip the Cream
In a separate bowl, pour in the cold heavy whipping cream.
Using a hand mixer, whip the cream until soft peaks form.
Don’t over-whip it. You want the cream to become fluffy and thick without turning grainy.
Whipped cream is one of the secrets to making this homemade ice cream feel light and creamy after freezing.
Step 4: Combine the Mixtures
Gently fold the whipped cream into the cream cheese and yogurt mixture.
Add the powdered sweetener, vanilla extract, and a tiny pinch of salt.
Fold everything together slowly with a spatula.
Avoid vigorous mixing at this stage because you want to preserve as much air as possible from the whipped cream.
Taste the mixture.
If it isn’t sweet enough, add another small amount of powdered sweetener.
Making Strawberry Ice Cream
For the strawberry version, place the chopped strawberries in a small bowl.
Mash some of the strawberries with a fork while leaving a few small pieces intact.
Add a little low-carb sweetener and lemon juice if desired.
Allow the berries to sit for about 5 minutes so their juices can develop.
Fold the strawberry mixture into part of the vanilla ice cream base.
Don’t completely blend the berries into the mixture. A few visible strawberry pieces and streaks make the finished ice cream much more appealing.
Transfer the mixture into a freezer-safe container.
Making Chocolate Ice Cream
Chocolate lovers can easily transform the basic mixture into a rich chocolate dessert.
Simply whisk unsweetened cocoa powder into a portion of the prepared base.
Add additional low-carb sweetener if needed.
For an even deeper chocolate flavor, add a few drops of vanilla extract and a tiny pinch of salt.
Mix until the cocoa powder is completely incorporated and no dry spots remain.
Transfer to a freezer-safe container and smooth the surface.
Making Berry Ice Cream
Raspberries and blackberries are excellent choices for a low-carb berry flavor.
Mash the berries lightly with a fork, then fold them into the vanilla base.
You can leave the berries partially mashed to create beautiful purple and pink streaks throughout the ice cream.
This gives the finished dessert a homemade appearance similar to the berry-colored container shown in the photo.
Freezing the Ice Cream
Pour the prepared mixture into a shallow freezer-safe container.
A shallow container is preferable to a very deep one because the ice cream freezes more evenly.
Smooth the top with a spatula.
Cover the container tightly with a lid or plastic wrap.
Place it in the freezer for approximately 3–5 hours, or until firm.
For the creamiest texture, stir the ice cream once or twice during the first couple of hours of freezing. This can help break up ice crystals.
If you have an ice cream maker, you can also churn the mixture according to your machine’s instructions before transferring it to the freezer.
How to Get Soft, Scoopable Ice Cream
Homemade ice cream can become quite firm after several hours in the freezer, especially when using low-sugar ingredients.
Don’t worry if it looks very hard straight from the freezer.
Allow the container to sit at room temperature for approximately 5–10 minutes before serving.
This gives the ice cream enough time to soften slightly.
For a dessert that stays especially creamy, allulose can be useful because it tends to freeze more softly than erythritol. The exact result will depend on the sweetener and other ingredients you choose.
Easy Flavor Ideas
Once you have the basic ice cream mixture, there are countless ways to customize it.
Vanilla Bean
Add vanilla bean seeds or a little extra vanilla extract for a classic flavor.
Peanut Butter
Swirl in a tablespoon or two of natural unsweetened peanut butter before freezing.
Coffee
Add 1–2 teaspoons of instant espresso powder to the base for a delicious coffee ice cream.
Cinnamon
Add cinnamon and a tiny pinch of nutmeg for a warm, spiced flavor.
Coconut
Use unsweetened coconut milk in place of a small amount of almond milk and add unsweetened shredded coconut.
Chocolate Berry
Combine unsweetened cocoa powder with raspberries for a rich chocolate-and-berry combination.
Tips for the Best Results
Use cold heavy cream. Cold cream whips more easily and creates a better texture.
Soften the cream cheese first. This prevents lumps.
Don’t overmix. Gently folding the whipped cream helps keep the mixture airy.
Taste before freezing. Frozen desserts taste less sweet than the mixture does at room temperature, so make sure the base tastes slightly sweeter than your preferred final result.
Use a freezer-safe container. A shallow container with a tight-fitting lid works best.
Let it soften before scooping. Homemade low-carb ice cream often needs a few minutes at room temperature before serving.
Storage
Keep the ice cream tightly covered in the freezer.
For the best texture and flavor, enjoy it within approximately 1–2 weeks. While it can remain frozen longer, homemade ice cream may gradually develop ice crystals and lose some of its creamy texture.
If you’re making several flavors, label each container with the flavor and date.
Individual containers are particularly convenient because you can prepare different flavors without having to make a large batch of each one.
Is This Really Zero Carb?
Despite the popular “zero-carb” description, it’s important to be accurate.
Heavy cream, Greek yogurt, cream cheese, berries, and other ingredients naturally contain some carbohydrates. Therefore, this recipe should not be considered literally zero-carb.
Instead, it is a low-carb, no-added-sugar homemade ice cream. To reduce carbohydrates further, choose unsweetened ingredients and keep higher-carb fruits to a moderate portion.
If you are following a strict ketogenic or medically prescribed diet, calculate the nutrition using the exact products you purchase.
Final Thoughts
This Homemade Low-Carb Ice Cream is an easy way to satisfy an ice cream craving with a creamy dessert you can customize at home. The base is rich and smooth, while different additions can turn it into strawberry, chocolate, berry, vanilla, coffee, or peanut butter ice cream.
You don’t need complicated equipment or a long preparation process. Simply mix the creamy ingredients, choose your favorite flavor, transfer everything to a freezer-safe container, and freeze until firm.
The result is a refreshing homemade treat that feels indulgent while fitting into many low-carb eating plans.
Whether you enjoy a scoop after dinner, prepare individual containers for the week, or make several flavors for the family, this recipe is simple enough to become a regular freezer favorite.
Creamy, customizable, no added sugar, and easy to make—this is the kind of homemade ice cream you’ll want to keep ready for whenever a sweet craving hits. 🍓🍦
Leave a Reply