Homemade Pita Bread Recipe – Instacart
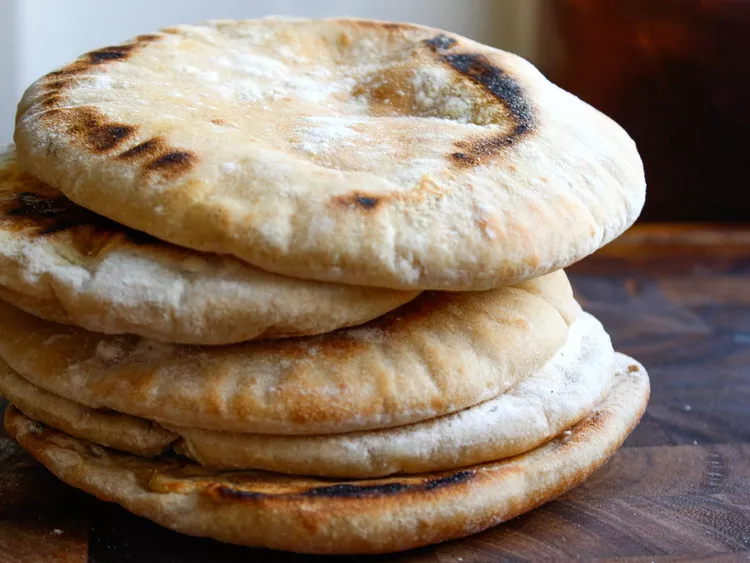
Homemade pita bread is soft, fluffy, and delicious, with a lightly crisp exterior and beautiful golden-brown spots. This classic Middle Eastern flatbread is easy to make with a few simple pantry ingredients. Whether you serve it with grilled chicken, kebabs, hummus, curry, or fresh vegetables, homemade pita bread adds a warm and comforting touch to any meal.
The best part about making pita bread at home is watching the dough puff up as it cooks, creating a soft pocket that can be filled with your favorite ingredients. You do not need any special equipment or professional baking experience to make this recipe. With a little patience and the right cooking temperature, you can prepare fresh pita bread right in your own kitchen.
Why You Will Love This Homemade Pita Bread
This pita bread recipe is perfect for beginners because it uses simple ingredients and straightforward steps. The dough is easy to work with, and the finished bread is soft enough to fold, tear, or fill.
- Soft and fluffy: Each piece has a tender texture that makes it perfect for sandwiches and wraps.
- Simple ingredients: You probably already have flour, yeast, water, salt, and oil in your kitchen.
- Versatile: Serve pita with Middle Eastern dishes, grilled meats, salads, dips, or soups.
- Budget-friendly: Homemade bread is an affordable alternative to store-bought flatbread.
- Freezer-friendly: Make a batch ahead of time and freeze the extra pieces for busy days.
Preparation and Cooking Time
- Prep time: 20 minutes
- Rising time: 60–90 minutes
- Cook time: 15–20 minutes
- Total time: Approximately 1 hour 45 minutes
- Servings: 8 pita breads
- Cuisine: Middle Eastern
- Difficulty: Easy
Ingredients for Homemade Pita Bread
The following ingredients make approximately eight medium-sized pita breads.
- 3 cups (375 g) all-purpose flour
- 1 cup (240 ml) warm water
- 2 teaspoons instant yeast
- 1 tablespoon sugar
- 1 teaspoon salt
- 2 tablespoons olive oil or vegetable oil
- Extra flour for rolling the dough
Use warm water rather than hot water, as excessively hot water can damage the yeast. The water should feel comfortably warm when touched.
How to Make Homemade Pita Bread
Step 1: Prepare the Yeast Mixture
In a large mixing bowl, combine the warm water, sugar, and instant yeast. Stir gently and allow the mixture to sit for about 5 minutes.
Instant yeast can usually be mixed directly with the flour, but combining it with warm water helps distribute it evenly throughout the dough. If you are using active dry yeast, let the mixture sit until it becomes foamy before continuing.
Step 2: Mix the Dough
Add the flour and salt to the yeast mixture. Pour in the olive oil and mix everything with a wooden spoon until a rough dough begins to form.
The dough may look slightly sticky at first. This is normal. Avoid adding too much extra flour, as doing so can make the finished pita bread dry or tough.
Step 3: Knead Until Smooth
Transfer the dough to a lightly floured work surface. Knead it for approximately 8–10 minutes until it becomes smooth, elastic, and soft.
If the dough sticks to your hands, lightly flour your work surface rather than adding large amounts of flour directly to the dough. Proper kneading develops the gluten, helping the pita bread stretch and puff during cooking.
You can also use a stand mixer fitted with a dough hook if you prefer.
Step 4: Let the Dough Rise
Lightly grease a clean bowl with oil and place the dough inside. Turn it once so that the surface is lightly coated.
Cover the bowl with a clean kitchen towel or plastic wrap. Leave the dough in a warm place for 60–90 minutes, or until it has roughly doubled in size.
The rising time depends on your kitchen temperature. In a cooler room, the dough may need a little longer.
Step 5: Divide the Dough
Once the dough has risen, gently press it down to release excess air. Transfer it to a lightly floured surface and divide it into eight equal portions.
Shape each portion into a smooth ball. Cover the dough balls with a kitchen towel and let them rest for 10–15 minutes.
This short resting period relaxes the gluten, making the dough easier to roll without shrinking back.
Step 6: Roll Out the Pita Breads
Using a rolling pin, roll each dough ball into a circle approximately 6–7 inches wide and about ¼ inch thick.
Try to keep the thickness even throughout each circle. Dough that is too thick may not cook evenly, while dough that is rolled too thin may not puff properly.
Place the rolled circles on a lightly floured surface and cover them while you prepare the pan.
Step 7: Heat the Pan
Place a heavy skillet, cast-iron pan, or nonstick frying pan over medium-high heat. Allow it to become thoroughly hot before cooking the pita.
A properly heated pan is important for creating steam inside the dough. That steam helps separate the layers and creates the familiar pita pocket.
You generally do not need to add oil to the pan.
Step 8: Cook the Pita Bread
Place one rolled dough circle onto the hot pan. Cook for approximately 30–60 seconds, until bubbles begin to appear on the surface.
Flip the bread and cook the other side for another 30–60 seconds. Flip it again if needed and allow it to puff up, developing light golden-brown spots.
Depending on your pan and heat level, each pita may take around 2–3 minutes in total. Adjust the temperature if the bread is browning too quickly before the center cooks.
Repeat with the remaining dough circles.
Step 9: Keep the Bread Soft
Transfer each cooked pita to a clean kitchen towel and cover it immediately. Stacking the warm breads and keeping them covered helps retain moisture, preventing them from becoming dry and brittle.
Allow them to rest for a few minutes before serving. The bread will remain soft and flexible, making it ideal for sandwiches, wraps, and dipping.
Tips for Perfectly Soft and Puffy Pita Bread
Making pita bread is simple, but a few small details can make a big difference.
Use the right water temperature. Warm water helps activate the yeast, while water that is too hot may prevent the dough from rising properly.
Allow enough rising time. The dough should become noticeably larger and airy before you divide it.
Roll the dough evenly. Uneven thickness can prevent the pita from puffing into a pocket.
Preheat the pan properly. A hot cooking surface helps create the steam needed for puffing.
Avoid overcooking. Leaving pita bread on the pan for too long can make it dry and hard. Remove it once it is cooked and lightly browned.
Keep cooked pita covered. Covering the warm bread with a towel helps maintain its soft texture.
What to Serve with Pita Bread
Homemade pita bread is incredibly versatile and pairs well with many meals. Here are some delicious serving ideas.
- Hummus and dips: Serve warm pita with hummus, garlic sauce, or a creamy yogurt dip.
- Chicken wraps: Fill pita pockets with grilled chicken, lettuce, tomatoes, cucumbers, and your favorite sauce.
- Kebabs: Pair the bread with chicken tikka, seekh kebabs, or grilled vegetables.
- Falafel sandwiches: Add falafel, chopped salad, pickles, and tahini sauce for a satisfying meal.
- Soups and stews: Tear the bread into pieces and use it to scoop up flavorful sauces.
- Breakfast: Serve warm pita with scrambled eggs, cheese, or an omelet.
You can also brush the bread lightly with olive oil, sprinkle it with garlic and herbs, and serve it alongside your favorite dinner.
How to Store Homemade Pita Bread
Allow the pita bread to cool completely before storing it.
At room temperature: Place the cooled breads in an airtight bag or container and store them for up to 2 days.
In the refrigerator: Store them in an airtight container for up to 5 days, although refrigeration can make bread dry out more quickly.
In the freezer: Separate the breads with parchment paper, place them in a freezer-safe bag, and freeze for up to 3 months for best quality.
To reheat, warm the pita in a skillet for a few seconds on each side. You can also wrap it in foil and heat it in a moderate oven until warm. If the bread feels dry, sprinkle it with a little water before reheating.
Common Mistakes to Avoid
One common mistake is adding too much flour while kneading. Although extra flour makes sticky dough easier to handle, too much can produce dense pita bread.
Another mistake is rolling the dough unevenly. If one section is much thicker than another, the bread may not puff evenly.
Cooking the pita in a pan that is not hot enough can also prevent it from forming a pocket. Make sure the pan is thoroughly preheated before adding the dough.
Finally, avoid leaving cooked pita uncovered for too long. Warm bread loses moisture as it cools, so covering it with a clean towel helps preserve its softness.
Frequently Asked Questions
Why didn’t my pita bread puff up?
The pan may not have been hot enough, the dough may have been rolled unevenly, or the dough may not have rested sufficiently. Check these factors the next time you make the recipe.
Can I make pita bread without a stand mixer?
Yes! You can easily mix and knead the dough by hand. A mixing bowl, wooden spoon, and rolling pin are enough.
Can I use whole wheat flour?
Yes. You can replace some of the all-purpose flour with whole wheat flour. Start by replacing about one-quarter to one-half of the flour. The bread may be denser and may require slightly more water.
Can I prepare the dough ahead of time?
Yes. Place the covered dough in the refrigerator for a slow rise, then allow it to come closer to room temperature before dividing and rolling it.
Can I bake pita bread instead of using a skillet?
Yes. Preheat an oven and a heavy baking tray to a very high temperature, around 475°F (245°C), if your oven safely reaches it. Bake the rolled dough on the hot tray until it puffs and develops light golden spots. Cooking times vary by oven, so watch the bread closely.
Final Thoughts
Homemade pita bread is a wonderful recipe to add to your everyday cooking routine. With its soft texture, lightly browned surface, and delicious homemade flavor, it makes an excellent companion for countless meals. The ingredients are simple, the method is beginner-friendly, and the results are worth the little bit of patience required for rising.
Once you learn how to make pita bread at home, you can experiment with whole wheat flour, garlic, herbs, and different fillings to suit your family’s taste. Serve it fresh from the pan with your favorite dips or turn it into a delicious sandwich for lunch.
Give this easy homemade pita bread recipe a try, and enjoy warm, fluffy flatbread made fresh in your own kitchen!

Leave a Reply