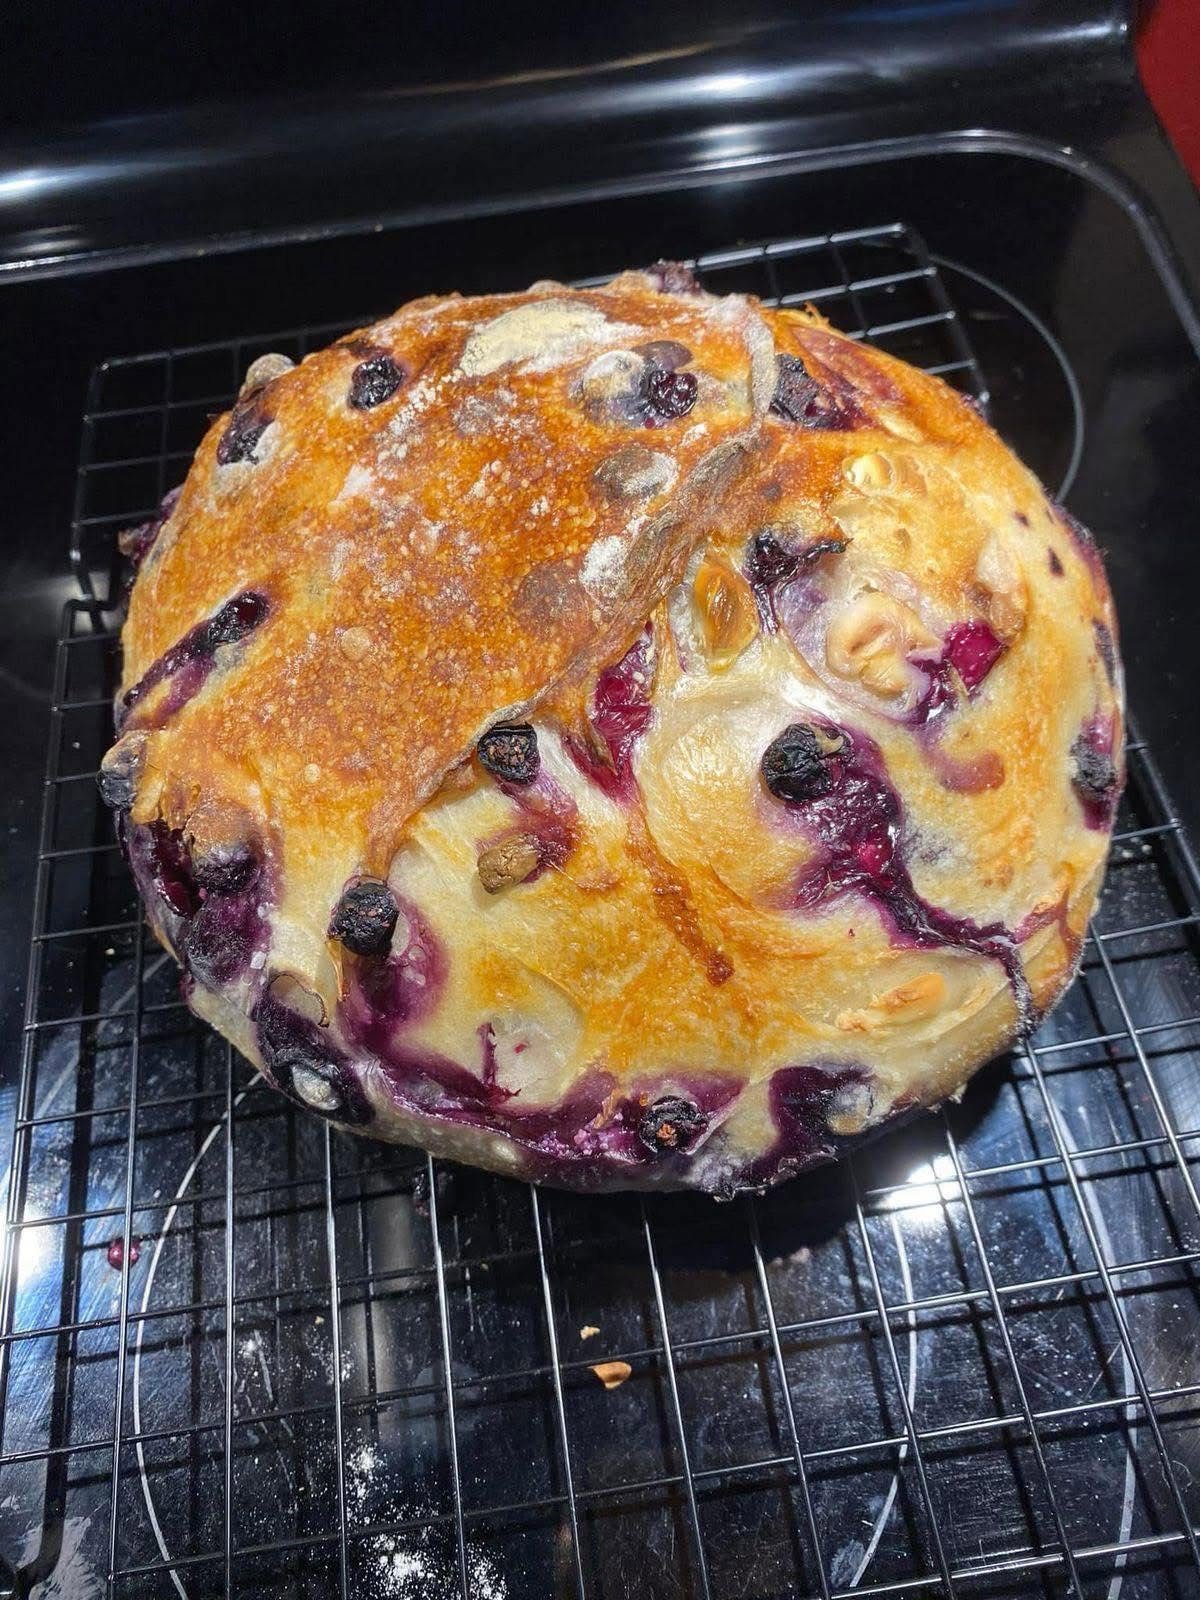
If you love homemade bread with a crispy golden crust, a soft chewy center, juicy berries, and crunchy nuts, this artisan blueberry cranberry walnut bread is a must-try! This beautiful rustic loaf combines the comforting taste of freshly baked bread with the sweet and tangy flavors of berries and the rich crunch of walnuts. Every slice looks gorgeous and tastes even better.
Whether you enjoy homemade bread for breakfast, serve it with afternoon tea, or share it with family and friends, this recipe is a wonderful addition to your baking collection. The golden crust, colorful berry swirls, and nutty texture make this loaf look like something straight from an artisan bakery.
The best part? You can make it at home with simple ingredients and a little patience. You do not need professional baking equipment to create a delicious loaf with a beautiful crust and flavorful interior.
Why You Will Love This Artisan Bread
This homemade bread offers a delicious balance of flavors and textures. The crust becomes crisp and golden during baking, while the inside remains soft and chewy. Sweet blueberries, tart cranberries, and crunchy walnuts add character to every bite.
It is also a versatile recipe. You can use fresh or frozen blueberries, dried cranberries, and your favorite nuts. Enjoy a slice plain, spread it with butter, or drizzle it with honey for a slightly sweeter treat.
For the best results, use a Dutch oven or another suitable covered baking pot. The trapped steam helps the loaf expand and develop its signature crispy crust.
Recipe Details
- Preparation time: 25 minutes
- Rising time: 2–3 hours
- Baking time: 40–45 minutes
- Total time: Approximately 3½–4 hours
- Yield: 1 medium round loaf
- Oven temperature: 230°C (450°F), then 220°C (425°F) if needed for the uncovered stage
Ingredients
For the bread dough
- 3 cups (375 g) bread flour or all-purpose flour
- 1½ teaspoons salt
- ½ teaspoon instant yeast
- 1½ cups (355 ml) lukewarm water
- 1 tablespoon honey or sugar, optional
For the filling
- ¾ cup fresh or frozen blueberries
- ½ cup dried cranberries
- ½ cup roughly chopped walnuts
For the crust
- 1 tablespoon flour for dusting
- Baking parchment, as needed
Ingredient note: Fresh blueberries contain more moisture than dried fruit, so handle them gently. Frozen berries can be used without thawing, but they may create more purple streaks in the dough. If you prefer a more predictable texture, use dried blueberries instead.
Step-by-Step Instructions
Step 1: Mix the Dry Ingredients
Take a large mixing bowl and add the flour, salt, and instant yeast. Stir everything together until evenly combined.
If you want a slightly sweeter loaf, add the honey or sugar. This is optional because the berries already contribute sweetness.
Pour in the lukewarm water and mix with a wooden spoon or spatula until a rough, sticky dough forms. The dough does not need to look smooth at this stage.
Avoid adding too much extra flour. A slightly sticky dough helps produce a soft, chewy crumb once the bread is baked.
Step 2: Knead or Fold the Dough
Transfer the dough to a lightly floured work surface and knead gently for approximately 5–8 minutes, until it becomes more elastic.
Alternatively, if the dough is too sticky to knead comfortably, leave it in the bowl and perform a series of stretch-and-folds. With slightly damp hands, lift one edge of the dough, stretch it upward, and fold it toward the center. Repeat on all four sides.
Cover the dough and let it rest for 15 minutes. This short rest helps the flour absorb the water and makes the dough easier to handle.
Step 3: Add the Blueberries, Cranberries, and Walnuts
Gently flatten the dough into a thick rectangle. Scatter the dried cranberries and chopped walnuts across the surface.
Add the blueberries and fold the dough over the filling. Continue folding gently until the ingredients are distributed as evenly as possible.
If using fresh or frozen blueberries, avoid squeezing or aggressively kneading the dough. This helps prevent the berries from breaking apart and turning the entire loaf purple.
Some berry streaks are completely normal and create a beautiful pattern in the finished bread.
Step 4: Let the Dough Rise
Place the dough in a lightly greased bowl and cover it with a clean kitchen towel or reusable cover.
Let it rise in a warm, draft-free location for approximately 1½–3 hours, depending on the temperature of your kitchen and the activity of your yeast.
The dough should become noticeably larger and feel airy. It does not always need to double completely, particularly when it contains fruit and nuts.
For a deeper flavor, you can refrigerate the dough overnight after it has started rising. Bring it out when ready to shape, allowing it to become workable before continuing.
Step 5: Shape the Loaf
Lightly flour your work surface and gently transfer the dough onto it.
Fold the edges toward the center, then turn the dough over so the seam is underneath. Use your hands to shape it into a round loaf with a slightly taut surface.
Place it on a piece of baking parchment and cover loosely with a clean towel. Let it rest for another 30–45 minutes.
Meanwhile, preheat your oven to 230°C (450°F). If using a Dutch oven, place the empty pot and its oven-safe lid inside the oven to heat for about 30 minutes. Always follow the manufacturer’s temperature and preheating instructions.
Step 6: Prepare the Bread for Baking
When the dough has rested, dust the surface lightly with flour.
Use a sharp bread lame or suitable razor tool to make one shallow slash across the top. This allows the loaf to expand during baking and gives it a rustic artisan appearance.
Carefully remove the hot Dutch oven and place it on a heat-resistant surface. Using the baking parchment as a sling, lower the dough into the pot.
Keep your hands away from the hot sides, and use oven mitts when handling the pot and lid.
Step 7: Bake Until Golden Brown
Cover the Dutch oven with its lid and bake for approximately 25–30 minutes.
Remove the lid carefully, watching out for escaping steam. Continue baking for another 10–15 minutes, until the crust becomes deep golden brown.
Because berries contain moisture, the inside may take slightly longer to bake than plain bread. If you have a food thermometer, aim for an internal temperature around 96–99°C (205–210°F), checking a bread section rather than a large pocket of fruit.
If the crust begins to darken too quickly, lower the oven temperature slightly for the final stage.
Step 8: Cool and Slice
Remove the loaf from the pot and place it on a wire rack. Let it cool for at least 1–2 hours before slicing.
Cooling is important because the crumb continues to set as the bread releases steam. Cutting too early may cause the center to become gummy or compressed.
Once cooled, use a serrated bread knife to cut generous slices. You will see golden bread surrounding colorful berry pockets and pieces of walnut.
Expert Tips for Perfect Bread
Use gentle handling. Blueberries can burst easily, so fold them into the dough rather than kneading aggressively.
Do not rush the rise. The dough needs enough time to develop flavor and structure. Watch how it looks and feels rather than relying only on the clock.
Measure flour carefully. Too much flour can create a dense loaf. Weighing your flour gives the most consistent results.
Choose your berries wisely. Dried cranberries add concentrated sweetness and less moisture, while fresh blueberries create juicy pockets and colorful streaks.
Let the bread cool completely. This improves the texture and makes slicing easier.
Check your baking equipment. Use only an oven-safe pot and lid rated for the baking temperature. Never place a cold pot into a hot oven unless its manufacturer specifically permits it.
Delicious Ways to Serve This Bread
This fruity artisan loaf is perfect for breakfast or brunch. Toast a slice and spread it with butter, cream cheese, or a little honey.
For an afternoon treat, serve it with a cup of coffee or tea. The tangy cranberries and sweet blueberries pair wonderfully with warm drinks.
You can also use the bread to make a special breakfast sandwich with cream cheese or serve toasted slices alongside a cheese board. If you prefer a dessert-style treat, drizzle the bread lightly with honey or maple syrup.
How to Store Homemade Berry Bread
Allow the bread to cool completely before storing it. Keep it in a paper bag or bread box at room temperature and enjoy it within 1–2 days for the best texture. Fresh berries add moisture, so check the loaf regularly and discard it if you notice mold or an unusual smell.
For longer storage, slice the cooled bread and freeze it in an airtight freezer-safe bag for up to 2–3 months for best quality.
Toast frozen slices directly or allow them to thaw before warming. A little butter or honey makes a simple slice taste freshly baked again.
Frequently Asked Questions
Can I use frozen blueberries?
Yes. Add them while frozen to reduce excess moisture during mixing. Fold gently because frozen berries can still break and color the dough.
Can I use dried blueberries instead?
Absolutely. Dried blueberries work well and produce a less moist filling. You can replace some or all of the fresh blueberries with dried ones.
Can I make this bread without a Dutch oven?
Yes. Bake the loaf on a preheated baking stone or suitable baking tray. An oven-safe steam tray can help create a crisp crust, provided you follow your oven manufacturer’s safety instructions. The finished crust may differ slightly.
Why is my bread dense?
Common causes include insufficient rising, inactive yeast, excessive flour, or cutting the loaf before it has cooled. Give the dough enough time to become airy before baking.
Final Thoughts
This homemade blueberry cranberry walnut bread is a delicious combination of rustic artisan baking and fruity flavor. With its golden crust, chewy interior, juicy berries, and crunchy walnuts, every slice offers something special.
Serve it fresh with butter, toast it for breakfast, or share it with loved ones over a cup of tea. Once you experience the wonderful aroma and flavor of this homemade loaf, it may become one of your favorite baking recipes.
Gather your ingredients, give the dough time to rise, and enjoy the simple pleasure of baking beautiful artisan bread right in your own kitchen!

Leave a Reply