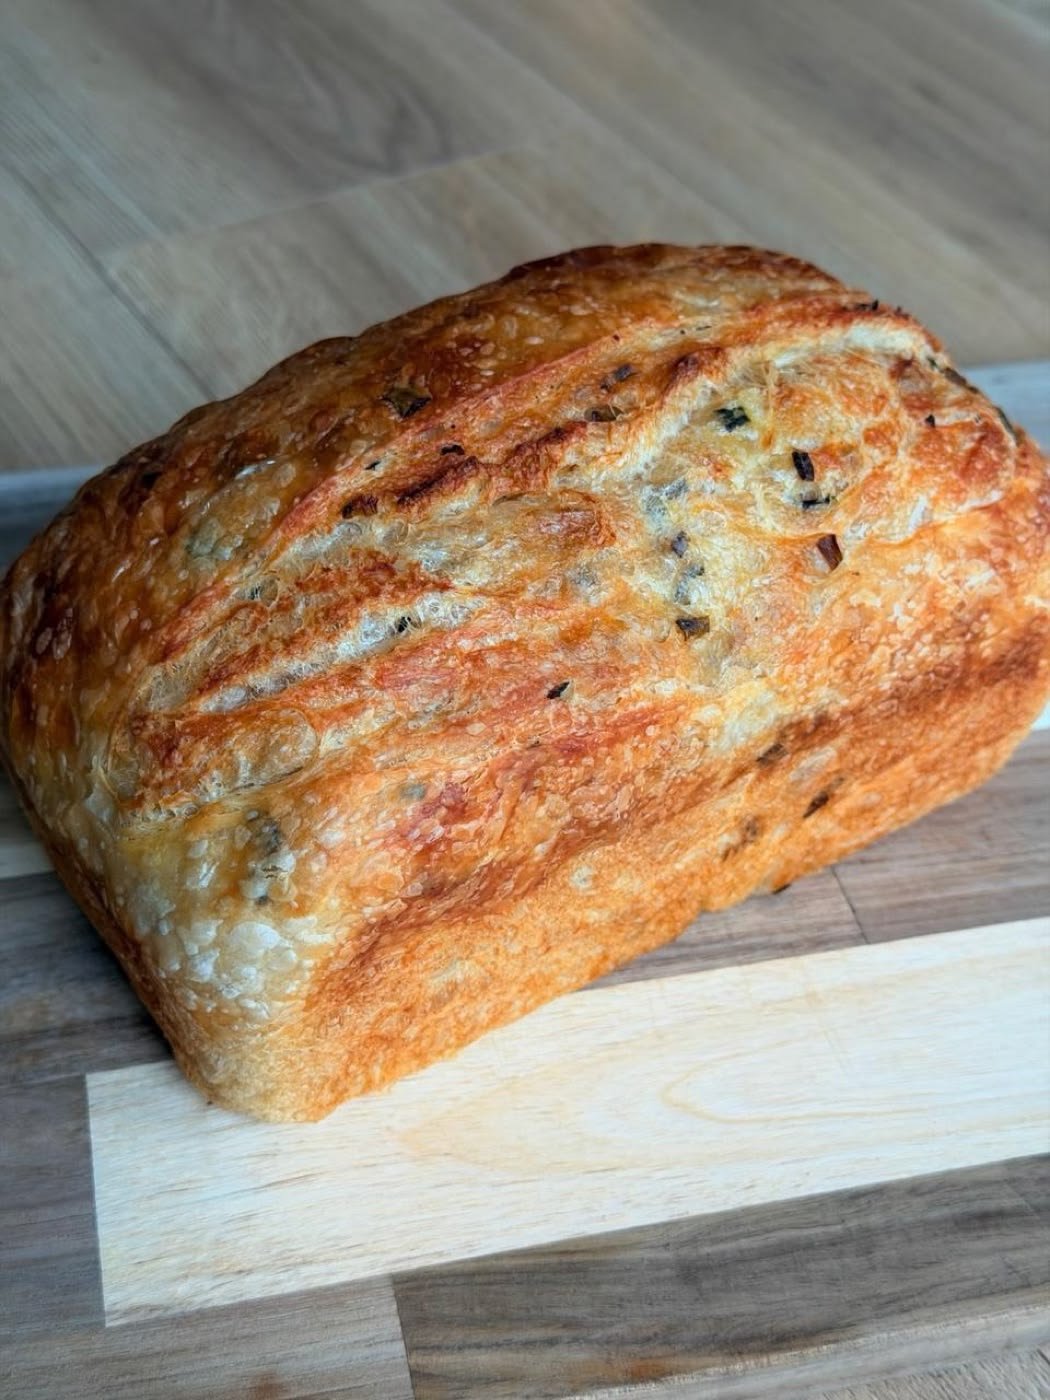
There is nothing quite like the aroma of freshly baked homemade bread filling your kitchen. Imagine a beautiful golden loaf with a crunchy crust, a soft and chewy interior, and delicious pieces of savory olives tucked into every slice. This homemade olive bread is perfect for anyone who loves rustic artisan bread with plenty of flavor.
Whether you serve it with soup, enjoy it with olive oil, or use it to make delicious sandwiches, this bread is a wonderful addition to your kitchen. Its golden crust and rustic appearance make it look like something straight from a traditional bakery, but you can prepare it at home using simple ingredients.
The secret to excellent olive bread is allowing the dough enough time to develop flavor, handling it gently, and baking it in a hot oven. You do not need complicated equipment or professional baking skills. With a little patience, you can create a beautiful loaf that tastes as good as it looks.
Why You Will Love This Olive Bread
- Crispy golden crust: High-temperature baking creates a beautifully browned exterior.
- Soft, chewy crumb: Proper hydration and fermentation help develop a tender interior.
- Savory olive flavor: Olives add a delicious salty, tangy taste to every slice.
- Simple ingredients: Made with flour, water, yeast, salt, and olives.
- Versatile serving options: Perfect for breakfast, sandwiches, appetizers, or dinner.
Preparation and Cooking Time
- Preparation time: 25 minutes
- First rise: 1–1½ hours
- Second rise: 45–60 minutes
- Baking time: 35–45 minutes
- Total time: Approximately 3 hours
- Yield: 1 medium loaf
Ingredients
For the bread dough:
- 500 g bread flour
- 350 ml lukewarm water
- 7 g instant yeast
- 10 g salt
- 1 tablespoon olive oil, optional
- 1 teaspoon sugar, optional
For the olive filling:
- 120–150 g pitted black or green olives
- 1 teaspoon dried oregano or thyme, optional
- 1 small garlic clove, finely chopped, optional
- 1 teaspoon olive oil, optional
Choose your favorite olives, or combine black and green varieties for a more interesting flavor. Drain the olives thoroughly and pat them dry before adding them to the dough. Excess moisture can make the bread difficult to shape.
Instructions
Step 1: Prepare the Dough
In a large mixing bowl, combine the flour and instant yeast. Add the lukewarm water and mix until a rough dough forms.
Add the salt and olive oil, if using. Mix thoroughly until the ingredients are incorporated. The dough should feel soft and slightly sticky rather than dry.
Cover the bowl and let the dough rest for 15–20 minutes. This resting period allows the flour to absorb the water and makes the dough easier to knead.
Step 2: Knead Until Smooth
Transfer the dough to a lightly floured work surface. Knead by hand for approximately 8–10 minutes, or use a stand mixer with a dough hook for about 5–7 minutes.
The dough should gradually become smoother, stretchier, and more elastic. Avoid adding too much extra flour because a soft dough helps create a lighter, more open crumb.
If the dough feels sticky, lightly wet your hands and continue kneading. You can also use a stretch-and-fold technique instead of traditional kneading.
Step 3: Let the Dough Rise
Place the dough in a lightly greased bowl and cover it with a clean kitchen towel or plastic wrap.
Allow it to rise in a warm place for 60–90 minutes, or until it has noticeably increased in size.
During this time, the yeast produces gas that helps the bread develop its airy texture. Do not rush this stage, as proper fermentation contributes to both flavor and structure.
Step 4: Prepare the Olives
While the dough rises, roughly chop the pitted olives into small pieces. Drain them well and pat them dry with paper towels.
If desired, combine the olives with dried oregano, thyme, or a little finely chopped garlic.
Avoid adding too much extra salt to the olive mixture because olives are naturally salty. If your olives taste particularly salty, rinse them briefly and dry them thoroughly before use.
Step 5: Incorporate the Olives
Once the dough has risen, gently transfer it to your work surface.
Flatten it into a rough rectangle and scatter the chopped olives over the surface. Fold the dough over the olives, then gently knead or fold until the pieces are distributed throughout.
Try not to overwork the dough. Some olives may become visible on the surface, giving the finished loaf its attractive rustic appearance.
If the dough becomes difficult to handle, let it rest for 5–10 minutes before continuing.
Step 6: Shape the Loaf
Gently flatten the dough into a rectangle. Fold the top third toward the center, then fold the bottom third over it, similar to folding a letter.
Roll the dough into a compact loaf, pinching the seam closed. Place it seam-side down on parchment paper or in a lightly greased loaf pan.
For a rustic artisan shape, use a round or oval loaf instead. For the loaf-pan appearance in the photo, a standard approximately 23 × 13 cm (9 × 5-inch) pan works well.
Cover loosely and let the dough rise for another 45–60 minutes, until it looks puffy. Avoid letting it rise so much that it collapses when touched.
Step 7: Preheat the Oven
Preheat your oven to 220°C (425°F). If using a heavy oven-safe pot with a lid, preheat it according to the manufacturer’s instructions.
For a loaf baked in a standard loaf pan, place the pan on the middle oven rack. For a rustic free-form loaf, a preheated baking stone or heavy baking tray can help produce a crispier base.
If you want a more pronounced rustic appearance, dust the surface lightly with flour and make one or two shallow slashes with a sharp blade before baking.
Step 8: Bake Until Golden Brown
Bake the loaf for approximately 35–45 minutes, depending on its shape and your oven.
The crust should become deeply golden brown, and the loaf should sound hollow when tapped on the bottom. If the crust is browning too quickly, loosely cover it with foil for the remaining baking time.
For a reliable doneness check, the center of the loaf should reach approximately 93–96°C (199–205°F).
Remove the bread from the oven and carefully transfer it to a wire rack. Allow it to cool for at least one hour before slicing. Cutting too early can compress the crumb and make the center seem gummy.
Tips for Perfect Olive Bread
Dry the olives well. Excess liquid can affect dough consistency and make the bread harder to shape.
Use good-quality olives. Choose pitted olives with a flavor you enjoy, since their taste will carry through the entire loaf.
Keep the dough soft. Adding too much flour may create dense bread instead of a tender, chewy loaf.
Allow enough rising time. Dough that has not risen sufficiently may bake into a heavy loaf.
Do not skip the cooling period. The crumb continues to set after baking, so patience helps produce cleaner slices.
How to Serve Homemade Olive Bread
This savory loaf is delicious served warm with extra-virgin olive oil and balsamic vinegar. It also pairs beautifully with tomato soup, vegetable soup, pasta, salads, and roasted vegetables.
For a quick snack, toast a slice and spread it with cream cheese or butter. You can also use it to prepare sandwiches with grilled vegetables, cheese, chicken, or fresh tomatoes.
For an appetizer, cut the bread into small pieces and serve it with hummus, herbed olive oil, or your favorite dips.
Storage and Freezing
Once completely cooled, store the bread in a paper bag or bread box at room temperature for up to two days for the best crust and texture.
For longer storage, slice the loaf and freeze the slices in an airtight freezer bag for up to three months. Toast slices directly from frozen or thaw them at room temperature.
To refresh a whole loaf, warm it in a 180°C (350°F) oven for approximately 5–10 minutes.
Frequently Asked Questions
Can I use whole-wheat flour?
Yes. Replace up to half of the bread flour with whole-wheat flour. You may need to add a little extra water because whole-wheat flour absorbs more moisture.
Can I make olive bread without a loaf pan?
Absolutely. Shape the dough into a round or oval loaf and bake it on a parchment-lined tray.
Why is my bread dense?
Common reasons include insufficient rising time, too much added flour, weak gluten development, or slicing before the loaf has cooled.
Can I add cheese?
Yes. A small amount of grated Parmesan or another firm cheese pairs well with olives and herbs. Keep the amount moderate to avoid making the dough heavy.
Final Thoughts
Homemade olive bread is a wonderful way to bring bakery-style flavor into your kitchen. Its golden crust, chewy interior, and savory olive pieces make every slice special.
With simple ingredients and a little patience, you can bake a loaf that looks beautiful on your table and tastes delicious alongside almost any meal. Serve it fresh, toast it for breakfast, or share it with family and friends. Once you try this recipe, it may become one of your favorite homemade breads!

Leave a Reply