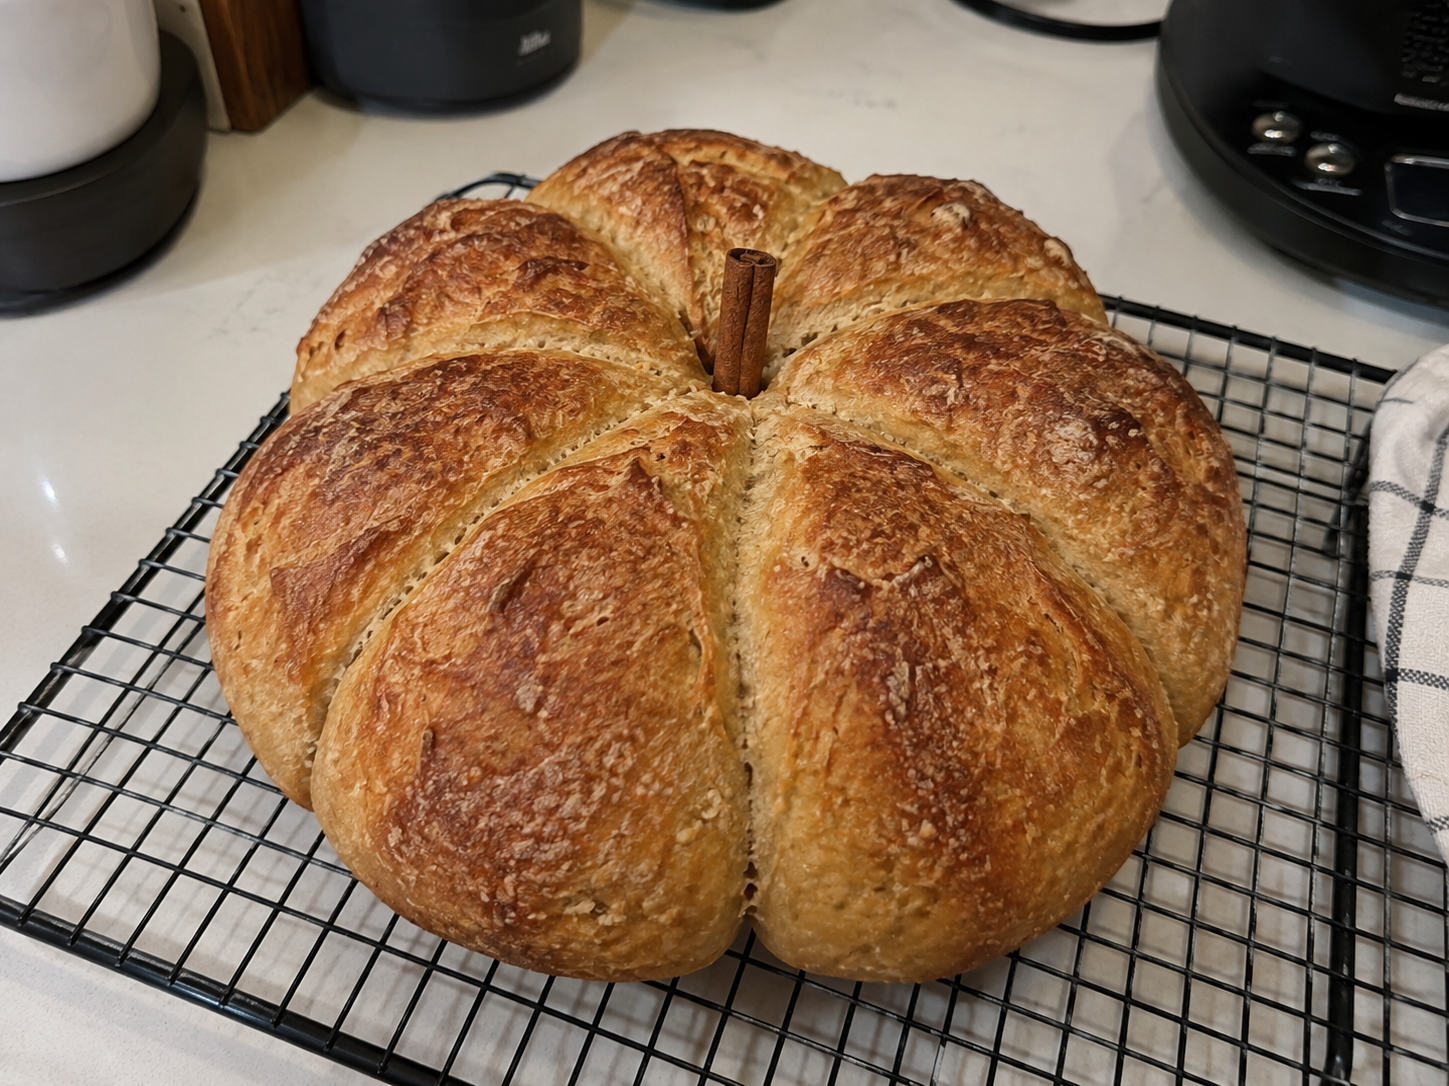
Has anyone here tried making Pumpkin-Shaped Sourdough? Did it turn out beautifully, or did it just end up a little messy? If you have ever looked at those gorgeous pumpkin-shaped sourdough loaves and thought they must be difficult to make, I have good news: the shape is much easier than it looks!
This rustic sourdough pumpkin is the perfect fall baking project. It has a beautiful golden-brown crust, a soft and chewy interior, and a charming pumpkin shape created with a few pieces of food-safe kitchen twine. The pumpkin effect becomes more pronounced as the dough expands during baking. (King Arthur Baking)
Whether you’re an experienced sourdough baker or still learning how to handle a starter, this recipe is a fun way to turn an everyday loaf into an impressive centerpiece.
Why You’ll Love This Pumpkin Sourdough
There is something special about homemade sourdough. The crisp crust, airy crumb, slightly tangy flavor, and irresistible aroma make it worth the time and patience.
But this recipe adds something extra: the shape!
Instead of baking a traditional round boule, the dough is divided into eight sections using food-safe string. As the loaf rises and bakes, the strings gently create deep grooves that resemble the natural ridges of a pumpkin. The technique is surprisingly simple and can be used with your favorite basic sourdough recipe. (King Arthur Baking)
The finished loaf looks beautiful on a fall table, making it ideal for Thanksgiving, autumn gatherings, dinner parties, or simply a cozy weekend baking project.
Ingredients
For one large pumpkin-shaped sourdough loaf, you’ll need:
- 100 g active sourdough starter
- 350 g water
- 500 g bread flour
- 10 g fine sea salt
- Rice flour or all-purpose flour, for dusting
- Food-safe cotton kitchen twine
- A little neutral oil or flour to help prevent sticking
- 1 cinnamon stick, optional, for the pumpkin stem
These ingredients create a classic rustic sourdough loaf. If you want a sweeter, more autumn-inspired version, you can also add pumpkin puree and warm spices such as cinnamon, ginger, and nutmeg. Pumpkin puree can add both flavor and a naturally warm color to the bread. (King Arthur Baking)
Step 1: Prepare the Sourdough Dough
Begin by making sure your sourdough starter is active and bubbly. A healthy starter is important because it provides the fermentation power needed to make the bread rise.
Add the water and active starter to a large mixing bowl. Stir until the starter is mostly dispersed through the water.
Add the bread flour and mix until no dry flour remains. The dough will look rough and shaggy at this point, which is completely normal.
Cover the bowl and allow the dough to rest for about 30 minutes.
Next, add the salt and work it into the dough using your hands. Pinch and fold the dough several times until the salt is evenly incorporated.
Step 2: Stretch and Fold
During the first few hours of fermentation, perform several rounds of stretch-and-folds.
To do this, grab one side of the dough, gently stretch it upward, and fold it toward the center. Rotate the bowl and repeat on all four sides.
Repeat this process every 30–45 minutes for several rounds.
The dough should gradually become smoother, stronger, and more elastic. Instead of being loose and sticky, it should eventually hold its shape much better.
Allow the dough to continue fermenting until it becomes noticeably lighter and slightly puffy.
Remember that sourdough fermentation depends heavily on temperature and starter strength, so don’t rely only on the clock. Watch the dough and learn to recognize its appearance.
Step 3: Shape the Dough
Once bulk fermentation is complete, gently turn the dough onto a lightly floured work surface.
Shape it into a tight round boule. Try to create good surface tension without tearing the dough.
Place the dough seam-side up into a well-floured banneton or bowl lined with a floured kitchen towel.
For the best pumpkin shape, a round boule works especially well. Many bakers also prefer working with cold, refrigerated dough because it is firmer and easier to handle when creating the pumpkin design. (Lo’s Kitchen)
Cover the dough and place it in the refrigerator for an overnight cold proof.
Step 4: Create the Pumpkin Shape
This is the fun part!
Cut four pieces of food-safe cotton twine. Arrange them across a sheet of parchment paper in a star-like pattern so that they create eight sections.
Lightly coat the twine with flour or a small amount of neutral oil to reduce the chance of sticking.
Carefully turn your chilled dough onto the center of the parchment paper, placing it directly over the middle of the strings.
Bring opposite ends of the strings upward toward the center of the loaf.
Tie them together gently.
Do not pull the strings too tightly. The dough needs room to expand during baking. If the strings are overly tight, they can pinch the dough or cause it to burst in unwanted places. Bakers who have tried this technique often recommend leaving the strings slightly loose for exactly this reason. (King Arthur Baking)
Once everything is tied, you should see eight sections forming around your dough.
Step 5: Add Decorative Scoring
Now grab your bread lame or a very sharp knife.
You can keep the design simple by making one shallow decorative slash in each pumpkin section. Alternatively, create small curved or leaf-like cuts for a more detailed appearance.
Be careful not to score too deeply. The strings are already helping control the expansion, so simple decorative scoring is enough.
A light dusting of flour can also make the scoring stand out beautifully against the golden crust.
Step 6: Bake the Sourdough Pumpkin
Preheat your oven and Dutch oven thoroughly before baking.
Carefully transfer the pumpkin-shaped dough into the hot Dutch oven, keeping the parchment underneath.
Cover and bake until the loaf has expanded and developed a strong crust. Then remove the lid and continue baking until the exterior becomes a deep golden brown.
Exact baking temperatures and times can vary depending on your oven and loaf size. For example, pumpkin-shaped sourdough methods commonly use a hot covered bake followed by an uncovered period to develop color and crust. (Living Bread Baker)
When finished, the loaf should sound hollow when tapped and have a beautifully browned crust.
Step 7: Remove the Strings
This is where patience matters!
Allow the bread to cool completely before removing the twine. Carefully cut each piece of string with scissors and gently pull it away from the crust.
Never try to remove the strings while the bread is extremely hot, because the crust can be delicate and you may accidentally tear it.
Once all the strings are removed, you will finally see your pumpkin-shaped sourdough!
For the finishing touch, insert a small cinnamon stick into the center as the pumpkin stem. It creates an adorable rustic look and adds a subtle autumn aroma. (King Arthur Baking)
Tips for a Perfect Pumpkin Shape
Use food-safe twine: Ordinary decorative string isn’t necessarily suitable for baking. Choose cotton kitchen or baker’s twine that is specifically food-safe.
Don’t tie too tightly: This is probably the most important tip. The dough needs space to expand.
Work with chilled dough: Cold dough is firmer and easier to score and shape.
Keep the strings evenly spaced: Uneven spacing can result in an oddly shaped pumpkin.
Don’t overdo the scoring: Simple cuts often produce the prettiest result.
Let it cool completely: This gives the crumb time to set and makes removing the twine much easier.
How to Serve Pumpkin-Shaped Sourdough
This bread is beautiful enough to serve as the centerpiece of a fall dinner table.
Slice it into wedges and serve with softened butter, honey, cinnamon butter, soup, roasted vegetables, or your favorite cheese.
It also makes incredible toast the next morning. The slightly tangy sourdough flavor pairs wonderfully with butter and jam, avocado, eggs, or even a drizzle of honey.
And if you happen to have leftovers, don’t worry. Sourdough is fantastic for French toast, grilled sandwiches, bread pudding, croutons, and stuffing.
Final Thoughts
So, did pumpkin-shaped sourdough turn out well—or become a complete mess? The answer is that it can absolutely turn out beautifully, even if your first attempt isn’t perfect!
The key is not to chase perfection. A pumpkin doesn’t have perfectly symmetrical ridges, so a rustic, slightly uneven loaf can actually look more natural.
With a strong sourdough starter, properly fermented dough, evenly spaced food-safe strings, and a gentle hand, you can transform a simple boule into a stunning autumn centerpiece.
The first time you make it, you may be nervous about tying the strings or wondering whether the dough will actually look like a pumpkin after baking. But once it comes out of the oven, golden, crusty, and beautifully ridged, you’ll probably want to make another one immediately.
This pumpkin-shaped sourdough is proof that homemade bread doesn’t have to be perfect to be beautiful—and sometimes the little imperfections make it even more special. 🎃🍞
Recipe technique adapted from established pumpkin-shaped sourdough shaping methods that use four pieces of string to create eight pumpkin sections. (King Arthur Baking)
Leave a Reply