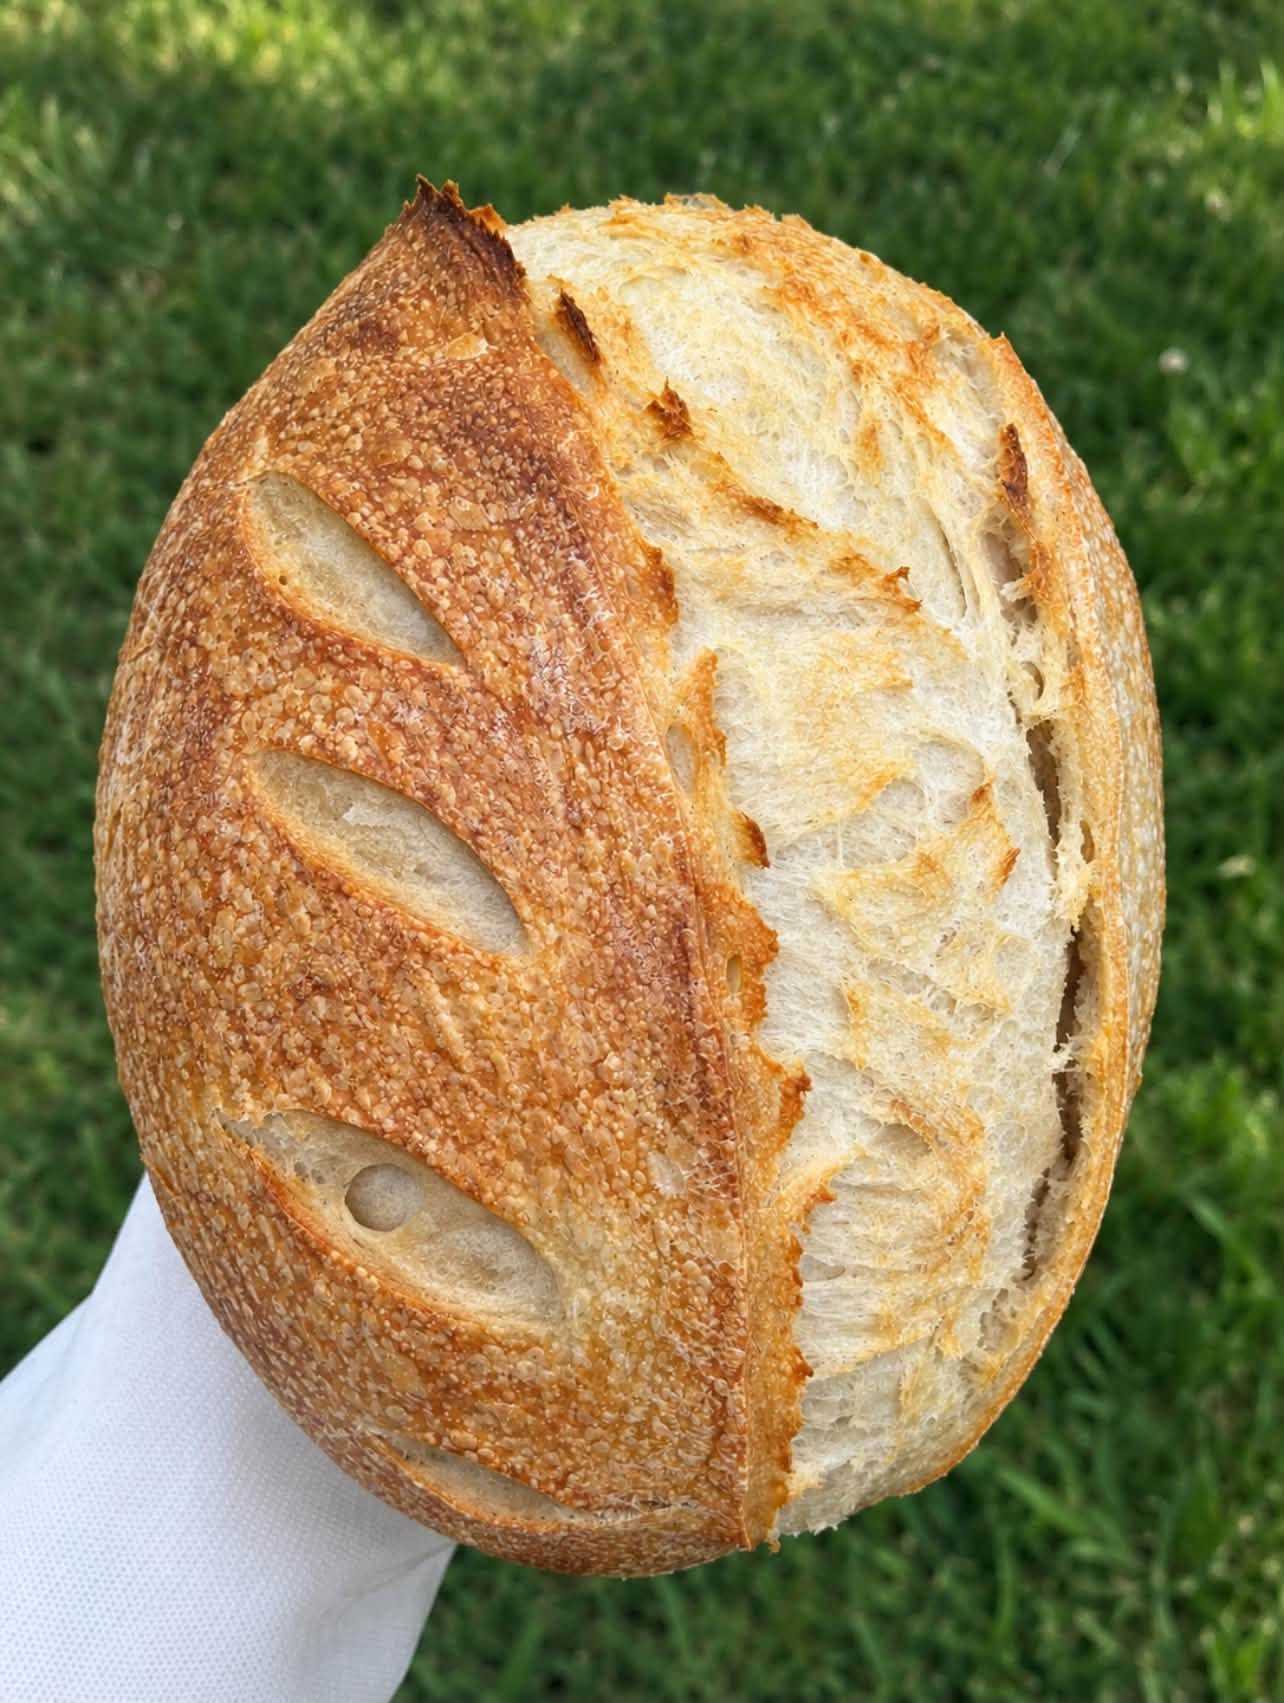
There is something wonderfully satisfying about a freshly baked loaf of artisan sourdough bread. A deep golden-brown crust, rustic scoring, a light and chewy interior, and that unmistakable tangy aroma make homemade sourdough feel like something from a traditional European bakery.
The loaf in the photo has a beautiful rustic shape with dramatic diagonal scoring and a wonderfully crisp crust. This recipe is designed to help you create a similar artisan-style sourdough boule at home. It uses a simple combination of flour, water, salt, and active sourdough starter, but the real magic comes from fermentation, gentle dough handling, and a hot oven.
Whether you are an experienced sourdough baker or making your first naturally leavened loaf, this recipe will walk you through the process from mixing to baking.
Why You’ll Love This Sourdough Bread
This homemade sourdough has a crisp, caramelized crust and a soft, slightly chewy crumb. The long fermentation develops flavor naturally, giving the bread a mild sourness and complex aroma.
The recipe also requires very few ingredients. You don’t need commercial yeast, special flavorings, or complicated equipment. A Dutch oven or heavy oven-safe pot is particularly useful because it traps steam around the loaf during the first part of baking, helping create that gorgeous crust and oven spring.
The scoring is also an opportunity to get creative. You can make simple cuts, curved patterns, leaves, or the dramatic diagonal design shown in the photo.
Ingredients
For one large loaf
- 500 g bread flour
- 350 g water, approximately 70% hydration
- 100 g active sourdough starter
- 10 g fine sea salt
- Rice flour or regular flour, for dusting
- A little water for handling the dough
For the best results, use a strong, active sourdough starter that has recently been fed and is showing plenty of bubbles. Ideally, it should rise significantly after feeding and have a pleasant, mildly fermented aroma.
Step 1: Prepare Your Starter
Before beginning, make sure your sourdough starter is active.
Feed your starter several hours before you plan to mix the dough. When it becomes bubbly, expands noticeably, and reaches or approaches its peak, it is ready to use.
A weak or inactive starter can result in a dense loaf, so this step is important.
Step 2: Mix the Dough
Add 350 g of water and 100 g of active sourdough starter to a large mixing bowl. Stir until the starter is mostly dispersed through the water.
Add the 500 g bread flour and mix with your hand or a dough whisk until there are no obvious dry patches.
At this stage, the dough will look rough and sticky. That’s perfectly normal.
Cover the bowl and let the dough rest for about 30–60 minutes. This resting period, often called an autolyse when salt is omitted, allows the flour to absorb the water and helps gluten begin developing.
After the rest, add 10 g of salt. Mix thoroughly, squeezing and folding the dough until the salt is incorporated.
Step 3: Build Strength With Stretch and Folds
Instead of aggressively kneading the dough, sourdough benefits from gentle folding.
During the first two hours of fermentation, perform a series of stretch-and-folds approximately every 30 minutes.
To do one fold, wet your hand, reach underneath one side of the dough, gently stretch it upward, and fold it over itself. Rotate the bowl and repeat on all four sides.
After several rounds, you’ll notice the dough becoming smoother, stronger, and more elastic.
If the dough feels very loose at the beginning, don’t panic. It should gradually develop structure as fermentation and folding continue.
Step 4: Bulk Fermentation
After the folds are complete, leave the dough covered at room temperature for the remainder of the bulk fermentation.
The exact time will depend on your room temperature, starter strength, and flour. Rather than relying only on the clock, look for signs that fermentation is progressing.
The dough should become noticeably smoother and puffier, with bubbles developing around the edges and underneath the surface. It doesn’t necessarily need to double in size.
A warm kitchen may require less time, while a cool kitchen can significantly slow fermentation.
Step 5: Shape the Loaf
Turn the fermented dough onto a lightly floured work surface.
Gently shape it into a loose round without pressing out all the air. Let it rest for about 15–20 minutes.
Next, perform the final shaping. Fold the dough toward the center from several directions, creating surface tension as you form a neat boule.
Place the shaped dough seam-side up into a well-floured banneton or bowl lined with a clean kitchen towel.
Dust the top with flour and cover.
Step 6: Cold Proof Overnight
Place the covered dough in the refrigerator for approximately 8–16 hours.
Cold fermentation is one of the secrets to flavorful sourdough. The dough develops additional flavor while becoming firmer and easier to score.
An overnight proof is particularly convenient because you can shape the loaf in the evening and bake it the following morning.
Step 7: Score the Dough
When you’re ready to bake, preheat your oven to 240°C (465°F) with a Dutch oven inside.
Carefully turn the cold dough onto a sheet of parchment paper.
Dust away excess flour if necessary.
Now comes the fun part: scoring.
Using a very sharp bread lame or razor blade, make several confident cuts across the surface. For a design similar to the loaf pictured, you can create a series of diagonal cuts running down one side of the dough, with each cut slightly overlapping the previous visual line.
Don’t make the cuts too shallow. A primary expansion score should generally be around 5–10 mm deep, while decorative scoring can be much shallower.
Work quickly but confidently. Cold dough is easier to score because it holds its shape.
Step 8: Bake
Carefully transfer the dough into the preheated Dutch oven.
Cover with the lid and bake at 240°C (465°F) for approximately 20 minutes.
The covered environment traps steam released from the dough. This allows the crust to remain flexible during the initial oven spring, helping the loaf expand dramatically.
After 20 minutes, remove the lid.
Reduce the temperature to around 220°C (425°F) and continue baking for another 20–25 minutes, or until the crust is deeply golden brown.
For the rustic appearance shown in the photo, don’t be afraid of a dark, richly caramelized crust.
If you have an instant-read thermometer, the center of a fully baked loaf will generally be around 96–99°C (205–210°F).
Step 9: Let It Cool
This is perhaps the hardest part of the recipe.
Remove the bread from the Dutch oven and place it on a wire rack.
Do not slice it immediately.
Allow the loaf to cool for at least 1–2 hours. The crumb continues to set as the bread cools. Cutting too early can produce a gummy interior even when the loaf is properly baked.
Once cool, slice with a serrated bread knife and enjoy.
Tips for Beautiful Sourdough Every Time
Use an active starter: Your starter should be bubbly and energetic before mixing the dough.
Watch the dough, not just the clock: Fermentation changes depending on temperature, flour, and starter activity.
Don’t add too much flour: Sticky dough is normal. Excess flour can make the finished bread dense.
Build surface tension: Proper shaping helps the loaf rise upward rather than spreading outward.
Bake with steam: A covered Dutch oven provides an excellent environment for oven spring and crust development.
Use a sharp blade: A dull blade can drag across the dough and ruin your scoring pattern.
Experiment with scoring: Once you’ve mastered basic scoring, try wheat stalks, leaves, curves, geometric patterns, or overlapping diagonal cuts.
How to Store Homemade Sourdough
Once completely cool, store the loaf in a paper bread bag, bread box, or clean kitchen towel. Avoid sealing a freshly baked loaf in plastic while it is still warm because trapped moisture can soften the crust.
For the best texture, enjoy the bread within 2–3 days.
You can also slice the loaf and freeze it. Place slices in an airtight freezer bag and toast them directly from frozen whenever you want fresh-tasting sourdough.
Final Thoughts
Making artisan sourdough bread takes patience, but the process is incredibly rewarding. The ingredients are simple, yet fermentation transforms them into a loaf with a crisp crust, chewy crumb, and rich natural flavor.
The beautiful scoring seen on a loaf like the one pictured makes homemade bread even more special. Don’t worry if your first design isn’t perfect. Focus first on fermentation, shaping, and baking; as your confidence grows, your scoring will become more adventurous.
Serve this rustic sourdough warm with butter, use it for sandwiches, dip it into soup, or simply tear off a piece and enjoy it fresh. A little flour, water, salt, and starter can create something truly extraordinary.

Leave a Reply