
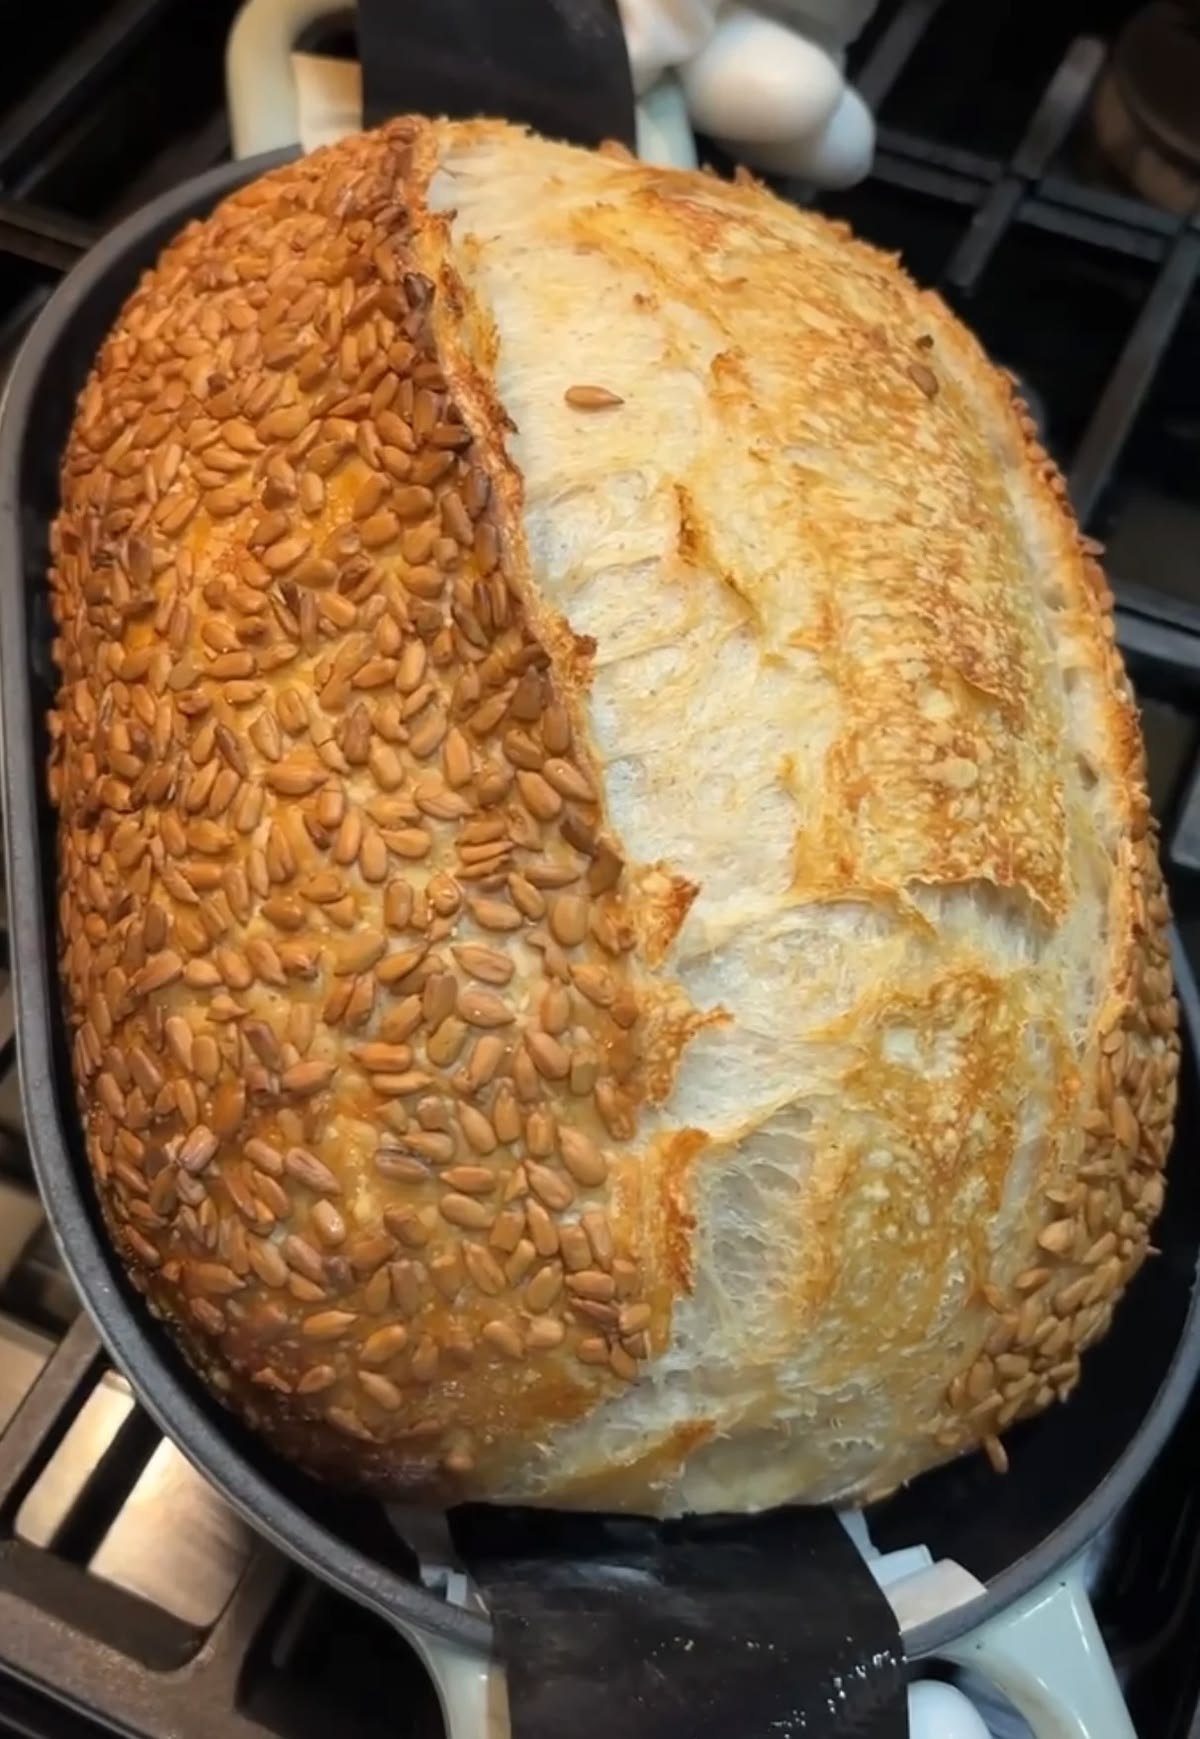
Sunflower Seed Sourdough
If you love rustic homemade bread with a satisfying crunch, this Sunflower Seed Sourdough is a wonderful recipe to add to your baking collection. It combines a naturally fermented sourdough loaf with toasted sunflower seeds, creating a beautiful contrast between a crisp crust, soft chewy crumb, and nutty seed flavor.
Sunflower seeds are an affordable and easy way to add texture and flavor to homemade bread. When lightly toasted, they develop a rich, roasted taste that pairs beautifully with the subtle tang of sourdough.
This loaf is delicious for breakfast, lunch, or dinner. Serve it with butter, eggs, cheese, soup, avocado, or your favorite sandwich fillings. It also makes excellent toast.
Why You’ll Love Sunflower Seed Sourdough
There are many reasons to make this rustic loaf at home:
- Crispy golden crust
- Soft and chewy interior
- Nutty toasted sunflower seed flavor
- Naturally fermented sourdough taste
- Simple ingredients
- Excellent for sandwiches and toast
- Great with soups and salads
- Easy to customize
- Freezer-friendly
The sunflower seeds provide a pleasant crunch without overpowering the flavor of the bread.
Ingredients
For one large loaf, you’ll need:
For the Dough
- 100 grams active sourdough starter
- 450 grams bread flour
- 320 grams water
- 10 grams fine sea salt
- 100 grams sunflower seeds
- 1 tablespoon olive oil, optional
Optional Additions
You can also add:
- 1 tablespoon honey
- 1 teaspoon sesame seeds
- 1 tablespoon flaxseed
- 1 tablespoon pumpkin seeds
- 1 teaspoon dried rosemary
- ½ teaspoon garlic powder
For the best flavor, use raw or lightly salted sunflower seeds. If your seeds are already heavily salted, reduce the amount of salt added to the dough.
Preparing the Sunflower Seeds
Before adding the seeds to the dough, lightly toast them.
Place the sunflower seeds in a dry skillet over medium-low heat.
Stir frequently for approximately 3–5 minutes.
They should become fragrant and lightly golden.
Be careful because sunflower seeds can burn quickly.
Once toasted, transfer them to a plate and allow them to cool completely.
Toasting isn’t absolutely necessary, but it gives the bread a deeper, nuttier flavor.
Preparing the Sourdough Dough
Step 1: Mix Starter and Water
Place the active sourdough starter and water into a large mixing bowl.
Stir until the starter is mostly dissolved.
Add the bread flour and mix until a rough dough forms.
Make sure there are no dry patches of flour remaining.
Cover the bowl and allow the dough to rest for approximately 30 minutes.
This rest allows the flour to hydrate and begins gluten development.
Step 2: Add Salt
Sprinkle the salt over the dough.
If you’re using olive oil, add it at this stage.
Gently mix until the salt is evenly incorporated.
The dough may feel sticky, but don’t immediately add extra flour.
Developing Dough Strength
Sourdough dough becomes stronger through a combination of fermentation and folding.
During the first couple of hours of fermentation, perform several rounds of stretch-and-folds.
To do this, grab one side of the dough, gently stretch it upward, and fold it toward the center.
Rotate the bowl and repeat around all sides.
After several rounds, the dough should feel smoother and stronger.
Adding the Sunflower Seeds
Once the dough has developed some strength, it’s time to add the toasted sunflower seeds.
Gently spread the dough out on a lightly dampened work surface.
Sprinkle approximately three-quarters of the sunflower seeds across the dough.
Fold the dough over itself to enclose the seeds.
Continue folding gently until the seeds are distributed throughout.
Avoid aggressively kneading because this can damage the dough structure.
Save some seeds for sprinkling over the crust if desired.
Bulk Fermentation
Place the dough into a lightly greased bowl or fermentation container.
Cover it and let it ferment at room temperature.
The exact fermentation time varies depending on the temperature of your kitchen and the strength of your starter.
Instead of relying only on a specific number of hours, watch for visual signs.
The dough should become noticeably puffier and smoother, with bubbles developing along the sides or surface.
It should also feel lighter and more elastic.
Avoid over-fermenting the dough because it may become weak and difficult to shape.
Shaping the Loaf
When bulk fermentation is complete, gently transfer the dough to a lightly floured surface.
Shape it into a round boule or an oval loaf.
To create surface tension, gently pull the dough toward yourself while rotating it.
Try not to flatten the dough excessively.
Place the shaped loaf into a well-floured banneton or a bowl lined with a floured kitchen towel.
If you’re using a banneton, place the seam side upward.
Final Proof
Cover the shaped loaf and allow it to proof.
You can proof it at room temperature or refrigerate it for a longer cold fermentation.
Cold proofing can make the dough easier to score and can develop additional sourdough flavor.
The loaf should become slightly larger and feel airy when gently pressed.
Avoid relying only on the clock because fermentation speed changes with temperature.
Preparing the Oven
Place a Dutch oven inside your oven.
Preheat the oven to approximately 475°F (245°C).
Allow the Dutch oven to heat thoroughly.
A properly preheated baking vessel is important for achieving good oven spring and a crisp crust.
When you’re ready to bake, carefully turn the dough onto parchment paper.
Dust away excess flour.
Use a sharp bread lame or razor blade to score the surface.
A simple long slash works beautifully for this loaf.
Adding the Sunflower Seed Topping
If you want extra sunflower seed flavor, lightly brush the top of the loaf with water.
Sprinkle the remaining sunflower seeds over the surface.
Press them very gently so they adhere.
You can also add sesame seeds for a beautiful mixed-seed crust.
Baking the Bread
Carefully transfer the loaf into the hot Dutch oven.
Cover with the lid.
Bake for approximately 20 minutes.
The covered environment traps steam, which helps the loaf expand and develop a crisp crust.
Remove the lid and continue baking for another 20–25 minutes.
The crust should become deep golden brown.
If you prefer a darker crust, allow it to bake for a few additional minutes while watching carefully.
Cooling the Loaf
Once the bread is finished, remove it from the Dutch oven and place it on a cooling rack.
Allow it to cool completely before slicing.
This is an important step because the interior continues to set after baking.
Cutting the loaf too soon can make the crumb appear gummy.
Once cooled, use a sharp serrated knife to slice it.
You’ll see the sunflower seeds distributed throughout the soft crumb.
Tips for the Best Sunflower Seed Sourdough
Use Active Starter
A bubbly, healthy starter will give your dough the best chance of rising properly.
Toast the Seeds
Toasting brings out their natural nutty flavor.
Cool the Seeds
Don’t add hot seeds to the dough. Allow them to cool completely first.
Don’t Add Too Many Seeds
Although sunflower seeds are delicious, excessive amounts can make the dough heavy and interfere with its structure.
Watch Fermentation
Kitchen temperature can dramatically affect sourdough timing.
Learn to recognize when your dough looks and feels ready rather than following the clock alone.
Serving Ideas
This bread is incredibly versatile.
Breakfast
Toast a slice and top it with:
- Avocado
- Scrambled eggs
- Cream cheese
- Butter
- Peanut butter
Lunch
Use it for sandwiches filled with:
- Grilled chicken
- Turkey
- Cheese
- Tuna salad
- Fresh vegetables
Dinner
Serve thick slices alongside:
- Tomato soup
- Lentil soup
- Vegetable soup
- Roasted chicken
- Salads
Snack
Simply toast a slice and spread it with butter or cream cheese.
Storage
Once completely cooled, store the bread in a bread bag or wrapped in a clean kitchen towel.
Keep it at room temperature for the best texture.
Avoid refrigerating the bread unless necessary because the cold temperature can cause it to stale more quickly.
Freezing Instructions
Sunflower Seed Sourdough freezes very well.
Slice the cooled loaf before freezing if you want to enjoy individual portions.
Wrap the slices tightly and place them in a freezer-safe bag.
When ready to eat, toast slices directly from frozen or let them thaw at room temperature.
This is a convenient way to preserve homemade sourdough bread.
Frequently Asked Questions
Can I use roasted sunflower seeds?
Yes, but choose unsalted roasted seeds when possible. If they are already heavily salted, reduce the salt in the dough.
Can I use sunflower seed butter?
Sunflower seed butter is not a direct substitute for whole sunflower seeds because it changes the moisture and fat balance of the dough.
Can I add other seeds?
Absolutely. Pumpkin seeds, sesame seeds, flaxseed, or chia seeds can be combined with sunflower seeds.
Can I make this bread with whole-wheat flour?
Yes. Replace a portion of the bread flour with whole-wheat flour. You may need to adjust the water slightly because whole-wheat flour absorbs more liquid.
Why is my loaf dense?
Dense sourdough can result from weak starter activity, insufficient fermentation, under-proofing, or poor gluten development.
Final Thoughts
This Sunflower Seed Sourdough is a delicious rustic loaf that combines the tangy character of sourdough with the rich, nutty flavor of toasted sunflower seeds. The crust becomes beautifully crisp while the interior stays soft, chewy, and packed with satisfying texture.
The recipe does require patience, but sourdough baking is as much about watching and understanding the dough as it is about following a clock. Give your starter time to become active, develop strength through gentle folds, and allow the dough to ferment and proof properly.
Once baked and cooled, slice the loaf and enjoy it with butter, avocado, eggs, cheese, soup, or your favorite sandwich fillings.
With its simple ingredients and wonderful texture, this bread is an excellent addition to any homemade sourdough collection. 🌻🍞✨
