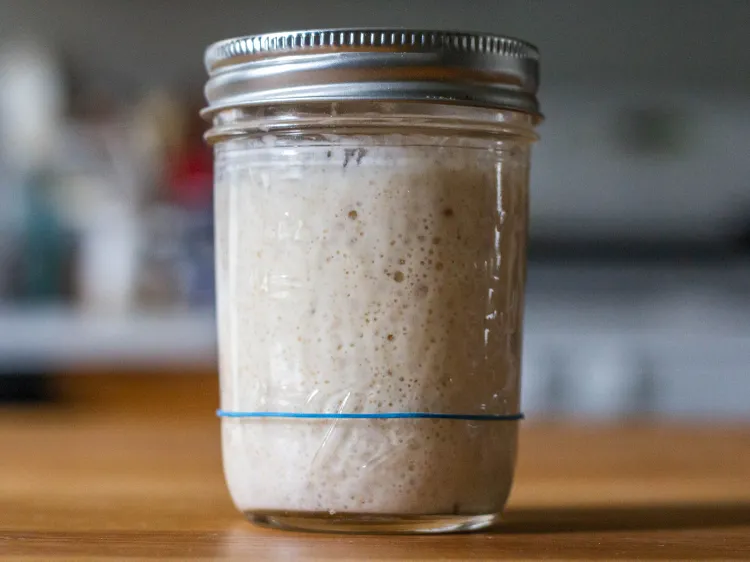
There is something magical about making sourdough bread from scratch. With just two simple ingredients—flour and water—you can create a living sourdough starter that helps bread rise naturally while developing its signature tangy flavor and chewy texture.
If you have ever admired a bubbly sourdough starter sitting in a glass jar, you might be surprised to learn how easy it is to make one at home. Although the process takes several days, most of the work happens naturally as wild yeast and beneficial bacteria develop in the mixture.
In this beginner-friendly guide, you will learn how to make a sourdough starter, feed it properly, recognize when it is ready, and maintain it for future baking adventures.
What Is a Sourdough Starter?
A sourdough starter is a mixture of flour and water that captures naturally occurring wild yeast and lactic acid bacteria. These microorganisms ferment the mixture, producing bubbles, a pleasant tangy aroma, and the gases needed to help bread dough rise.
Unlike commercial yeast, a sourdough starter develops gradually and requires regular feeding. Once established, it can be maintained for months or even years with proper care.
Ingredients
This recipe makes a small starter that is easy to maintain without wasting too much flour.
50 grams whole wheat flour
50 grams unbleached all-purpose flour
100 grams room-temperature water
Optional equipment:
A clean glass jar, approximately 500 ml in capacity
A kitchen scale
A spoon or spatula
A rubber band or washable marker
A loose-fitting lid
Whole wheat flour is especially helpful at the beginning because it contains nutrients that support microbial activity. However, you can use all-purpose flour if that is what you have available.
Step-by-Step Instructions
Day 1: Mix the Flour and Water
Add 50 grams of whole wheat flour, 50 grams of all-purpose flour, and 100 grams of water to your clean glass jar.
Stir thoroughly until no dry flour remains. The mixture should resemble a thick pancake batter. Scrape down the sides of the jar to keep the mixture tidy.
Cover the jar loosely with its lid. Do not seal it tightly, because fermentation produces gas that needs to escape.
Place the jar in a warm location, ideally around 24–27°C (75–81°F). Leave it undisturbed for 24 hours.
Day 2: Check for Activity
Look for small bubbles, a slightly different smell, or a little expansion. You might notice activity already, but it is also completely normal if nothing appears to have happened.
Discard approximately half of the mixture, leaving 100 grams behind. Add 50 grams of flour and 50 grams of water, then mix well.
Cover loosely and let the starter rest for another 24 hours.
Day 3: Begin Daily Feeding
By the third day, you may see bubbles throughout the mixture. The aroma might be mildly sour, fruity, or slightly unusual.
Discard all but 50 grams of starter. Add 50 grams of flour and 50 grams of water. Mix thoroughly and mark the starting level with a rubber band.
Leave it in a warm place for another 24 hours.
Do not worry if the starter rises dramatically and then falls. Early fermentation can be unpredictable, and an initial burst of activity does not necessarily mean the starter is ready for baking.
Days 4–6: Build Strength
Continue feeding your starter every 24 hours.
For each feeding, keep 50 grams of starter and mix in 50 grams of water and 50 grams of flour.
As the days pass, you should begin noticing more consistent bubbles, a pleasantly tangy smell, and a gradual increase in volume after feeding.
If your kitchen is cold, fermentation may take longer. A starter can sometimes become temporarily less active around this stage. Continue feeding patiently rather than assuming it has failed.
Days 7–10: Check for Readiness
Your starter may be ready after seven days, although some starters require 10–14 days or longer.
A mature starter should show predictable activity after feeding. It should rise noticeably, often doubling in volume within approximately 4–8 hours in a warm environment, depending on the flour, temperature, and feeding ratio.
Look for bubbles throughout the mixture, a pleasantly sour aroma, and a clear rise-and-fall pattern.
When these signs become consistent, your starter is generally ready to help leaven bread dough.
How to Feed and Maintain Your Starter
If you bake frequently, keep your starter at room temperature and feed it regularly, usually every 12–24 hours depending on how quickly it ferments.
For occasional baking, store the starter in the refrigerator once it is established. Feed it, allow fermentation to begin, and then refrigerate it. Refresh it about once a week for best results.
Before baking, give a refrigerated starter one or more room-temperature feedings until it becomes active and predictable again.
Remember that feeding ratios can be adjusted. A common maintenance routine is to combine one part starter, one part water, and one part flour by weight.
Helpful Tips for Success
Use a kitchen scale. Measuring ingredients by weight provides more consistent results than using cups.
Choose the right temperature. Warm conditions generally encourage fermentation, while colder temperatures slow it down.
Keep the jar clean. Use clean equipment and avoid letting dried starter accumulate around the rim.
Watch the starter, not just the clock. Temperature, flour type, and water quality can all affect fermentation speed.
Avoid sealing the jar tightly. A loose lid helps prevent pressure from building up.
Do not rely on the float test alone. A starter that floats in water is not necessarily ready, and a healthy starter may sink. Consistent rising and falling after feeding are more useful indicators.
Common Sourdough Starter Problems
My starter is not bubbling.
Give it more time and maintain a comfortable room temperature. If your water is heavily chlorinated, try filtered water. Also, check that your flour is fresh.
My starter smells sour or fruity.
A mildly sour, fruity, or fermented aroma is normal. However, discard the starter if you see fuzzy mold or pink, orange, or unusual colored growth. Do not try to rescue a moldy starter by removing only the affected portion.
My starter has liquid on top.
A grayish or brownish liquid may be hooch, which can develop when a starter becomes hungry. Stir it in or pour it off, then feed the starter. If the mixture shows signs of mold or unusual discoloration, discard it instead.
My starter rises and then collapses.
This usually means the starter has consumed much of its available food. Feed it again and observe how quickly it rises.
Frequently Asked Questions
Can I use plain all-purpose flour?
Yes. Whole wheat flour can help establish a starter, but all-purpose flour can also work well.
Can I make sourdough starter without a kitchen scale?
Yes, although weighing ingredients is more reliable. Flour measurements by volume can vary considerably.
How long does homemade sourdough starter last?
With regular feeding and proper storage, a healthy starter can last for years.
Can I use the discard in recipes?
Once your starter is established, discard can be used in recipes such as pancakes, crackers

Leave a Reply