
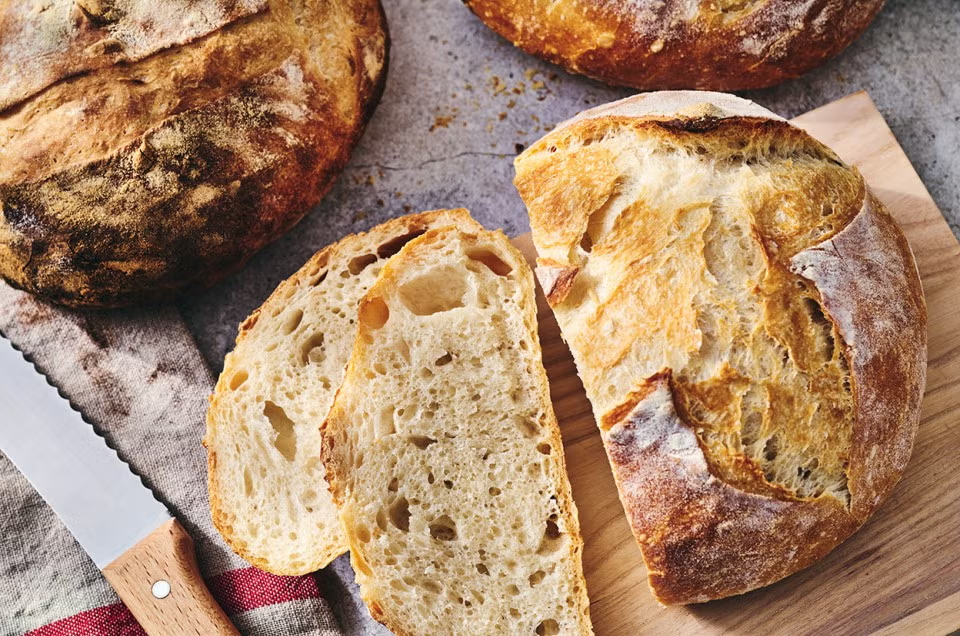
There is something special about a loaf of homemade sourdough bread. Its crisp, deeply golden crust, airy interior, rustic appearance, and naturally tangy flavor make it a favorite among bread lovers. This Classic Homemade Sourdough Bread is made with a simple combination of flour, water, salt, and active sourdough starter. Although the process takes time, most of that time is hands-off, allowing the dough to slowly develop its flavor and texture.
The result is a beautiful artisan-style loaf with a crunchy crust and a soft, chewy crumb filled with those characteristic little air pockets. It is perfect for breakfast, sandwiches, toast, or simply enjoying warm with butter.
Why You’ll Love This Sourdough Recipe
This recipe is a wonderful introduction to traditional sourdough baking. It does not require commercial yeast because the sourdough starter naturally provides the fermentation needed to make the bread rise.
The long fermentation process gives the loaf its distinctive flavor and creates a wonderfully chewy texture. The crust becomes crisp and golden in a hot oven, while the inside stays soft and moist.
Once you become comfortable with the process, you can easily make sourdough bread regularly and experiment with different flours, seeds, herbs, or other additions.
Ingredients
For one large loaf, you will need:
- 100 grams active sourdough starter
- 350 grams lukewarm water
- 500 grams bread flour
- 10 grams fine sea salt
- A little rice flour or all-purpose flour for dusting
- Extra flour for shaping
Using a kitchen scale is highly recommended for sourdough because accurate measurements make it easier to achieve consistent results.
Before You Begin
The most important ingredient is an active sourdough starter.
Your starter should be bubbly, active, and recently fed. When it is ready for baking, it should have risen significantly and contain plenty of visible bubbles.
A weak or inactive starter may result in a loaf that does not rise properly.
The temperature of your kitchen also affects fermentation. A warm kitchen generally speeds up the process, while a cooler kitchen slows it down.
Step 1: Mix the Dough
Place the active sourdough starter into a large mixing bowl.
Add the lukewarm water and stir until the starter is mostly dissolved.
Add the bread flour and mix until no large areas of dry flour remain. The dough will look rough and sticky at this stage.
Cover the bowl and let the dough rest for approximately 30 minutes.
This resting period allows the flour to absorb the water and begins developing gluten naturally.
Step 2: Add the Salt
After the initial rest, sprinkle the salt over the dough.
Wet your hands slightly and gently work the salt into the dough. You can pinch, fold, and squeeze the dough until the salt is evenly distributed.
Do not worry if the dough feels sticky. Sourdough dough often feels much different from traditional bread dough.
Cover the bowl again and allow it to rest.
Step 3: Stretch and Fold
Instead of kneading the dough heavily, this recipe uses a series of gentle stretch-and-fold movements.
With wet hands, grab one side of the dough, stretch it upward, and fold it toward the center. Turn the bowl and repeat with another side.
Continue until you have folded all four sides.
Perform a stretch-and-fold session approximately every 30 minutes for the first 2 hours.
You should notice the dough becoming smoother, stronger, and more elastic with each round.
Stretching and folding helps build gluten strength without requiring intensive kneading.
Step 4: Bulk Fermentation
After the final stretch and fold, cover the bowl and allow the dough to continue fermenting.
This stage is called bulk fermentation.
Depending on the temperature of your kitchen and the strength of your starter, this can take approximately 4–6 hours.
Do not rely entirely on the clock. Look at the dough instead.
The dough should become noticeably larger, smoother, and slightly puffy. You may also see bubbles forming around the sides or surface.
The dough does not necessarily need to double completely during bulk fermentation.
Step 5: Pre-Shape the Dough
Lightly flour your work surface.
Gently turn the fermented dough out of the bowl. Try not to completely deflate it.
Using a bench scraper, carefully shape the dough into a loose round.
Let it rest uncovered for approximately 20–30 minutes.
This resting period allows the gluten to relax before the final shaping.
Step 6: Final Shape
Dust your work surface lightly with flour.
To shape the loaf, gently fold the edges of the dough toward the center.
Turn the dough over so the seam is underneath.
Use your hands or a bench scraper to gently pull the dough toward you across the work surface. This creates surface tension and helps form a smooth, tight outer skin.
Avoid using excessive flour during shaping because too much flour can prevent the dough from developing enough tension.
Step 7: Proof the Loaf
Place the shaped dough seam-side up into a well-floured banneton or bowl lined with a floured kitchen towel.
Cover it carefully.
For a more developed sourdough flavor, refrigerate the dough for an overnight cold proof.
A cold fermentation of approximately 8–14 hours allows the flavor to develop while also making the dough easier to score and bake.
If you are short on time, you can proof the loaf at room temperature instead.
Step 8: Preheat the Oven
For the best crust, use a Dutch oven or another heavy oven-safe baking vessel with a lid.
Place the Dutch oven inside your oven and preheat to 450°F (230°C) for at least 30–45 minutes.
A thoroughly heated Dutch oven creates the intense heat and steam necessary for a beautiful sourdough crust.
Step 9: Score the Bread
When you are ready to bake, carefully turn the chilled dough onto a piece of parchment paper.
Dust off any excess flour if necessary.
Use a sharp bread lame or razor blade to make a deep score across the surface.
The score gives the expanding bread a controlled place to open during baking.
You can keep the design simple with one long slash or create decorative patterns if you prefer.
Step 10: Bake
Carefully place the dough into the preheated Dutch oven.
Cover with the lid and bake for approximately 20 minutes.
The covered environment traps steam, which helps the bread expand and keeps the crust flexible during the first part of baking.
After 20 minutes, remove the lid.
Continue baking for another 20–25 minutes, or until the crust becomes deeply golden brown.
For a darker, more rustic crust, allow it to bake a little longer while keeping a close eye on it.
Step 11: Cool Completely
This step is very important.
Remove the finished loaf from the Dutch oven and place it on a wire rack.
Allow it to cool for at least 1–2 hours before slicing.
It can be tempting to cut into a warm loaf immediately, but the interior continues setting as it cools. Cutting too early can result in a gummy crumb.
Once cooled, use a serrated bread knife to slice the loaf.
You should see a beautiful open crumb with irregular air pockets and a soft, chewy texture.
Tips for Better Sourdough Bread
Use an Active Starter
A bubbly, healthy starter is essential. If your starter is sluggish, give it one or two regular feedings before baking.
Watch the Dough, Not Just the Clock
Fermentation time varies depending on room temperature, flour, water, and starter activity.
Learning to recognize when the dough is ready will improve your sourdough results.
Avoid Too Much Flour
Using excessive flour during shaping can make the bread dense. Use only enough to prevent sticking.
Build Good Surface Tension
Proper shaping helps the loaf hold its form and encourages a beautiful rise in the oven.
Bake in a Hot Dutch Oven
A preheated Dutch oven is one of the easiest ways to create a bakery-style crust at home.
Be Patient
Sourdough is naturally slower than bread made with commercial yeast. The long fermentation is what helps create its distinctive flavor and texture.
How to Store Sourdough Bread
Once completely cooled, store the loaf in a bread bag, paper bag, or loosely wrapped kitchen towel.
Avoid sealing freshly baked sourdough in an airtight plastic container while it is still warm because trapped moisture can soften the crust.
For the best texture, enjoy the loaf within a few days.
If you cannot finish it quickly, slice the bread and freeze it in an airtight freezer-safe bag.
Individual slices can be removed whenever needed and toasted directly from frozen.
Delicious Ways to Serve Sourdough
Fresh sourdough is incredibly versatile.
For breakfast, toast a thick slice and top it with butter, scrambled eggs, avocado, or fruit preserves.
For lunch, use it to make grilled cheese, turkey sandwiches, chicken sandwiches, or vegetable sandwiches.
You can also serve slices alongside soups and stews. The chewy bread is excellent for dipping into creamy soups, tomato soup, lentil soup, or hearty vegetable stews.
For a simple snack, toast sourdough and spread it with butter, honey, or homemade jam.
Easy Sourdough Variations
Once you master the basic recipe, try adding different ingredients.
Rosemary Garlic Sourdough: Add finely chopped rosemary and roasted garlic during the folding stage.
Cheese Sourdough: Add shredded cheddar, Parmesan, or Gruyère for a savory loaf.
Seeded Sourdough: Mix in sunflower seeds, pumpkin seeds, sesame seeds, or flaxseeds.
Whole Wheat Sourdough: Replace part of the bread flour with whole wheat flour for a heartier loaf.
Cinnamon Raisin Sourdough: Add raisins, cinnamon, and a small amount of brown sugar for a sweet breakfast bread.
Frequently Asked Questions
Why didn’t my sourdough rise?
The most common reasons are an inactive starter, insufficient fermentation, or a kitchen that is too cold. Make sure your starter is active before beginning.
Why is my sourdough gummy inside?
Cutting the loaf while it is still hot can make the crumb appear gummy. Allow it to cool completely before slicing.
Can I make sourdough without a Dutch oven?
Yes. A Dutch oven is helpful because it traps steam, but you can also bake sourdough on a preheated baking stone or sheet with another method of introducing steam.
Can I use all-purpose flour?
Yes. Bread flour generally provides more gluten strength, but all-purpose flour can work well depending on its protein content.
Final Thoughts
Making Classic Homemade Sourdough Bread takes patience, but the result is worth every minute. The combination of a crisp golden crust, airy crumb, chewy texture, and naturally developed flavor makes this loaf something truly special.
The recipe relies on simple ingredients, but sourdough baking is as much about learning the dough as it is about following measurements. With practice, you will begin to recognize when your starter is ready, when fermentation is complete, and when the dough has developed enough strength for shaping.
Once you become comfortable with this basic loaf, you can experiment with herbs, cheese, seeds, whole grains, and sweet additions.
Serve it warm with butter, toast it for breakfast, or use it to make your favorite sandwiches. Homemade sourdough brings a rustic, bakery-style touch to everyday meals and is a rewarding recipe for anyone who enjoys baking from scratch.
Recipe at a Glance
Prep Time: 30 minutes
Bulk Fermentation: 4–6 hours
Cold Proof: 8–14 hours
Bake Time: 40–45 minutes
Total Time: Approximately 13–21 hours, mostly hands-off
Yield: 1 large loaf
Difficulty: Intermediate
Best Tip: Keep an eye on the dough rather than following the clock exactly. Temperature and starter activity can significantly change how quickly your sourdough ferments.

