
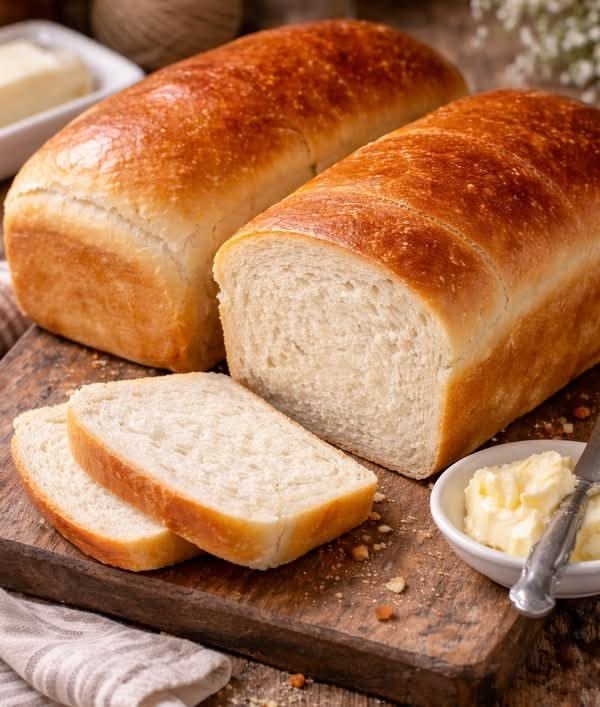
Sourdough Sandwich Bread Recipe – Soft, Fluffy & Perfect for Everyday Sandwiches
Nothing compares to the taste and aroma of freshly baked Sourdough Sandwich Bread. Unlike traditional artisan sourdough with its thick, crusty exterior and large air pockets, sourdough sandwich bread is soft, tender, and easy to slice, making it perfect for sandwiches, toast, grilled cheese, and breakfast. It combines the rich, slightly tangy flavor of natural sourdough with the light texture of classic sandwich bread, creating a loaf that’s both delicious and versatile.
If you’re looking for an easy homemade bread recipe that delivers bakery-quality results, this sourdough sandwich bread is an excellent choice. Made with an active sourdough starter, bread flour, milk, butter, and a touch of honey, this loaf develops incredible flavor through slow fermentation while remaining soft enough for everyday use.
Whether you’re new to sourdough baking or have years of experience, this recipe will become one of your favorite homemade bread recipes.
Why You’ll Love This Recipe
There are countless reasons to bake your own sourdough sandwich bread.
- Soft, fluffy texture
- Light golden crust
- Perfect for sandwiches and toast
- Naturally fermented for incredible flavor
- Easy to slice
- No commercial yeast required (optional)
- Great for meal prep
- Stays fresh for several days
- Freezer-friendly
- Beginner-friendly recipe
Unlike store-bought bread that often contains preservatives and additives, homemade sourdough sandwich bread is made with simple pantry ingredients you can trust.
What Makes Sourdough Sandwich Bread Different?
Traditional artisan sourdough usually has a chewy crust and an open crumb with large holes. While it’s excellent for dipping into soups or serving with olive oil, it isn’t always ideal for sandwiches because spreads and fillings can fall through the holes.
Sourdough sandwich bread is enriched with milk, butter, and a small amount of honey, creating a softer crumb and thinner crust. The loaf bakes in a bread pan, producing uniform slices that are perfect for lunchboxes and everyday meals.
The slow fermentation process also enhances flavor while helping create a moist, tender loaf that stays fresh longer than many conventional breads.
Ingredients
- 100g active sourdough starter
- 500g bread flour
- 250ml warm whole milk
- 50ml warm water
- 30g unsalted butter, softened
- 1 tablespoon honey
- 10g salt
Optional Ingredients
- 1 tablespoon olive oil
- Sesame seeds
- Oats for topping
- Melted butter for brushing after baking
Kitchen Equipment
- Large mixing bowl
- Measuring scale
- Dough scraper
- Stand mixer (optional)
- 9×5-inch loaf pan
- Kitchen towel
- Cooling rack
- Bread knife
Preparing Your Starter
A healthy sourdough starter is the secret to successful bread.
Feed your starter about 4–6 hours before baking until it becomes bubbly, active, and doubles in size. If your starter isn’t active, your bread may rise slowly or become dense.
A simple float test can help determine readiness. Drop a small spoonful into water—if it floats, it’s generally ready to use.
Step-by-Step Instructions
Step 1: Mix the Dough
In a large bowl, combine the active sourdough starter, warm milk, warm water, and honey. Stir until mostly dissolved.
Add the bread flour and salt. Mix until a rough dough forms.
Step 2: Knead
Transfer the dough to a lightly floured surface or use a stand mixer with a dough hook.
Knead for about 8–10 minutes until smooth and elastic.
Gradually add the softened butter while kneading until fully incorporated.
The dough should become soft, stretchy, and only slightly tacky.
Step 3: First Rise
Place the dough into a lightly greased bowl.
Cover with plastic wrap or a damp towel.
Allow it to rise at room temperature for 4–6 hours, or until doubled in size.
Depending on your kitchen temperature, this step may take longer.
Step 4: Shape the Dough
Lightly flour your work surface.
Turn out the dough and gently press it into a rectangle.
Roll it tightly into a log, pinching the seam closed.
Place it seam-side down into a greased loaf pan.
Step 5: Final Proof
Cover the loaf loosely.
Let it rise for another 2–4 hours until the dough rises just above the rim of the loaf pan.
Avoid over-proofing, as it may collapse during baking.
Step 6: Bake
Preheat the oven to 375°F (190°C).
Bake for 35–40 minutes until the loaf is golden brown.
The internal temperature should reach approximately 200°F (93°C).
If the crust browns too quickly, loosely cover the loaf with foil during the final 10 minutes.
Step 7: Cool
Remove the bread from the pan immediately.
Place it on a cooling rack.
Allow it to cool completely before slicing.
Cutting while hot can make the crumb gummy.
Tips for Perfect Sourdough Sandwich Bread
- Always use an active starter.
- Measure ingredients with a kitchen scale for accuracy.
- Don’t rush fermentation.
- Use bread flour for the softest texture.
- Avoid adding excessive flour during kneading.
- Let the loaf cool completely before slicing.
- Store properly to maintain freshness.
Delicious Serving Ideas
This bread is incredibly versatile.
Enjoy it with:
- Butter and jam
- Peanut butter
- Avocado toast
- Turkey sandwiches
- Ham and cheese
- Grilled cheese
- French toast
- Garlic bread
- Breakfast sandwiches
- Egg salad
Storage Tips
Store cooled bread in an airtight container or bread bag at room temperature for up to 4 days.
For longer storage:
- Slice the loaf.
- Freeze slices individually.
- Toast directly from frozen.
Avoid refrigerating the bread, as it can dry out more quickly.
Easy Variations
Whole Wheat Version
Replace up to half the bread flour with whole wheat flour.
Honey Oat
Mix rolled oats into the dough and sprinkle more on top before baking.
Herb Bread
Add chopped rosemary, thyme, or parsley for a savory twist.
Cheese Bread
Fold shredded cheddar into the dough before shaping.
Garlic Herb
Mix roasted garlic and Italian herbs into the dough for extra flavor.
Common Mistakes to Avoid
Using an Inactive Starter
A weak starter leads to poor rise and dense bread.
Over-Flouring
Too much flour creates a dry, heavy loaf.
Skipping Cooling Time
Fresh bread needs time to finish setting before slicing.
Under-Proofing
Bread won’t rise fully in the oven if proofed too little.
Over-Proofing
Too much rising can cause the loaf to collapse during baking.
Approximate Nutrition (Per Slice)
- Calories: 170
- Carbohydrates: 30g
- Protein: 6g
- Fat: 4g
- Fiber: 1g
- Sugar: 2g
Nutritional values are estimates and may vary based on ingredients used.
Frequently Asked Questions
Can I make this without milk?
Yes. Replace the milk with water or an unsweetened plant-based milk for a dairy-free version.
Can I add commercial yeast?
Yes. If you’re short on time, adding a small amount of instant yeast can speed up the rise, though it will slightly change the traditional sourdough process.
Why is my bread dense?
The most common causes are an inactive starter, insufficient proofing, or too much flour in the dough.
Can I freeze it?
Absolutely. Slice the loaf before freezing so you can remove individual slices as needed.
Do I need a stand mixer?
No. This dough can be kneaded by hand with excellent results.
Final Thoughts
Homemade Sourdough Sandwich Bread is one of the most rewarding recipes you can bake. It combines the wholesome flavor of natural fermentation with the soft texture of classic sandwich bread, making it perfect for everything from morning toast to packed lunches. With a little patience and an active sourdough starter, you’ll create a loaf that’s fresher, tastier, and more satisfying than anything from the grocery store.
Once you bake this recipe, you’ll discover just how easy it is to enjoy fresh, homemade bread every week. Serve it warm with butter, use it for your favorite sandwiches, or toast a slice for breakfast—the possibilities are endless, and every bite is worth the effort.v
