
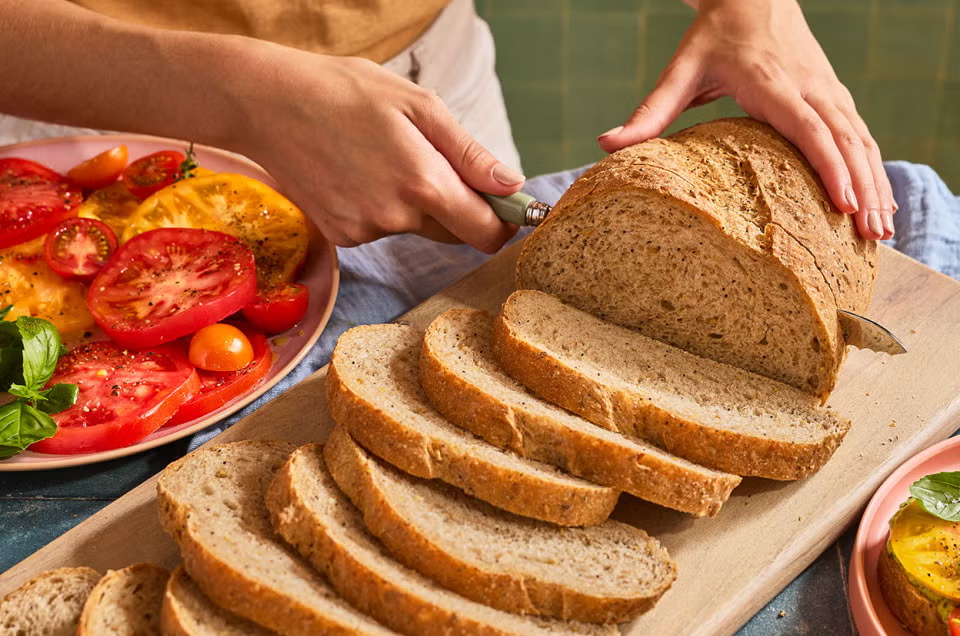
There is something incredibly comforting about a freshly baked loaf of homemade bread. The golden-brown crust, soft and slightly chewy center, and warm aroma filling the kitchen make homemade bread worth every minute of preparation. This rustic whole wheat bread is simple enough for beginners but delicious enough to become a regular favorite. It has a hearty texture, a beautiful crust, and a slightly nutty flavor from whole wheat flour.
Unlike many store-bought breads, this loaf has a homemade character that makes every slice special. It is perfect for breakfast with butter and jam, for sandwiches at lunchtime, or alongside soups, salads, and roasted vegetables. You can also toast it and top it with avocado, eggs, cheese, or your favorite spread.
The recipe below is designed to give you a loaf similar to the rustic bread shown in the picture, with a thick golden crust and a soft, wholesome interior.
Ingredients
- 2 cups whole wheat flour
- 1½ cups all-purpose or bread flour
- 2¼ teaspoons active dry yeast
- 1½ cups warm water
- 1 tablespoon honey or maple syrup
- 2 tablespoons olive oil
- 1½ teaspoons salt
- 1 tablespoon milk powder, optional
- 2 tablespoons sunflower seeds, optional
- 1 tablespoon flaxseeds, optional
- 1 tablespoon sesame seeds, optional
The seeds are completely optional, but they add a wonderful nutty flavor and give the bread a rustic appearance. You can also add oats, pumpkin seeds, or chopped walnuts if you like.
Prepare the Dough
Begin by making sure your water is warm rather than hot. Very hot water can damage the yeast, while water that is too cool may make the dough rise slowly. Add the warm water to a large mixing bowl and stir in the honey. Sprinkle the yeast over the surface and leave it for about 5–10 minutes.
If the yeast becomes slightly foamy, it is ready to use. This is a good indication that your yeast is active.
Add the whole wheat flour, all-purpose flour, and salt to the bowl. If you are using milk powder or seeds, add them at this stage as well. Pour in the olive oil and begin mixing everything together with a wooden spoon or your hands.
The dough will initially look rough and slightly sticky. That is completely normal. Whole wheat flour absorbs a lot of water, so give the flour a few minutes to hydrate before deciding whether you need more flour.
Knead the Bread
Transfer the dough onto a lightly floured surface. Knead it for approximately 8–10 minutes until it becomes smoother and more elastic.
You can also knead the dough in a stand mixer using a dough hook. Mix on low speed until the ingredients come together, then knead on medium-low speed for several minutes.
The dough should feel soft and slightly tacky but should not be extremely sticky. Avoid adding too much extra flour because this can make the finished bread dense and dry.
To test the dough, gently stretch a small piece between your fingers. If it stretches without immediately tearing, the gluten has developed sufficiently.
Place the kneaded dough into a lightly oiled bowl. Turn it once so the surface is coated with a little oil. Cover the bowl with plastic wrap, a clean kitchen towel, or a reusable cover.
Let the Dough Rise
Place the covered bowl somewhere warm and allow the dough to rise for about 1–1½ hours.
The exact time will depend on the temperature of your kitchen. In a warm environment, the dough may rise quickly, while a cooler kitchen may require additional time.
You are looking for the dough to become approximately twice its original size. Do not worry if it takes longer than expected. Bread dough responds to temperature, humidity, flour, and yeast activity, so the size of the dough is a better guide than the clock.
Once the dough has risen, gently press it down with your fingertips to release some of the trapped air.
Shape the Loaf
Place the dough onto a lightly floured work surface and shape it into a round or oval loaf.
To create a smooth surface, gently pull the edges of the dough toward the bottom and pinch them together underneath. This creates tension on the surface, which helps the bread maintain its shape while baking.
Place the shaped loaf on a parchment-lined baking tray. Alternatively, you can place it into a lightly floured loaf basket or Dutch oven if you have one.
Cover the shaped loaf loosely and let it rest again for about 30–45 minutes.
This second rise gives the bread a lighter texture and helps develop a beautiful crumb.
Score the Bread
Before baking, use a very sharp knife or bread lame to make a few shallow cuts across the top of the loaf.
The cuts are not only decorative. They give the bread a controlled place to expand as it bakes.
For a rustic appearance like the bread in the picture, you can make three or four diagonal cuts across the top. You can also dust the surface lightly with flour before scoring for a classic bakery-style finish.
If desired, brush the top with a little water and sprinkle it with oats or seeds.
Bake the Bread
Preheat your oven to 425°F (220°C).
For the best crust, place a small oven-safe dish of hot water on the bottom rack during the first part of baking. The steam helps create a crisp, golden crust while keeping the inside moist.
Place the loaf in the preheated oven and bake for approximately 30–40 minutes, depending on the size and shape of your loaf.
The bread should become deep golden brown on the outside. If you gently tap the bottom of the loaf, it should sound hollow.
If the top is becoming too dark before the bread is completely baked, loosely cover it with aluminum foil during the final part of baking.
Once baked, remove the bread from the oven and transfer it to a wire rack.
The Most Important Step: Let It Cool
It can be very tempting to slice homemade bread immediately, especially when your kitchen smells amazing. However, allowing the loaf to cool is important.
Leave the bread on a wire rack for at least 45–60 minutes before slicing. During this time, the interior continues to set.
Cutting into the bread too early can result in a gummy or slightly sticky center, even if the loaf is fully baked.
Once cooled, use a serrated bread knife to cut even slices. You should see a soft, slightly dense crumb surrounded by a beautifully browned crust.
How to Serve Homemade Whole Wheat Bread
This rustic loaf is incredibly versatile. Serve it warm with butter for a simple breakfast, or spread it with cream cheese, peanut butter, honey, or your favorite fruit preserves.
For a savory option, toast a slice and top it with mashed avocado, sliced tomatoes, salt, pepper, and a drizzle of olive oil. It also makes excellent sandwiches because the hearty texture holds fillings well.
You can serve the bread alongside creamy soups, pasta, salads, grilled vegetables, or roasted chicken. It is also delicious as toast with eggs for a filling breakfast.
Storage Tips
Once completely cooled, store the bread in a bread bag, paper bag, or airtight container at room temperature for up to 3 days.
Avoid refrigerating homemade bread unless necessary because refrigeration can make bread become stale more quickly.
For longer storage, slice the loaf and place the slices in a freezer-safe bag. Freeze for up to 2–3 months. When you want a slice, simply toast it directly from frozen.
Helpful Tips for Perfect Bread
Use fresh yeast: Old or inactive yeast can prevent the bread from rising properly.
Don’t add too much flour: A slightly sticky dough usually produces softer bread.
Give the dough enough time: Rising time can vary depending on your kitchen temperature.
Preheat properly: A fully heated oven helps the bread rise beautifully when it first goes into the oven.
Create steam: Steam helps develop a crisp and attractive crust.
Cool before slicing: This gives the crumb time to finish setting.
Final Thoughts
Homemade rustic whole wheat bread is one of those recipes that looks impressive but is actually quite simple once you understand the basic process. With just a handful of everyday ingredients, you can create a beautiful loaf with a golden crust and soft, hearty center.
The combination of whole wheat flour, a touch of honey, olive oil, and optional seeds gives this bread a wonderfully wholesome flavor without making it overly heavy. It is perfect for everyday meals, weekend baking, breakfast toast, and homemade sandwiches.
Once you make this recipe successfully, you can easily experiment with different flavors. Try adding rosemary and garlic for a savory loaf, cinnamon and raisins for a sweeter version, or a mixture of sunflower, pumpkin, and flaxseeds for a hearty seeded bread.
The best part is that every homemade loaf has its own character. A slightly uneven shape, rustic scoring, and crisp golden crust are all part of its charm. Serve it warm, share it with family, and enjoy the simple satisfaction of freshly baked bread made right in your own kitchen.

