
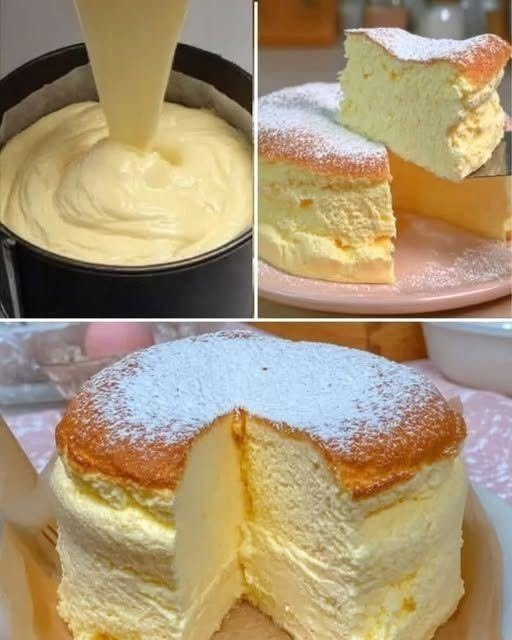
The Ultimate Japanese Cotton Cheesecake Recipe: Light, Fluffy & Melt-in-Your-Mouth Perfection
Few desserts are as impressive as a Japanese Cotton Cheesecake. With its cloud-like texture, delicate sweetness, and beautiful golden top dusted with powdered sugar, this cake has become a favorite among dessert lovers worldwide. Unlike traditional New York cheesecake, which is dense and rich, Japanese cheesecake combines the creaminess of cheesecake with the airy softness of a sponge cake.
If you’ve ever wanted to recreate this bakery-style masterpiece at home, you’re in the right place. In this detailed guide, you’ll learn everything you need to know—from ingredients and baking tips to common mistakes and serving suggestions.
Why You’ll Love This Recipe
This Japanese cotton cheesecake is:
- Light and fluffy
- Soft like a cloud
- Perfectly creamy
- Not overly sweet
- Beginner-friendly
- Made with simple ingredients
Whether you’re baking for a birthday, afternoon tea, or a family gathering, this cake is guaranteed to impress.
Ingredients
For the Cheesecake Batter
- 250g cream cheese (room temperature)
- 50g unsalted butter
- 100ml whole milk
- 6 large eggs (separated)
- 60g cake flour
- 20g cornstarch
- 1 teaspoon vanilla extract
- 1 teaspoon lemon juice
- 120g granulated sugar
- ¼ teaspoon salt
For Decoration
- Powdered sugar
- Fresh berries (optional)
- Whipped cream (optional)
Kitchen Equipment
You’ll need:
- 8-inch round cake pan
- Mixing bowls
- Electric mixer
- Rubber spatula
- Fine sieve
- Baking tray
- Parchment paper
- Aluminum foil
- Oven
Step-by-Step Instructions
Step 1: Prepare the Pan
Line the bottom and sides of an 8-inch cake pan with parchment paper. Wrap the outside with two layers of aluminum foil to prevent water from entering during baking.
Preheat your oven to 320°F (160°C).
Step 2: Melt the Cream Cheese Mixture
In a heatproof bowl over simmering water, combine:
- Cream cheese
- Butter
- Milk
Stir continuously until smooth and creamy.
Remove from heat and let it cool slightly.
Step 3: Add Egg Yolks
Whisk the egg yolks into the cream cheese mixture one at a time.
Add:
- Vanilla extract
- Lemon juice
Mix until completely smooth.
Step 4: Sift Dry Ingredients
Sift together:
- Cake flour
- Cornstarch
- Salt
Gradually fold them into the cheesecake mixture until no lumps remain.
Avoid overmixing.
Step 5: Make the Meringue
In a clean bowl, beat the egg whites until foamy.
Gradually add the sugar while beating.
Continue until medium-stiff peaks form.
The meringue should hold its shape but still have a slightly curved tip.
Step 6: Fold Carefully
Add one-third of the meringue into the cheesecake batter and gently mix.
Fold in the remaining meringue using a spatula.
Be gentle to preserve as much air as possible.
The batter should look smooth, airy, and silky.
Step 7: Pour Into the Pan
Pour the batter into the prepared pan.
Tap the pan lightly on the counter to remove large air bubbles.
Step 8: Bake Using a Water Bath
Place the cake pan inside a larger baking tray.
Pour hot water into the tray until it reaches halfway up the cake pan.
Bake for:
- 25 minutes at 320°F (160°C)
- Then reduce to 285°F (140°C)
- Continue baking for 45–50 minutes
The cake should be golden brown and gently spring back when touched.
Step 9: Cool Slowly
Turn off the oven.
Leave the cheesecake inside with the oven door slightly open for 15 minutes.
Remove from the oven and allow it to cool completely.
Refrigerate for at least 4 hours before serving.
Expert Tips
For the best results:
- Always use room-temperature ingredients.
- Do not overbeat the egg whites.
- Fold gently to keep the batter airy.
- Use a water bath for even baking.
- Avoid opening the oven during baking.
- Cool the cake gradually to prevent cracking.
Common Mistakes to Avoid
Overmixing
Too much mixing removes air from the batter, resulting in a dense cake.
Overbaking
The cheesecake should remain soft and slightly jiggly in the center.
Skipping the Water Bath
Without steam, the cake may crack or bake unevenly.
Using Cold Cream Cheese
Cold cream cheese creates lumps that are difficult to remove.
Storage Tips
Store the cheesecake in an airtight container in the refrigerator for up to 4 days.
For longer storage, freeze individual slices for up to 2 months. Thaw overnight in the refrigerator before serving.
Serving Suggestions
Japanese cotton cheesecake tastes wonderful with:
- Fresh strawberries
- Blueberries
- Raspberry sauce
- Whipped cream
- Vanilla ice cream
- Honey drizzle
- Fresh mint leaves
- Powdered sugar
It also pairs beautifully with coffee, green tea, or hot chocolate.
Frequently Asked Questions
Why did my cheesecake sink?
A slight drop is normal. Significant sinking usually happens because of overmixing, underbaking, or sudden temperature changes.
Can I make it without cake flour?
Yes. Replace cake flour with all-purpose flour mixed with a little cornstarch for a similar texture.
Can I freeze Japanese cheesecake?
Absolutely. Wrap it tightly in plastic wrap and foil before freezing.
Why is my cheesecake cracking?
Cracks usually occur from baking at too high a temperature or skipping the water bath.
Can I use low-fat cream cheese?
Yes, but full-fat cream cheese gives the richest flavor and fluffiest texture.
Final Thoughts
Japanese Cotton Cheesecake is the perfect dessert for anyone who loves light, elegant sweets. Its airy texture, creamy flavor, and beautiful appearance make it ideal for celebrations or simply enjoying with a warm cup of tea. Although it may look complicated, following the steps carefully will reward you with a bakery-quality cheesecake that is soft, fluffy, and irresistibly delicious.
Whether you’re an experienced baker or trying cheesecake for the first time, this recipe is sure to become one of your favorites. Dust it generously with powdered sugar, slice into its cloud-like layers, and enjoy every bite of this delicate homemade masterpiece.
