
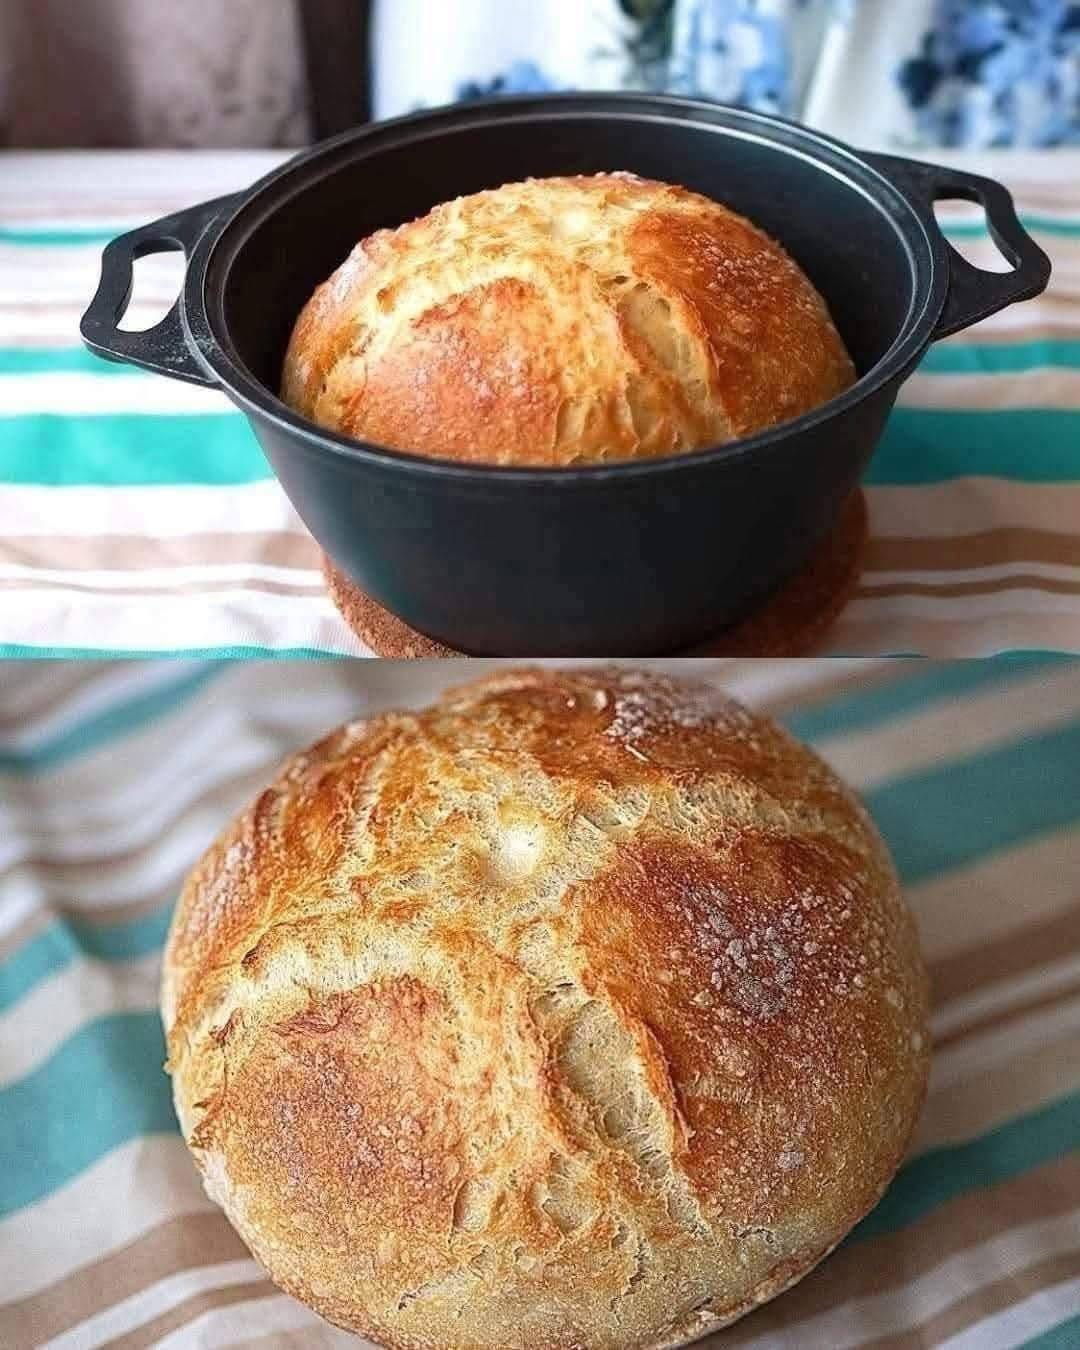
There is something wonderfully satisfying about baking a loaf of bread from scratch. The smell of freshly baked bread filling the kitchen, the crackle of a golden crust as the loaf cools, and that first slice revealing a soft, airy center—it is hard to beat.
This rustic Dutch oven bread is one of the easiest ways to achieve bakery-style bread at home. You do not need a bread machine, special mixer, or advanced baking skills. A heavy Dutch oven does most of the work by trapping steam around the dough, helping create the beautiful crisp, golden crust you see in the photo.
The inside is soft and chewy, while the outside develops a deeply browned, wonderfully crunchy crust. This recipe is perfect for beginners because it uses a simple dough and requires very little kneading.
Why You’ll Love This Bread
This homemade loaf has everything you want in a rustic artisan bread. It has a crisp crust, a tender and slightly chewy interior, and plenty of flavor. The long resting time also gives the flour time to develop a more complex taste.
The best part? You only need a handful of everyday ingredients:
- All-purpose or bread flour
- Instant or active dry yeast
- Salt
- Water
That’s it!
You can also customize the loaf by adding herbs, roasted garlic, shredded cheese, olives, seeds, or dried fruit.
Ingredients
For the Bread
- 3 cups (360–390 g) all-purpose or bread flour
- 1½ teaspoons salt
- 1 teaspoon instant yeast
- 1½ cups (360 ml) lukewarm water
- 1 teaspoon honey or sugar, optional
The exact amount of flour can vary slightly depending on humidity and the type of flour you use. The dough should be sticky and soft rather than firm and dry.
Optional Additions
For a flavored loaf, consider adding:
- 1 teaspoon dried rosemary
- 1 teaspoon dried thyme
- 2–3 cloves roasted garlic
- ½ cup shredded Parmesan or cheddar
- ¼ cup sunflower or pumpkin seeds
- ½ cup chopped olives
Step-by-Step Instructions
1. Make the Dough
Begin by combining the flour, salt, and yeast in a large mixing bowl.
If you are using honey or sugar, add it to the lukewarm water and stir briefly. Pour the water into the flour mixture.
Using a wooden spoon, spatula, or your hands, mix everything together until no large patches of dry flour remain.
Do not worry if the dough looks messy. It should be sticky, shaggy, and somewhat wet. That is exactly what you want.
If the dough seems extremely dry, add another tablespoon or two of water. If it looks like a liquid batter, sprinkle in a little additional flour.
2. Let the Dough Rise
Cover the bowl tightly with plastic wrap, a reusable cover, or a clean kitchen towel.
Place the bowl somewhere warm and allow the dough to rise for approximately 8–12 hours.
Overnight is ideal.
As the dough rests, the yeast slowly ferments the flour. This develops flavor and creates the bubbles that give rustic bread its beautiful texture.
By morning, the dough should look noticeably larger and covered with bubbles. It may appear loose and slightly jiggly.
Don’t rush this step. The long fermentation is one of the secrets to making such flavorful bread with so few ingredients.
3. Shape the Dough
Lightly flour your countertop or work surface.
Carefully scrape the dough out of the bowl. Try not to completely flatten it because you want to preserve some of those precious air bubbles.
Sprinkle a little flour over the top and gently fold the edges toward the center.
Turn the dough over so that the smoother side is facing upward.
Using your hands, gently shape it into a round loaf. You don’t need to knead it extensively.
Place the shaped dough on a piece of parchment paper and cover it loosely with a clean towel.
Let it rest for another 30–45 minutes.
4. Preheat the Dutch Oven
While the dough is resting, place your Dutch oven—with its lid on—inside the oven.
Preheat the oven to 450°F (230°C).
Allow the Dutch oven to heat for at least 30 minutes.
Preheating the pot is important because the hot surface immediately begins cooking the dough and helps create excellent oven spring.
Be extremely careful when handling the Dutch oven. It will become very hot.
5. Score the Bread
Just before baking, uncover the dough.
Using a sharp knife or bread lame, make one or two cuts across the surface.
A simple cross, slash, or curved line works beautifully.
Scoring gives the expanding bread a controlled place to release steam. It also creates the attractive rustic appearance associated with artisan loaves.
For an even more decorative loaf, you can lightly dust the surface with flour before scoring.
6. Bake in the Dutch Oven
Carefully remove the hot Dutch oven from the oven.
Using the parchment paper as a sling, lower the dough into the pot.
Put the lid on immediately.
Bake at 450°F (230°C) for approximately 30 minutes with the lid on.
The covered environment traps moisture released from the dough. This creates steam, which keeps the crust flexible during the first part of baking and allows the loaf to expand dramatically.
After 30 minutes, remove the lid.
Continue baking for another 10–20 minutes, or until the bread is deeply golden brown.
If you prefer a lighter crust, remove it earlier. For the gorgeous dark, rustic crust shown in the photo, allow it to become a rich golden-brown color.
7. Cool Before Slicing
Remove the finished bread from the Dutch oven and place it on a wire rack.
Now comes the hardest part: wait before slicing it!
Allow the loaf to cool for at least 45–60 minutes.
Although it may smell irresistible, cutting into bread immediately can cause the interior to become gummy because the crumb is still finishing its cooking process.
Once cooled, listen for the satisfying crackle of the crust and slice into it with a serrated bread knife.
You should find a beautifully rustic, airy interior surrounded by a crisp crust.
Expert Tips for Perfect Dutch Oven Bread
Don’t add too much flour
One of the most common mistakes beginners make is adding excessive flour because the dough feels sticky.
Resist the temptation.
This is a high-hydration-style dough, and the stickiness helps create a moist, open crumb. Use lightly floured hands and a bench scraper if necessary.
Use the right water temperature
The water should be lukewarm rather than hot.
Very hot water can damage or kill the yeast, while cold water will slow fermentation considerably.
Give the dough enough time
If your kitchen is cool, the dough may need longer than 8 hours.
Look at the dough rather than relying solely on the clock. You want it to become puffy and bubbly.
Preheat the Dutch oven
A cold Dutch oven will still produce bread, but a thoroughly preheated pot gives better oven spring and crust development.
Don’t skip the lid
The lid is what creates the steamy environment that makes Dutch oven bread so special.
How to Store Homemade Bread
Once completely cool, store the bread at room temperature in a paper bag, bread box, or loosely wrapped kitchen towel.
Avoid storing crusty bread in a sealed plastic bag if you want to preserve its crisp crust. The trapped moisture can soften it.
For longer storage, slice the bread and freeze it in an airtight freezer bag. Individual slices can be removed as needed and toasted directly from frozen.
Delicious Ways to Serve It
This rustic loaf is incredibly versatile.
Serve thick slices with butter and honey for breakfast, or use it to make sandwiches for lunch. It is also wonderful alongside soups, stews, pasta, roasted vegetables, and salads.
For an easy appetizer, toast slices of bread and top them with tomatoes, basil, olive oil, and a pinch of salt.
You can also turn leftover bread into homemade croutons, breadcrumbs, French toast, or garlic toast.
Frequently Asked Questions
Can I use all-purpose flour?
Yes. All-purpose flour works very well. Bread flour can give you a slightly chewier texture and stronger structure, but it isn’t essential.
Can I let the dough rise overnight?
Absolutely. In fact, overnight fermentation is one of the easiest ways to develop flavor. If your kitchen is particularly warm, consider reducing the yeast slightly or shortening the rising time.
What if I don’t have a Dutch oven?
You can bake the loaf on a heavy baking sheet or baking stone, but you will need another method to introduce steam into the oven. A Dutch oven is the simplest option because it naturally traps steam.
Why is my bread dense?
Dense bread can result from insufficient fermentation, inactive yeast, too much flour, or handling the dough too aggressively after it has risen.
How do I get a darker crust?
Bake uncovered for a few additional minutes. Keep a close eye on it because the crust can go from beautifully browned to overly dark quickly.
Final Thoughts
Making homemade bread doesn’t have to be complicated. This rustic Dutch oven bread proves that a few simple ingredients, a little patience, and the right baking method can produce an incredibly beautiful loaf.
The magic happens inside the covered Dutch oven: trapped steam helps the dough rise, while the intense heat creates that gorgeous crisp crust. Once you get comfortable with the basic recipe, you can experiment with different flours, herbs, cheeses, seeds, and other flavors.
So mix your dough before bed, let it slowly rise overnight, and wake up to the possibility of fresh, bakery-style bread in your own kitchen.
Recipe at a glance:
Prep: 15 minutes
Rise: 8–12 hours
Second rise: 30–45 minutes
Bake: 40–50 minutes
Oven: 450°F (230°C)
Yield: 1 rustic loaf
The result: a beautifully golden, crunchy crust with a soft, chewy, flavorful center—the kind of homemade bread that makes an ordinary meal feel special.

