
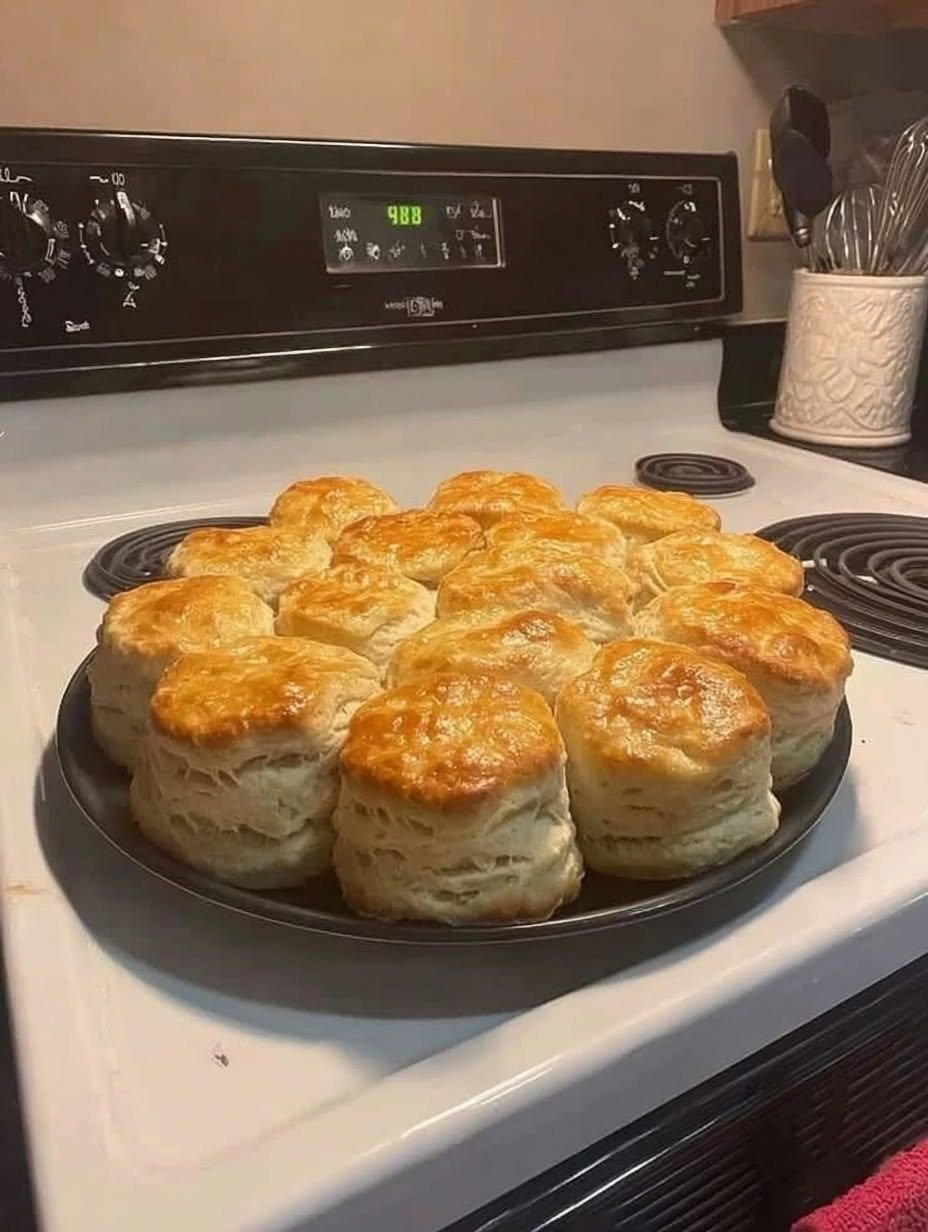
There is nothing quite like a basket of freshly baked homemade biscuits. Golden brown on top, beautifully flaky through the middle, and tender enough to pull apart with your hands, these classic buttermilk biscuits are the kind of comfort food that turns an ordinary breakfast into something special.
The biscuits shown in the photo have that irresistible combination of a crisp, golden exterior and tall, layered centers. The secret isn’t complicated ingredients—it is all about how you handle the dough. Cold butter, cold buttermilk, minimal mixing, and a few simple folds create those beautiful flaky layers.
Serve them warm with butter and honey, alongside eggs and bacon, or use them as the base for sausage gravy. Once you learn this simple technique, you may never want canned biscuits again.
Why You’ll Love These Biscuits
These homemade biscuits are:
Fluffy and tall with plenty of flaky layers
Golden and crisp on the outside
Tender and buttery inside
Made with simple pantry ingredients
Perfect for breakfast, brunch, or dinner
Easy to customize with cheese, herbs, or spices
The recipe is especially good when you want something homemade without spending hours in the kitchen.
Ingredients
For approximately 10–12 biscuits, you will need:
3 cups (375 g) all-purpose flour
1 tablespoon baking powder
½ teaspoon baking soda
1 tablespoon granulated sugar
1 teaspoon salt
½ cup (115 g) unsalted butter, very cold
1¼ cups (300 ml) cold buttermilk
1 tablespoon melted butter, for brushing
Optional
1 tablespoon honey for serving
Extra melted butter for serving
½ teaspoon garlic powder for savory biscuits
1 teaspoon dried herbs such as thyme or rosemary
½ cup shredded cheddar cheese for cheesy biscuits
Step 1: Keep Everything Cold
The first secret to flaky biscuits is cold ingredients.
Place the butter in the refrigerator until you are ready to use it. Your buttermilk should also be cold.
Why does this matter?
When cold butter is surrounded by flour and placed into a hot oven, the water in the butter turns into steam. That steam pushes apart the layers of dough, helping create the flaky texture you see in the finished biscuits.
If the butter becomes warm and melts completely into the flour before baking, you will lose those distinct layers and may end up with dense biscuits.
So don’t worry about making the dough perfectly smooth. Small pieces of visible butter are actually a good thing.
Step 2: Mix the Dry Ingredients
Preheat your oven to 425°F (220°C).
In a large mixing bowl, combine the flour, baking powder, baking soda, sugar, and salt.
Whisk everything together thoroughly.
The baking powder and baking soda provide the lift that makes the biscuits rise. The small amount of sugar doesn’t make the biscuits sweet; instead, it helps balance the flavor and encourages beautiful browning.
Step 3: Cut in the Butter
Cut the cold butter into small cubes.
Add the butter to the flour mixture.
Using a pastry cutter, two forks, or your fingertips, work the butter into the flour until the mixture resembles coarse crumbs.
However, don’t overwork it.
You should still have some pieces of butter roughly the size of small peas scattered throughout the flour.
Those pieces will become pockets of buttery goodness as the biscuits bake.
If your kitchen is warm and you notice that the butter is becoming soft, place the bowl in the refrigerator for a few minutes before continuing.
Step 4: Add the Buttermilk
Make a well in the center of the flour mixture.
Pour in the cold buttermilk.
Using a wooden spoon or spatula, gently stir until the dough just comes together.
The dough will look somewhat rough and shaggy.
That’s exactly what you want.
Do not knead it like bread dough.
Overmixing develops gluten, which can make biscuits tough and chewy instead of tender and fluffy.
If the dough seems extremely dry, add another tablespoon of buttermilk at a time until it comes together.
On the other hand, don’t add too much liquid. The dough should be soft and slightly sticky but still manageable.
Step 5: Create the Flaky Layers
Lightly flour your work surface and turn the dough onto it.
Gently pat the dough into a rectangle approximately ¾-inch thick.
Now comes the most important technique.
Fold the dough in half.
Pat it out again.
Fold it once more and gently flatten it.
Repeat this process about 3–4 times.
These simple folds create layers of butter and dough. During baking, the butter melts and releases steam, causing those layers to separate and puff upward.
Be gentle during this process. Don’t press or knead aggressively.
Finally, pat the dough to approximately ¾–1 inch thick.
For taller biscuits like those shown in the photograph, don’t roll the dough too thin.
Step 6: Cut the Biscuits
Use a round biscuit cutter approximately 2½–3 inches wide.
Press the cutter straight down into the dough.
Don’t twist the cutter.
Twisting can seal the edges of the dough and prevent the biscuits from rising properly.
Place each biscuit onto a baking sheet lined with parchment paper.
For soft-sided biscuits, arrange them fairly close together so they gently touch while baking.
For crispier sides, leave a little space between each biscuit.
Gather the scraps and gently press them together to cut additional biscuits. Try not to repeatedly knead the scraps, because this can make the final biscuits tougher.
Step 7: Brush and Bake
Place the tray of biscuits into the preheated 425°F (220°C) oven.
For a beautiful golden top, lightly brush each biscuit with melted butter.
You can also brush them with a little buttermilk or cream if you prefer a deeper golden finish.
Bake for approximately 15–20 minutes, depending on their size and your oven.
The biscuits are ready when the tops are golden brown and the sides have risen noticeably.
The aroma of butter filling the kitchen is usually the first sign that they are almost ready!
Once baked, remove the tray from the oven and brush the hot biscuits with a little more melted butter.
Let them cool for about 5 minutes before serving.
How to Get Extra-Tall Biscuits
If you want biscuits that look especially tall and layered, like the ones in the photograph, follow these simple tips.
Don’t flatten the dough too much
Keep the final dough around ¾–1 inch thick.
Use very cold butter
Cold butter is essential for creating steam and flaky layers.
Don’t overmix
The dough should look rustic rather than perfectly smooth.
Fold the dough
Three or four gentle folds can make a significant difference in the number of visible layers.
Cut straight down
Press the biscuit cutter directly into the dough rather than twisting it.
Bake immediately
Once your biscuits are shaped, get them into the hot oven. You want the butter to remain cold until baking begins.
Serving Suggestions
These biscuits are incredibly versatile.
For a classic breakfast, split one open while it is still warm and spread it generously with butter. Add honey or homemade jam for a sweet version.
For a savory breakfast, serve them with scrambled eggs, crispy bacon, sausage, or breakfast potatoes.
One of my favorite ways to enjoy homemade biscuits is with sausage gravy. Split the warm biscuit in half and spoon creamy sausage gravy over the top for a hearty Southern-style breakfast.
You can also use these biscuits to make breakfast sandwiches. Fill them with eggs, cheese, ham, sausage, or bacon.
For dinner, serve them alongside roasted chicken, soups, stews, or creamy vegetables. They are particularly good for soaking up rich sauces and gravies.
Easy Variations
Cheddar Biscuits
Add ½–1 cup shredded sharp cheddar cheese to the dry ingredients before adding the buttermilk.
Garlic Herb Biscuits
Add ½ teaspoon garlic powder and 1 teaspoon dried parsley, thyme, or rosemary.
After baking, brush the biscuits with melted butter mixed with a little garlic and parsley.
Honey Butter Biscuits
Mix softened butter with honey and a tiny pinch of salt. Serve it alongside warm biscuits.
Jalapeño Cheddar Biscuits
Add shredded cheddar and finely chopped pickled or fresh jalapeños for a spicy variation.
Storage and Reheating
Homemade biscuits are best when served fresh, but leftovers can be stored in an airtight container at room temperature for approximately 1–2 days.
For longer storage, freeze the baked biscuits for up to about 3 months.
To reheat, place them in a 350°F (175°C) oven for several minutes until warm.
You can also freeze the unbaked biscuits. Arrange them on a tray, freeze until solid, and then transfer them to a freezer-safe bag or container.
When you’re ready to bake them, place the frozen biscuits directly on a baking sheet and bake in a hot oven, adding a few extra minutes to the baking time.
Final Thoughts
Making homemade biscuits from scratch may seem intimidating at first, but the process is actually wonderfully simple. The key is to treat the dough gently and keep the butter cold.
You don’t need special equipment or complicated techniques. A bowl, a cutter, and a hot oven are enough to produce biscuits with beautifully flaky layers and a golden, buttery crust.
The finished biscuits should be crisp and golden on top, tender in the center, and easy to pull apart into delicate layers. Serve them warm with butter and honey for a comforting breakfast, or pair them with eggs, sausage gravy, soup, or a hearty dinner.
Once you experience the smell of freshly baked buttermilk biscuits coming out of your oven, you’ll understand why this simple recipe deserves a permanent place in your recipe collection.
Pro tip: For the tallest, flakiest biscuits, remember the four golden rules: cold butter, cold buttermilk, gentle folds, and a very hot oven. Those four things make all the difference.

