
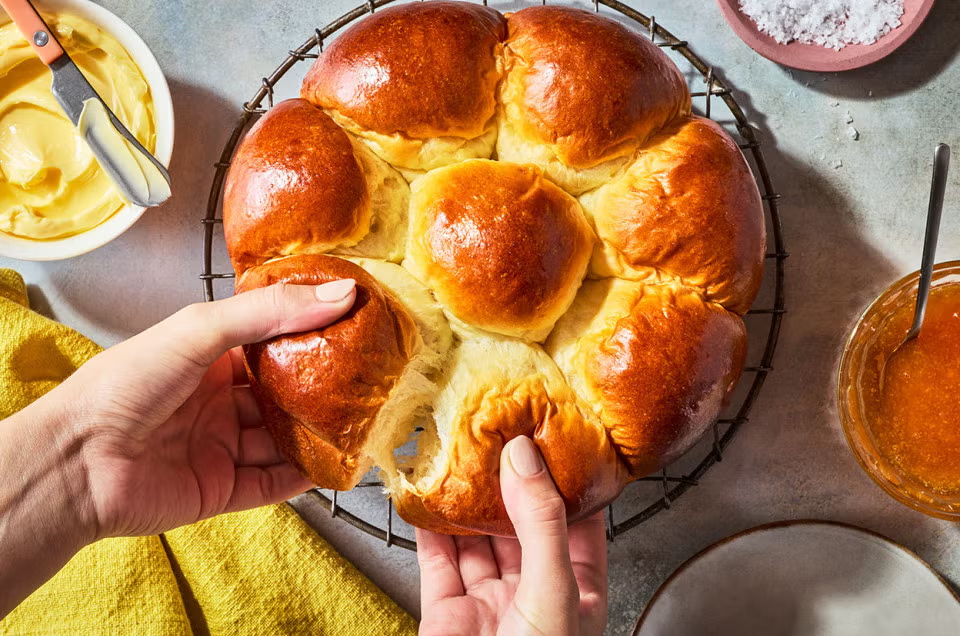
These beautiful sourdough pull-apart brioche rolls are soft, buttery, golden, and slightly sweet, with a wonderfully tender crumb. The rolls are baked together in a round arrangement, making them perfect for sharing at breakfast, brunch, holidays, family dinners, or special gatherings. Their shiny golden-brown tops and fluffy centers make them especially inviting when served warm with butter, jam, or honey.
Unlike traditional brioche that relies entirely on commercial yeast, this recipe uses an active sourdough starter. The natural fermentation gives the bread a subtle tangy flavor while creating a soft, flavorful texture. Because sourdough fermentation takes time, these rolls are best started the day before you plan to serve them.
Why You’ll Love These Sourdough Rolls
There is something special about homemade sourdough bread, and these rolls are no exception. They have a rich buttery flavor without being overly heavy. The individual rolls are easy to pull apart, so there is no need for slicing.
The dough is enriched with butter, eggs, and milk, which gives it the classic tender texture associated with brioche. The sourdough starter adds depth and complexity, while a small amount of sugar provides gentle sweetness and helps the tops develop a gorgeous golden color.
They are also versatile. Serve them alongside savory meals, use them for breakfast sandwiches, or simply tear one apart while it is still warm and spread it with butter and fruit preserves.
Ingredients
For the Dough
- 100 g active sourdough starter, preferably at peak activity
- 120 g whole milk, lukewarm
- 2 large eggs
- 40 g granulated sugar
- 400 g bread flour
- 8 g salt
- 100 g unsalted butter, softened and cut into small pieces
For the Egg Wash
- 1 egg
- 1 tablespoon milk or water
Optional Toppings
- Sesame seeds
- Poppy seeds
- Flaky sea salt
- Melted butter
- Honey
Step 1: Prepare the Sourdough Dough
Begin by making sure your sourdough starter is active and bubbly. A healthy starter should have risen significantly after feeding and have a pleasant, mildly fermented aroma.
In a large mixing bowl, combine the active sourdough starter, lukewarm milk, eggs, and sugar. Whisk until the mixture is fairly smooth.
Add the bread flour and mix until a shaggy dough forms. Let the dough rest for approximately 20 to 30 minutes. This short resting period allows the flour to absorb the liquid and makes the dough easier to develop.
Add the salt and begin kneading. You can knead by hand or use a stand mixer fitted with a dough hook.
Step 2: Incorporate the Butter
Once the dough begins to look smooth and elastic, gradually add the softened butter.
This is an important part of the recipe. Add only one or two pieces of butter at a time, allowing each addition to become incorporated before adding more. At first, the dough may look greasy or messy, but keep kneading. Eventually, it will become smooth, stretchy, and glossy.
The finished dough should be soft and elastic. If you gently stretch a small piece between your fingers, it should be capable of forming a thin membrane without immediately tearing.
Because enriched dough can be sticky, avoid adding large amounts of extra flour. Too much flour can make the finished rolls dense instead of light and fluffy.
Step 3: Bulk Fermentation
Place the dough into a lightly greased bowl and cover it with a lid, plastic wrap, or a damp kitchen towel.
Allow the dough to ferment at room temperature until it becomes noticeably puffy and increases in volume. Depending on the strength of your starter and the temperature of your kitchen, this can take approximately 4 to 8 hours.
Sourdough timing is flexible, so focus on the appearance of the dough rather than following the clock exactly. A warm kitchen will speed fermentation, while a cool kitchen will slow it down.
During the first few hours, you can perform one or two gentle stretches and folds if the dough needs additional strength.
Step 4: Chill the Dough
For easier shaping and a richer flavor, place the covered dough in the refrigerator for several hours or overnight.
Chilling is particularly helpful with brioche-style dough because the butter firms up, making the dough much easier to handle. The slow fermentation also allows the sourdough flavor to develop.
An overnight rest is convenient if you want fresh rolls the following morning.
Step 5: Shape the Rolls
When you are ready to shape the bread, transfer the chilled dough onto a lightly floured work surface.
Divide it into approximately 9 to 12 equal pieces, depending on how large you want your rolls to be.
Take one piece of dough and gently pull the edges toward the center. Turn it over and roll it gently beneath your palm to create a smooth, round ball.
Repeat with the remaining dough pieces.
Arrange the dough balls in a greased round baking pan or cake pan, leaving a little space between each one. As they proof, they will expand and eventually touch one another.
Step 6: Final Proof
Cover the shaped rolls and allow them to rise again.
This stage can take anywhere from 2 to 5 hours depending on the temperature of your kitchen and the activity of your starter. The rolls are ready to bake when they look visibly puffy and soft.
Avoid rushing this step. Proper final proofing is one of the secrets to achieving light, fluffy sourdough rolls.
If the dough is under-proofed, the rolls may bake up dense. If they are significantly over-proofed, they may lose their structure and collapse.
Step 7: Add the Egg Wash
Preheat your oven to 375°F (190°C).
Whisk together one egg and one tablespoon of milk or water.
Gently brush the egg wash over the tops of the risen rolls. Try to coat the surface evenly without pressing down on the dough.
The egg wash gives these rolls their beautiful glossy, deep golden-brown finish.
For an extra decorative touch, sprinkle the tops with sesame seeds, poppy seeds, or a small amount of flaky salt.
Step 8: Bake
Place the pan in the preheated oven and bake for approximately 25 to 35 minutes, or until the rolls are beautifully golden brown and cooked through.
Because every oven is slightly different, begin checking them toward the lower end of the baking time.
If the tops become dark too quickly, loosely cover the rolls with aluminum foil and continue baking until the centers are fully cooked.
The finished rolls should feel light and springy when gently pressed.
Step 9: Finish and Serve
Remove the rolls from the oven and let them cool for about 10 to 15 minutes.
For an extra-soft, buttery finish, brush the hot rolls with melted butter immediately after baking.
Serve them warm while the centers are still soft and fluffy. They are delicious with butter and honey, homemade jam, fruit preserves, or simply on their own.
Helpful Sourdough Tips
Use an active starter: Your starter should be bubbly and recently fed. A weak or inactive starter can make enriched dough take much longer to rise.
Be patient with fermentation: Sourdough does not follow a strict schedule. Temperature, starter strength, and flour can all affect fermentation time.
Don’t add too much flour: Brioche dough is naturally soft and slightly sticky. Extra flour can produce heavy rolls.
Use softened butter: Cold butter is difficult to incorporate and can prevent the dough from becoming smooth.
Watch the dough, not the clock: Look for a dough that becomes noticeably puffy during bulk fermentation and shaped rolls that expand significantly during final proofing.
Allow them to cool slightly: Fresh bread continues to set as it cools. Waiting a few minutes before pulling the rolls apart helps preserve their delicate crumb.
How to Store Sourdough Brioche Rolls
These rolls are best enjoyed fresh, but leftovers can be stored in an airtight container at room temperature for up to two days.
For longer storage, place the completely cooled rolls in a freezer-safe bag and freeze them for up to several weeks. When ready to eat, thaw them at room temperature and warm them gently in the oven.
A few minutes in a warm oven can bring back their soft texture and buttery aroma.
Final Thoughts
These sourdough pull-apart brioche rolls are a wonderful combination of naturally fermented bread and rich, buttery brioche. The golden tops, fluffy centers, and subtle sourdough tang make them difficult to resist.
Although the recipe requires patience, most of the work is simply allowing the dough time to ferment and rise. Once baked, the result is a gorgeous round of soft rolls that everyone can pull apart and enjoy.
Serve them for breakfast with butter and jam, alongside a holiday dinner, or as a homemade addition to your weekend brunch. Once you make them, these soft and golden sourdough rolls may quickly become a favorite in your baking routine.

